This guide covers both import paths - a local image file and the community gallery - and then the part that actually matters: aligning the mask in VR. You'll switch on Trace VR, look at your real cockpit and press Face Me for the coarse placement, then fine-tune position, tilt and roll with the shortcuts. Three interactive 3D previews below show exactly what each step does.
Importing is a quick desktop step. Aligning is done in the headset: you switch on Trace VR, look at your real cockpit and press Face Me, then trim it with the shortcuts while watching the mask through passthrough. So: import at the PC, then put the headset on to place it.
Import: file or community gallery
🖥️ At your PCEvery import starts the same way: click the green + Add Mask (Wizard) button at the top-left. The wizard lists every kind of mask you can create - the two that import a finished mask are the ones we want.
Import a PNG / JPG / BMP
Someone sent you a mask, or you
exported one earlier? Pick Import premade image mask, then choose the file
(here: Testmask.png from the desktop). The image becomes a new mask instantly.
Get Community Masks
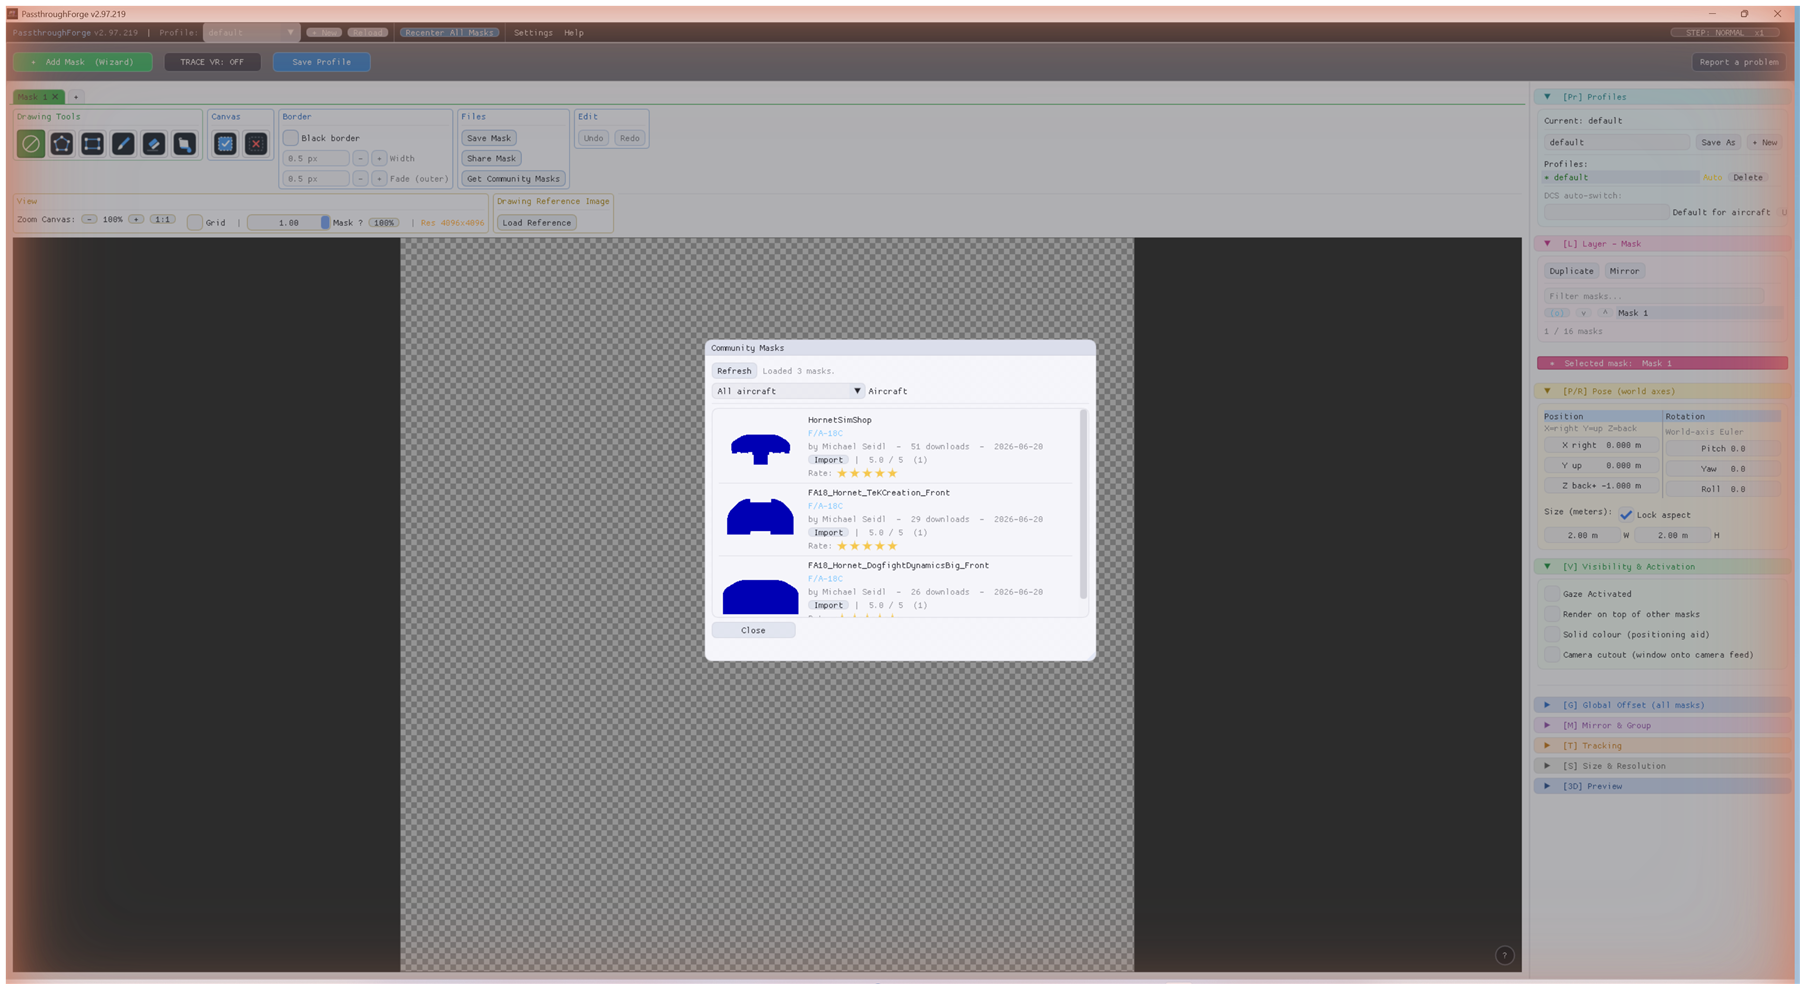
Browse masks other pilots shared, right inside the app. Make an Empty mask first so the editor opens, then click Get Community Masks, pick one for your aircraft and press Import.
Way 1 - from an image file
In the wizard, choose Import premade image mask (PNG / JPG / BMP) and click Create:
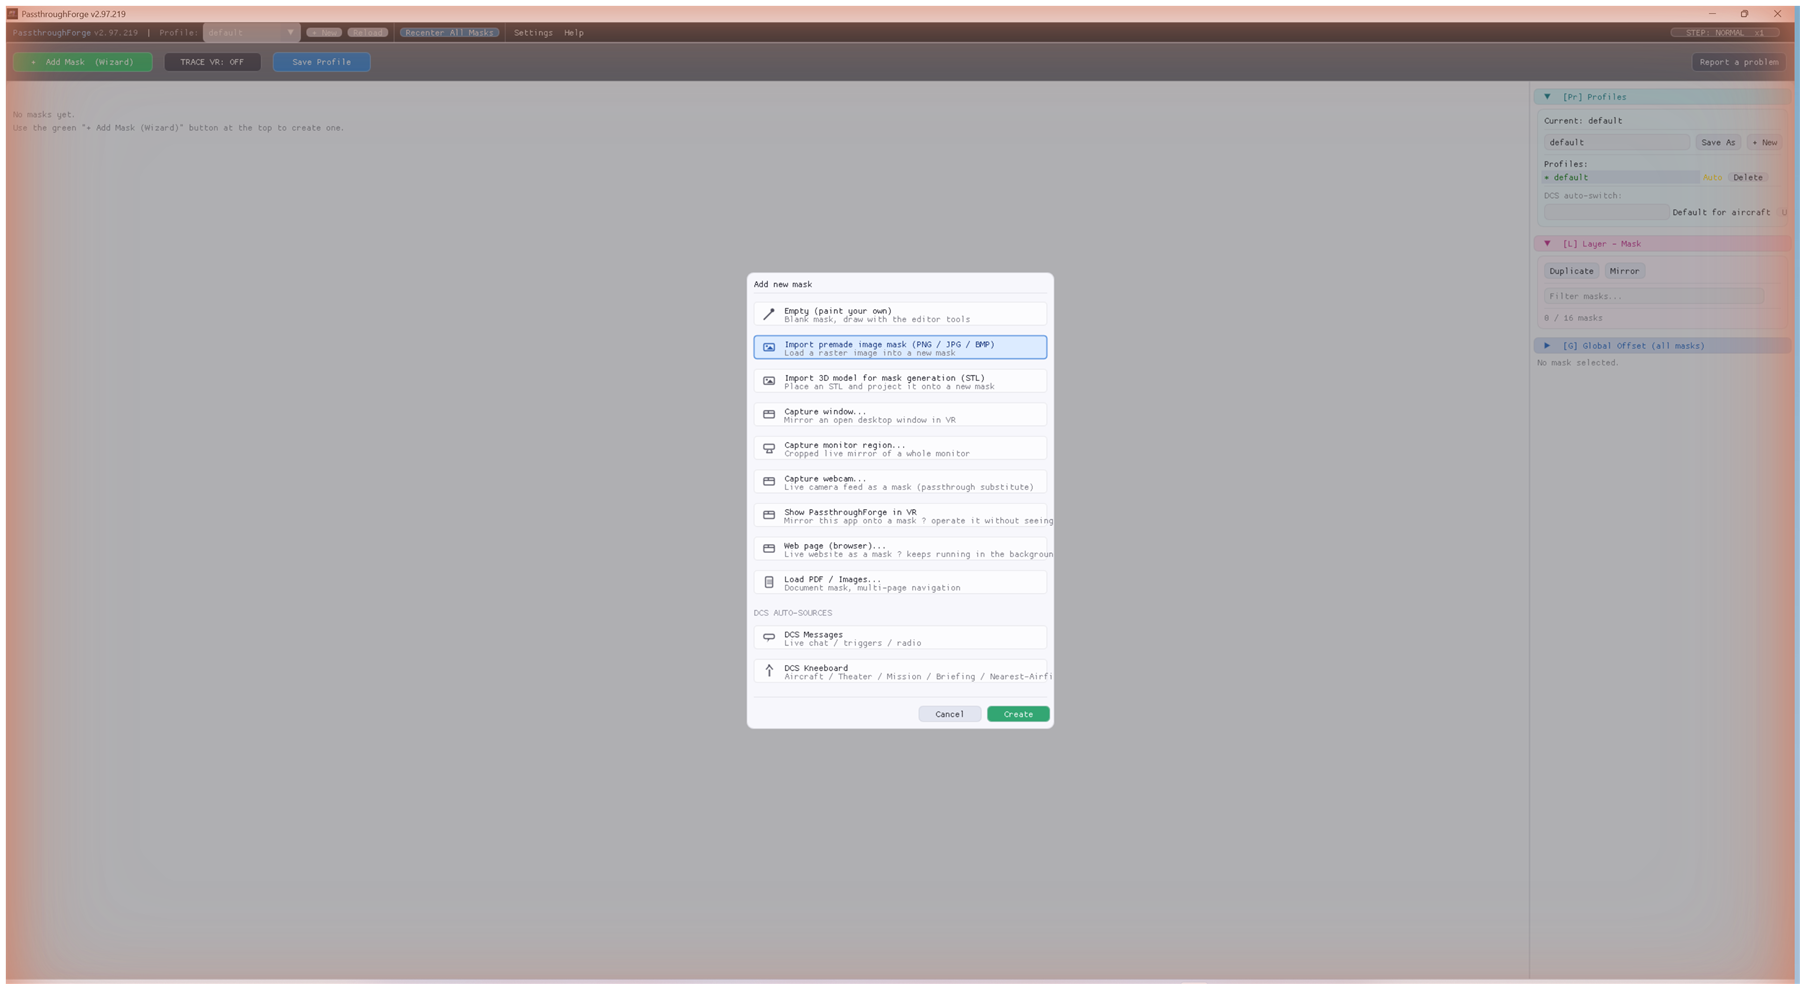
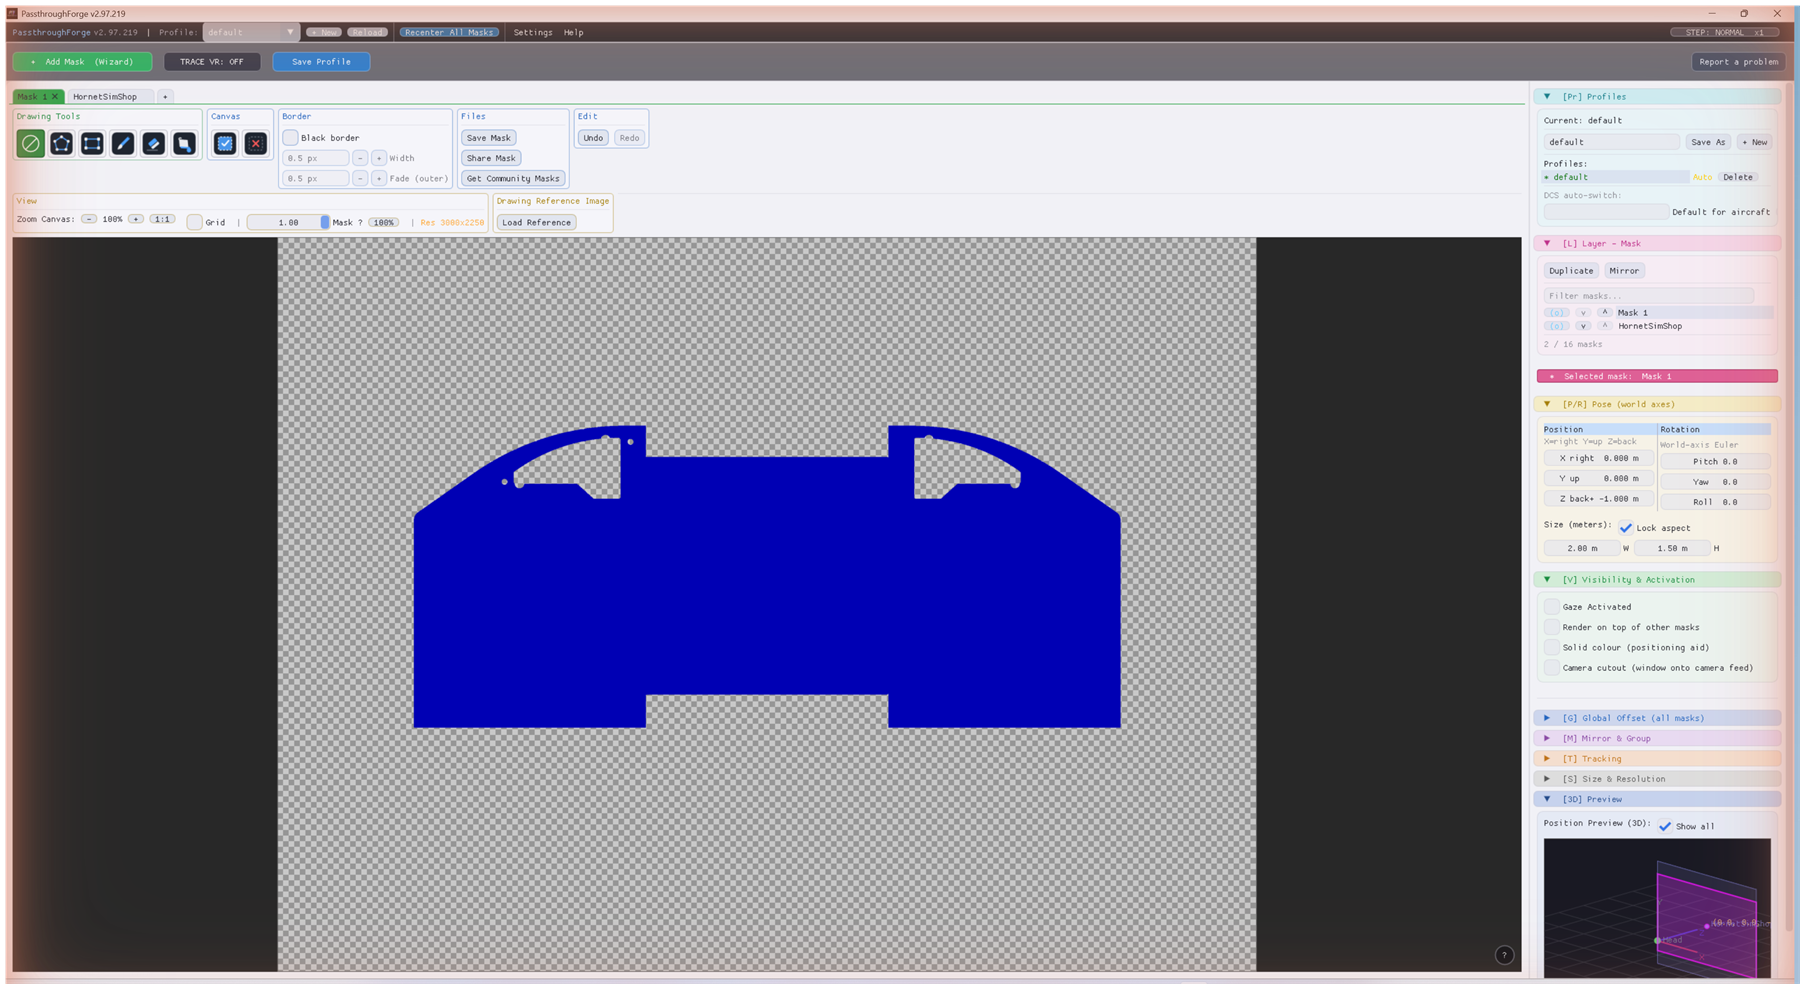
A file dialog opens - choose your image (we used Testmask.png). PassthroughForge
turns it into a new mask right away and drops you into the editor: the mask fills the canvas, and
the [P/R] Pose panel sits on the right.
Way 2 - from the community gallery
The gallery lives in the editor toolbar, which only appears once a mask is open. So first create an empty mask: open the wizard, pick Empty (paint your own), then Create.
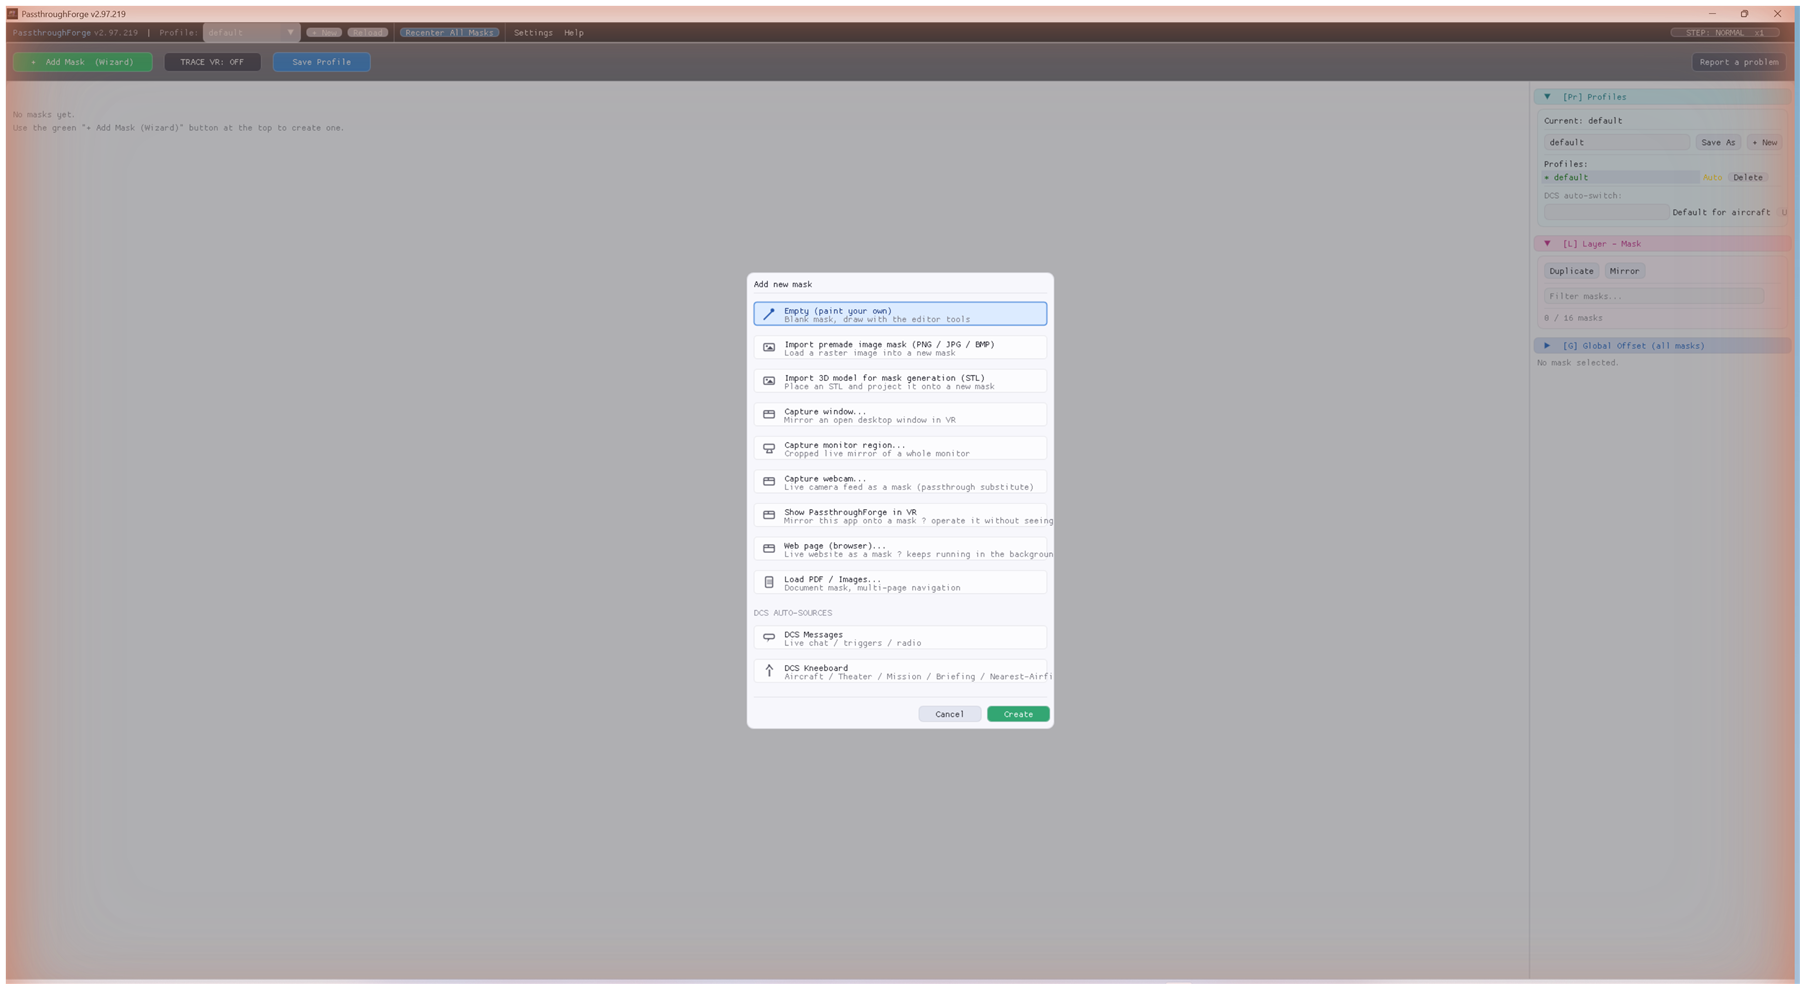
Now the editor is open, and its toolbar shows a Get Community Masks button under Files:

The gallery opens: filter by aircraft, check the rating and download count, then hit Import on the one you want.
Rough-align in VR: Trace VR + Face Me
🥽 In VRAlignment happens in the headset - but you flip the switch at the desktop first. At your PC, press the TRACE VR button in the top bar (or a key you bound):

Now put the headset on. In Trace VR the editor canvas turns transparent - you see your real cockpit straight through it - and the mask is drawn in bright yellow, so it stands out clearly for placement. A small dock floats in front of you with the tools, and on the right the Face Me and Trace VR buttons:
Then it's two moves:
- Turn to face your real cockpit - look straight at where your panel actually is through the passthrough.
- Press Face Me - the yellow mask swings round and drops squarely in front of you, over the cockpit. Coarse alignment, one click.
Here's Face Me in action - the imported mask starts adrift, then snaps to face you over the panel. Press Play, and drag to orbit the view:
Fine-tune position (X / Y / Z)
🥽 In VRFace Me got the mask roughly there. Now trim it exactly onto the panel with the keyboard - still in the headset, watching it through passthrough. Everything lives in the [P/R] Pose panel: three numbers for position, three for rotation.
![The [P/R] Pose panel: Position X right, Y up, Z back and Rotation Pitch, Yaw, Roll, plus Size in meters.](screenshots/imp-pose.png)
Three pairs of keys slide the selected mask along the three world axes - hold to glide by 1 cm per frame, tap for a single step:
| Move | Shortcut | Axis |
|---|---|---|
| Left / Right | Ctrl+← / Ctrl+→ | X |
| Down / Up | Ctrl+↓ / Ctrl+↑ | Y |
| Forward / Back | Ctrl+PgUp / Ctrl+PgDn | Z |
Here's what that looks like - three axis moves walk the mask onto the panel. Press Play, and drag to orbit the view:
Tilt & roll to match the panel
🥽 In VRPosition gets the mask in front of the right spot; rotation makes it lie flat on your panel. Real dashboards are tilted back and often sit at a slight angle - so you'll almost always need a little pitch (tilt) and roll. These live on the numpad:
| Rotate | Shortcut | What it does |
|---|---|---|
| Pitch (tilt) | Ctrl+Num 8 / Ctrl+Num 2 | Tips the top edge away / toward you |
| Roll | Ctrl+Num 7 / Ctrl+Num 9 | Tips it left / right like a steering wheel |
| Yaw (swivel) | Ctrl+Num 4 / Ctrl+Num 6 | Swivels it left / right like a door |
Watch the mask tilt back to match the dashboard's slope, then roll level. Press Play:
Fine-tune, scale & save
🥽 In VRA few more shortcuts round out the alignment - and one button makes it permanent:
- Resize the mask if it's a touch too big or small for your panel: Ctrl+Num + / Ctrl+Num − (uniform scale, aspect kept).
- Fine / Coarse step toggles: Q for fine, E for coarse.
- Overshot everything? Ctrl+Del recenters all masks - or just press Face Me again to re-square and start over.
- Save it. When the mask sits right, hit Save Profile so the position is stored and comes back next launch.
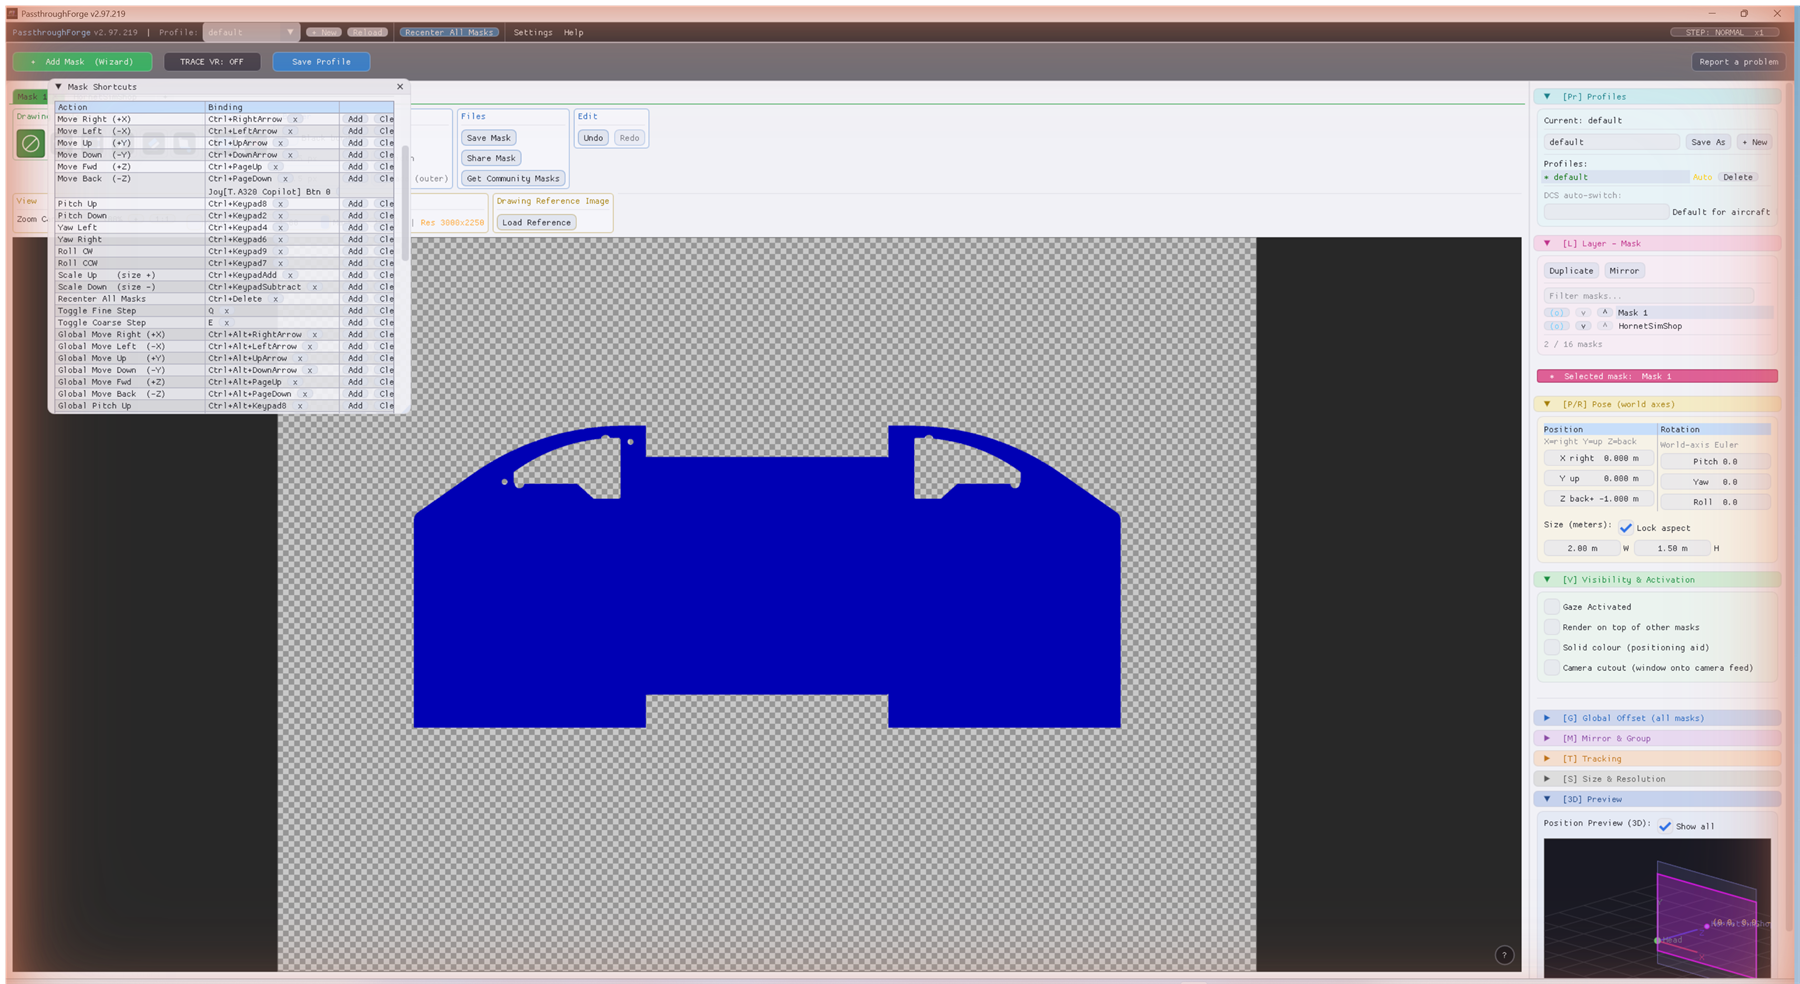
Every one of these keys is listed - and fully re-bindable, including onto HOTAS buttons - under Settings → Mask Shortcuts:
Shortcut cheat-sheet
The full default set for placing a mask (all re-bindable under Settings → Mask Shortcuts):
| Action | Default shortcut |
|---|---|
| Move X left / right | Ctrl+← / Ctrl+→ |
| Move Y up / down | Ctrl+↑ / Ctrl+↓ |
| Move Z forward / back | Ctrl+PgUp / Ctrl+PgDn |
| Pitch (tilt) up / down | Ctrl+Num 8 / Ctrl+Num 2 |
| Yaw left / right | Ctrl+Num 4 / Ctrl+Num 6 |
| Roll CCW / CW | Ctrl+Num 7 / Ctrl+Num 9 |
| Scale up / down | Ctrl+Num + / Ctrl+Num − |
| Fine step / Coarse step toggle | Q / E |
| Recenter all masks | Ctrl+Del |
| Select next / previous mask | Ctrl+Tab / Ctrl+Shift+Tab |
| Move all masks together | same combos + Alt |
Imported masks stay editable
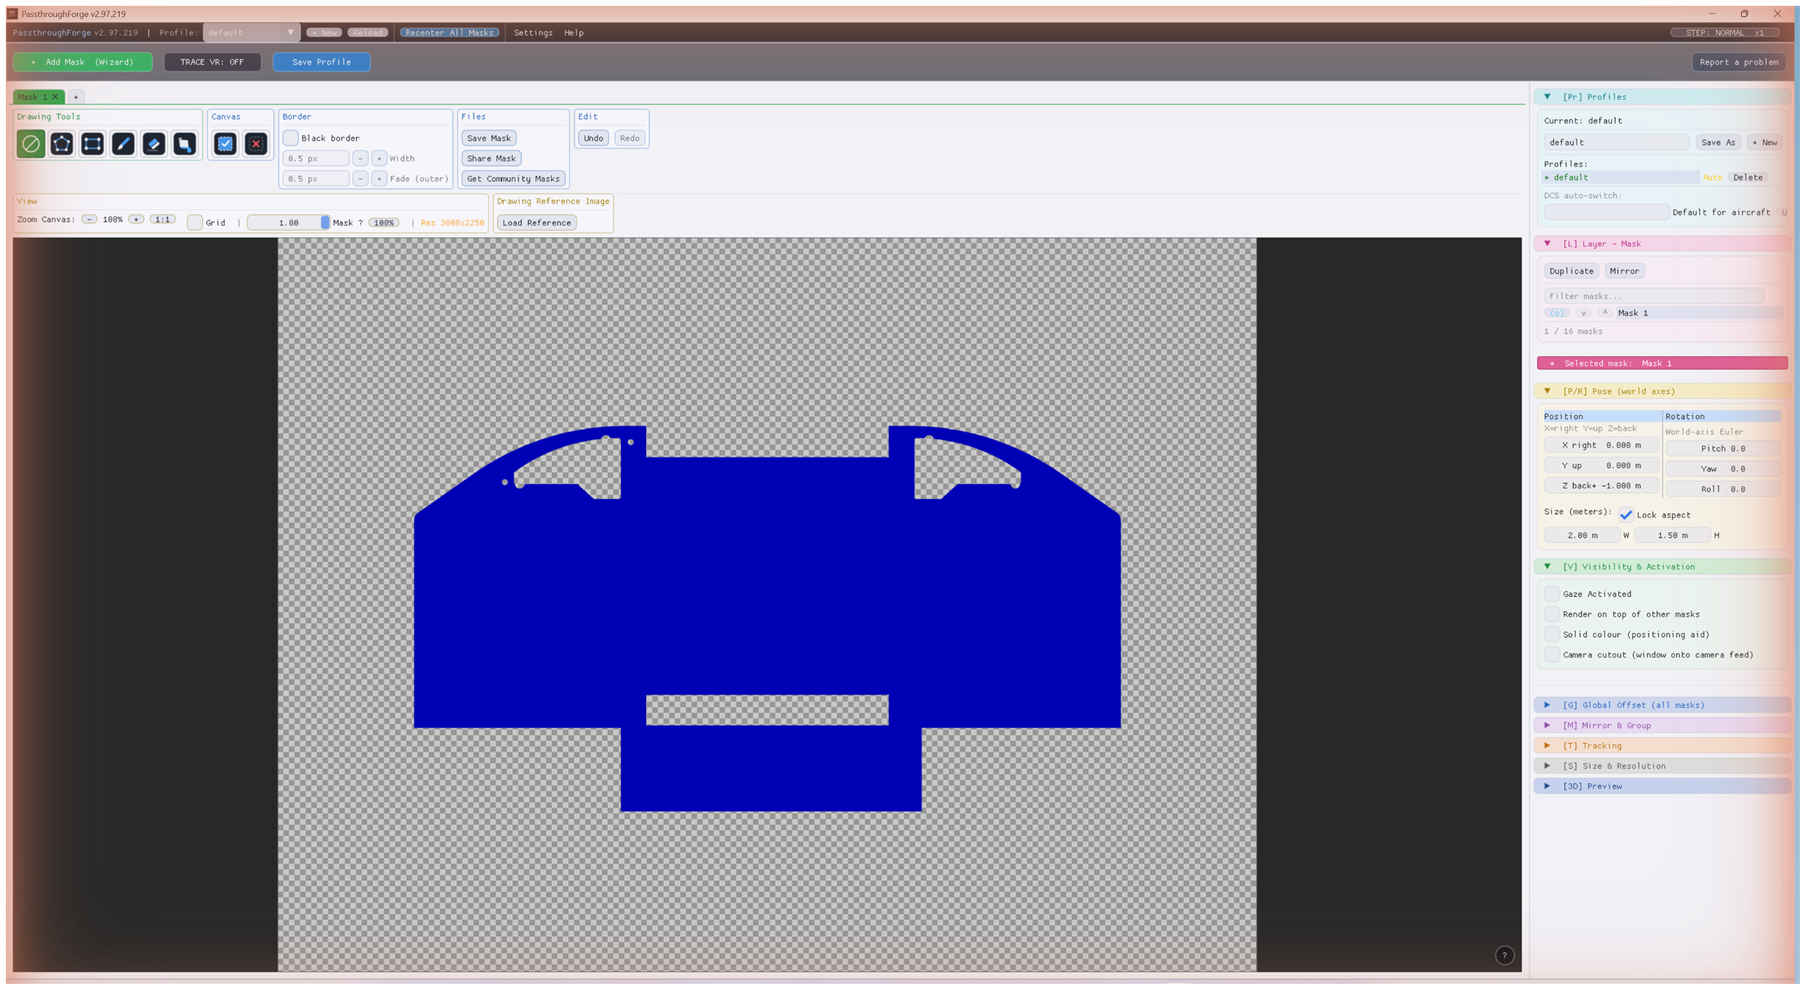
🖥️ At your PCOne last thing worth knowing: an imported mask isn't locked - it's a normal mask like any other. You can keep drawing on it with the editor's tools: extend it with the Rectangle or Polygon tool, paint with the Brush, cut bits away with Subtract, or clean up edges with the Eraser. The workflow is always the same: pick a tool, make sure Add (or Subtract) is selected in the Canvas box, draw on the canvas, then hit Finish shape.
Here we took the imported mask from earlier and added a strip along the bottom with the Rectangle tool - one drag, Finish shape, done:
Mask picker won't show up?
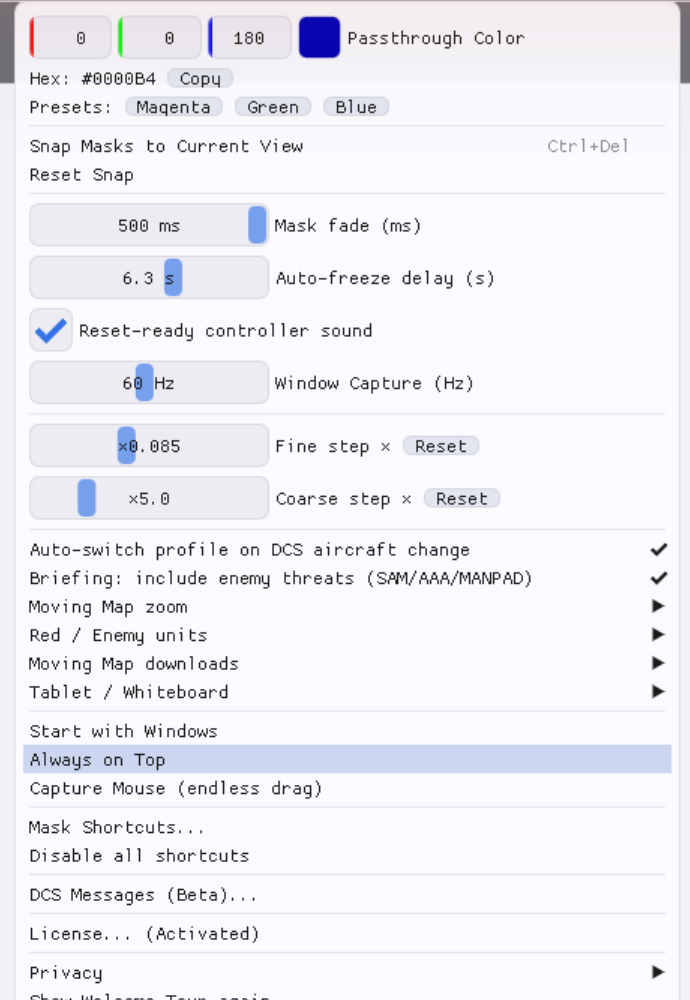
🖥️ At your PCClicked + Add Mask (Wizard) but the Add new mask popup never appears? The usual culprit is PassthroughForge's Always on Top setting. With it enabled, the picker - and the Windows file dialog it opens when you import an image - can open behind the main window and stay hidden there, so it looks like nothing happened.
Fix it in one click: open Settings and make sure Always on Top is unchecked, then click Add Mask again.
Where to next
Draw your own mask from scratch: Trace VR, Face Me and the drawing tools. Snap Masks Back into Alignment
Mount a controller as a fixed reference and re-align any mask with one button. A Crisp Mask Edge
Tame the chroma outline: VD settings, resolution and the Black border. Join the Discord
Ask questions, share masks and grab more community masks.