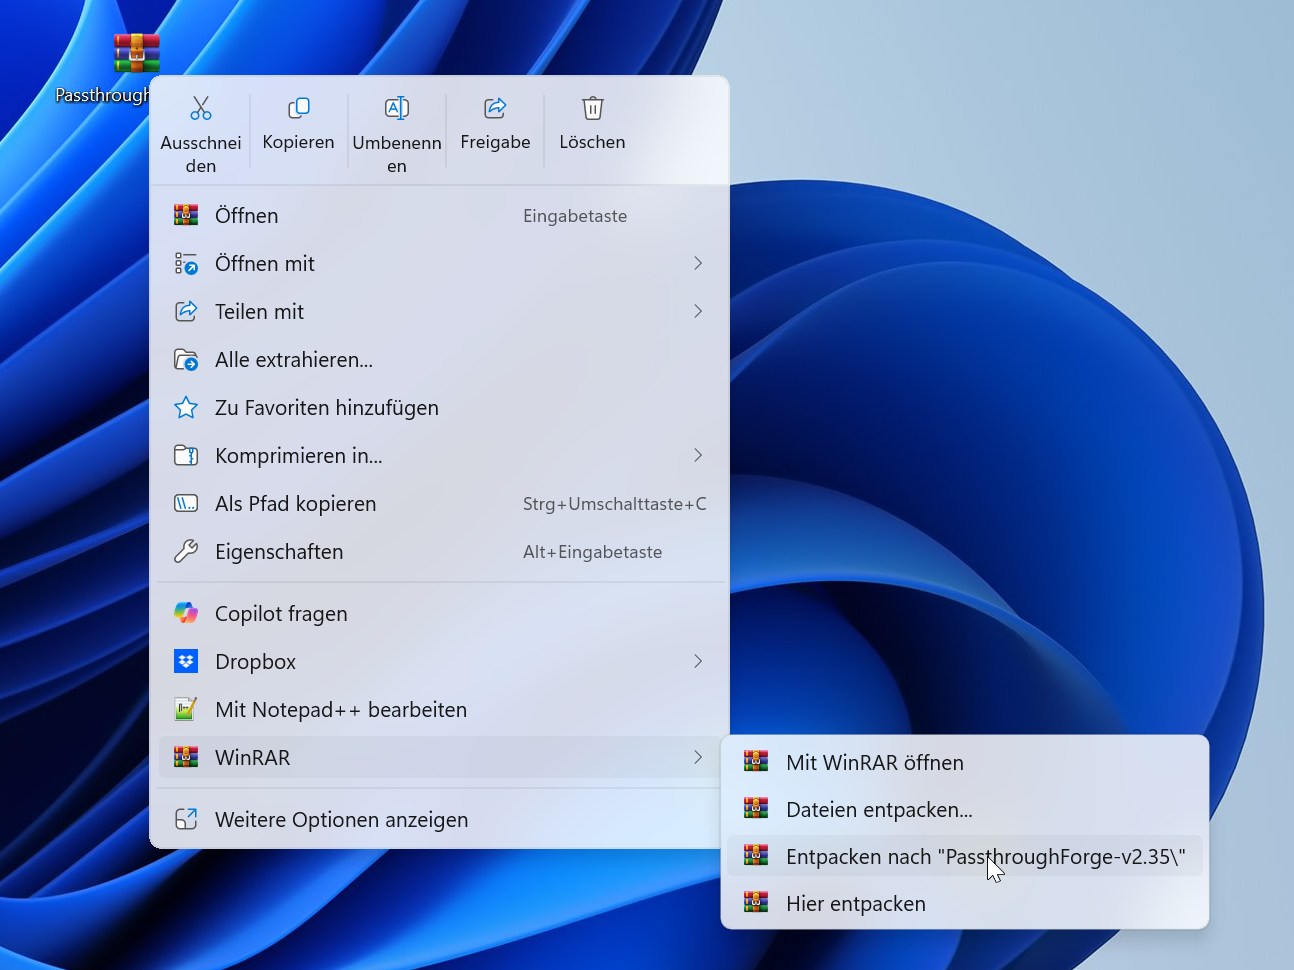
InstallDownload & extract
PassthroughForge ships as a single ZIP. Download PassthroughForge-vX.YY.zip
from the website, then right-click it and pick Extract All... to
unpack into a folder of your choice. The extracted folder contains the executable,
the OpenXR API layer DLL, the layer manifest and the installer scripts.
| File | Purpose |
|---|---|
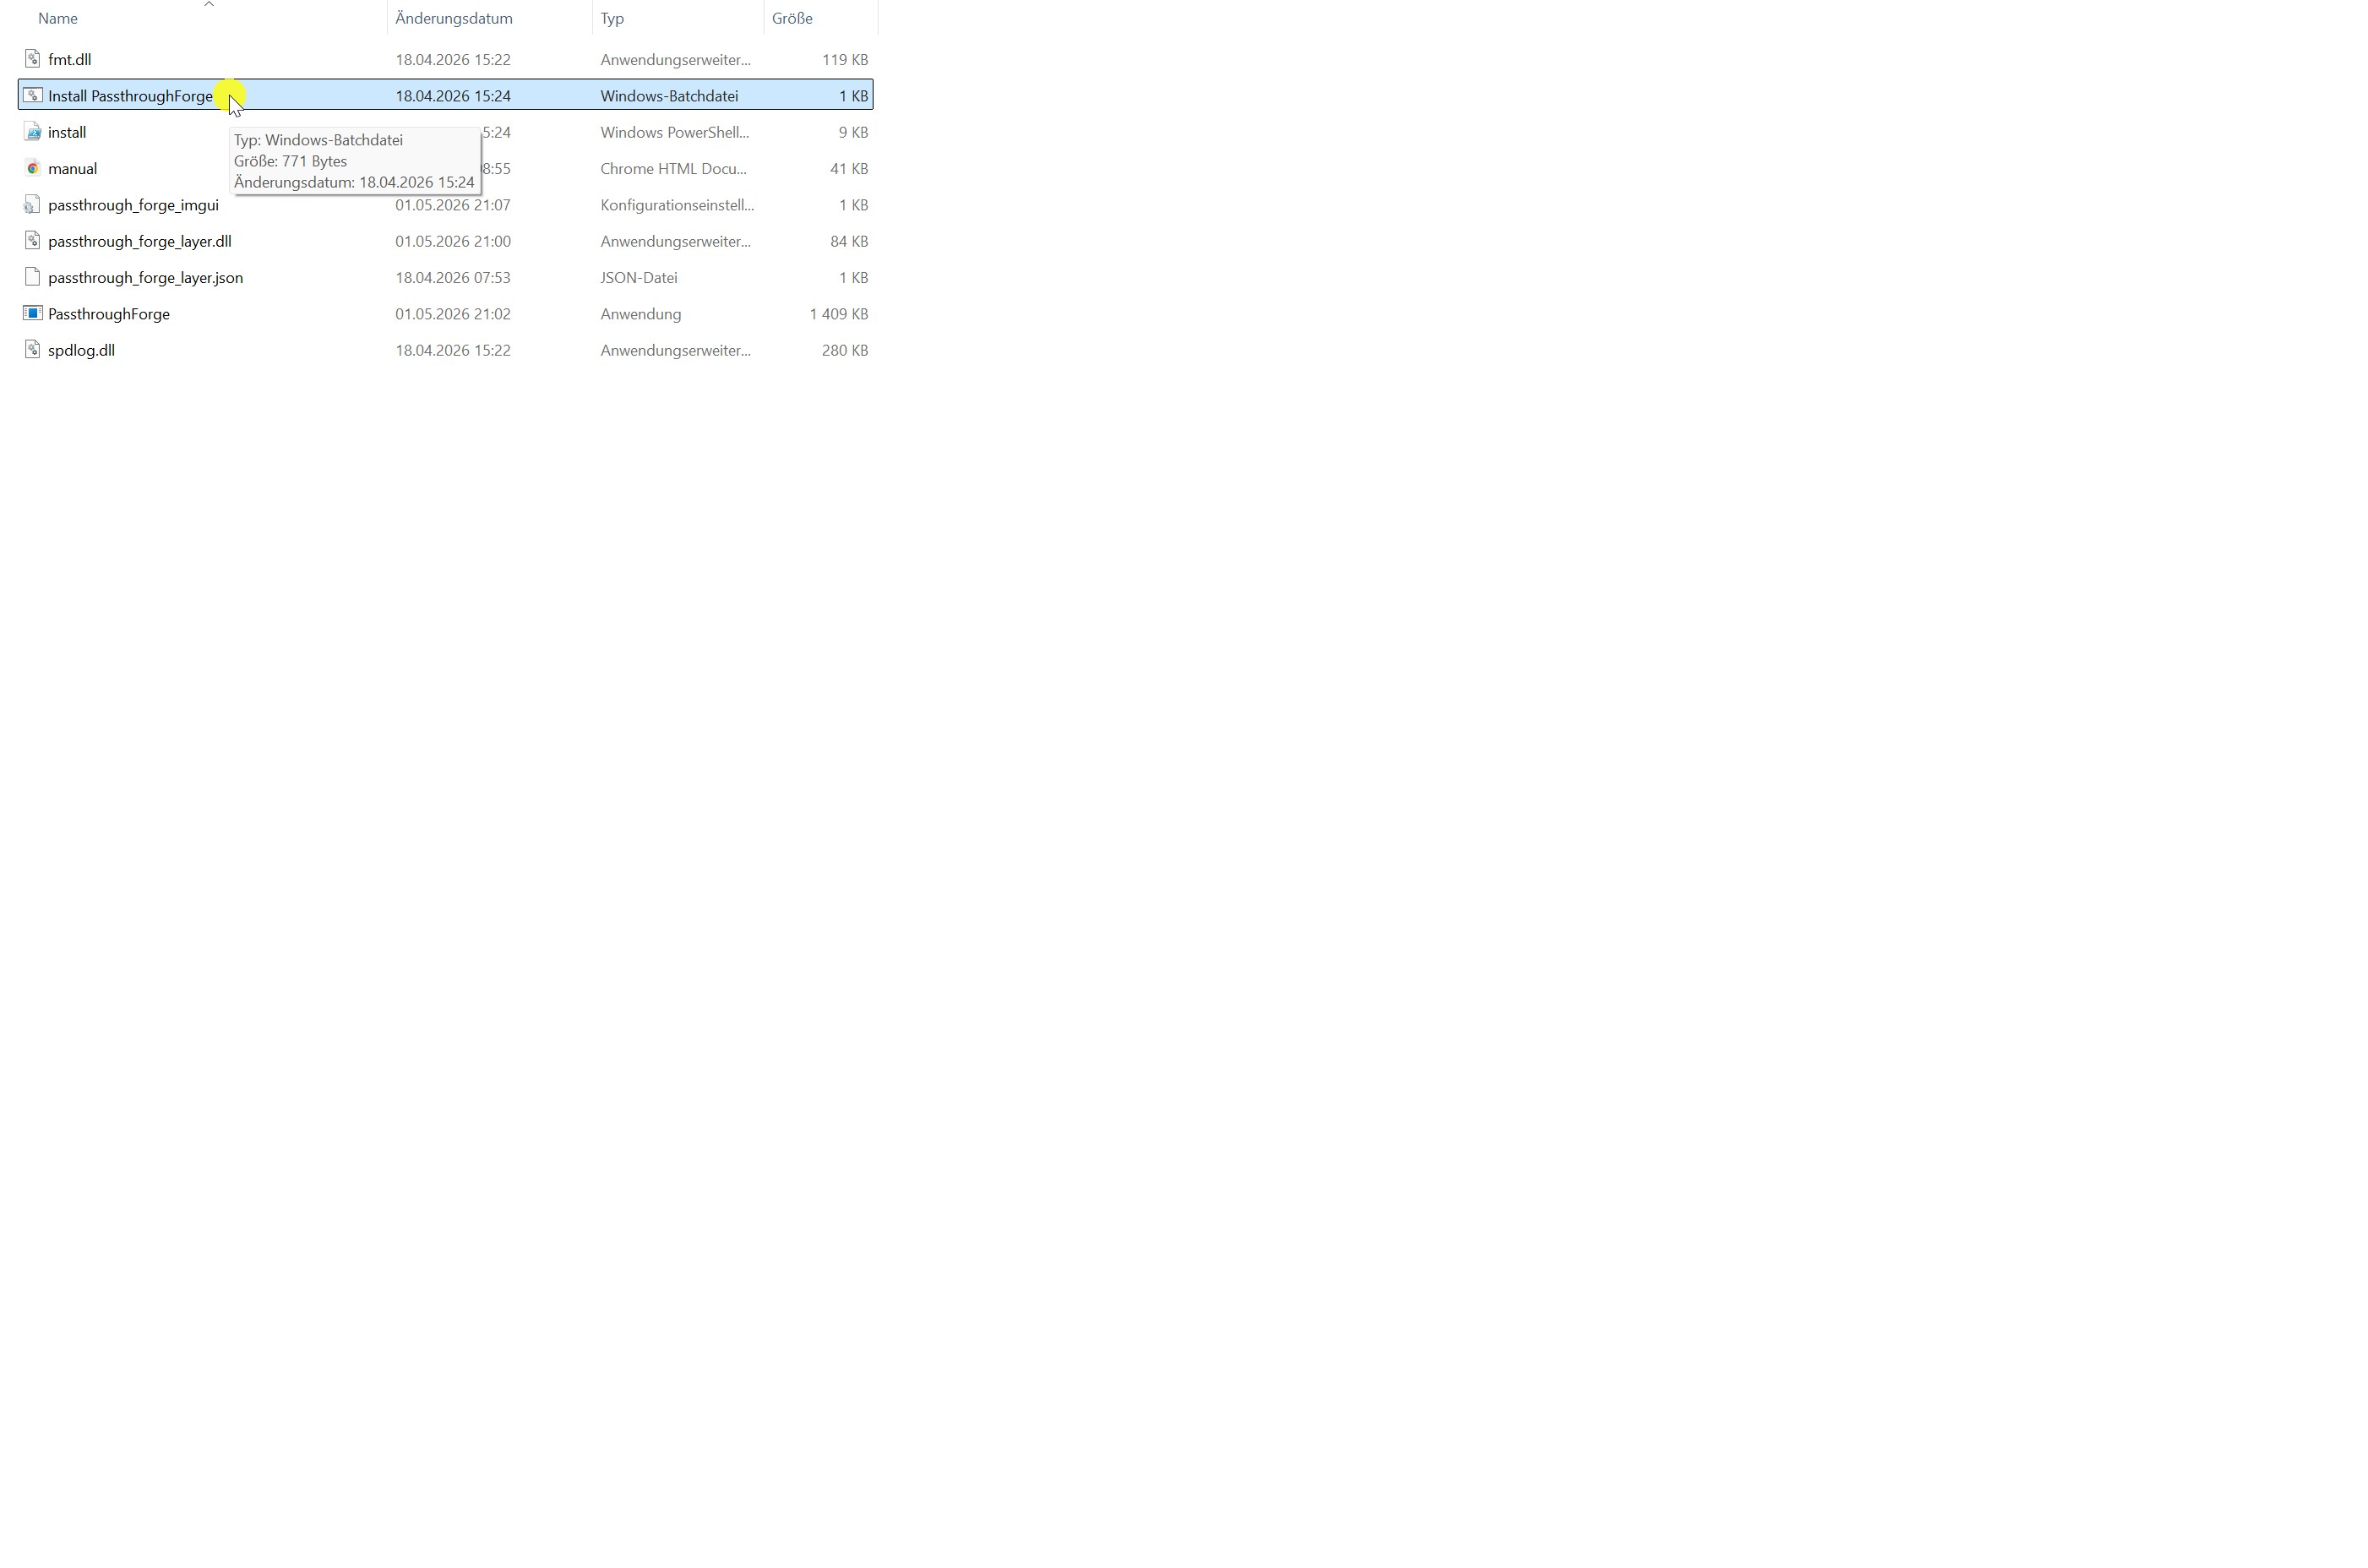
Install PassthroughForge.bat | Double-click this to start the installer. Wraps the PowerShell script with the right permissions flags. |
install.ps1 | PowerShell installer that copies binaries to C:\Program Files\PassthroughForge\, registers the OpenXR API layer in the Windows registry, and creates the Start-menu / Startup shortcuts. |
PassthroughForge.exe | The desktop application (mask editor + tray controller). |
passthrough_forge_layer.dll | OpenXR API layer that injects mask quads into the runtime's composition stack. |
passthrough_forge_layer.json | API layer manifest read by the OpenXR loader. |
InstallRun the installer
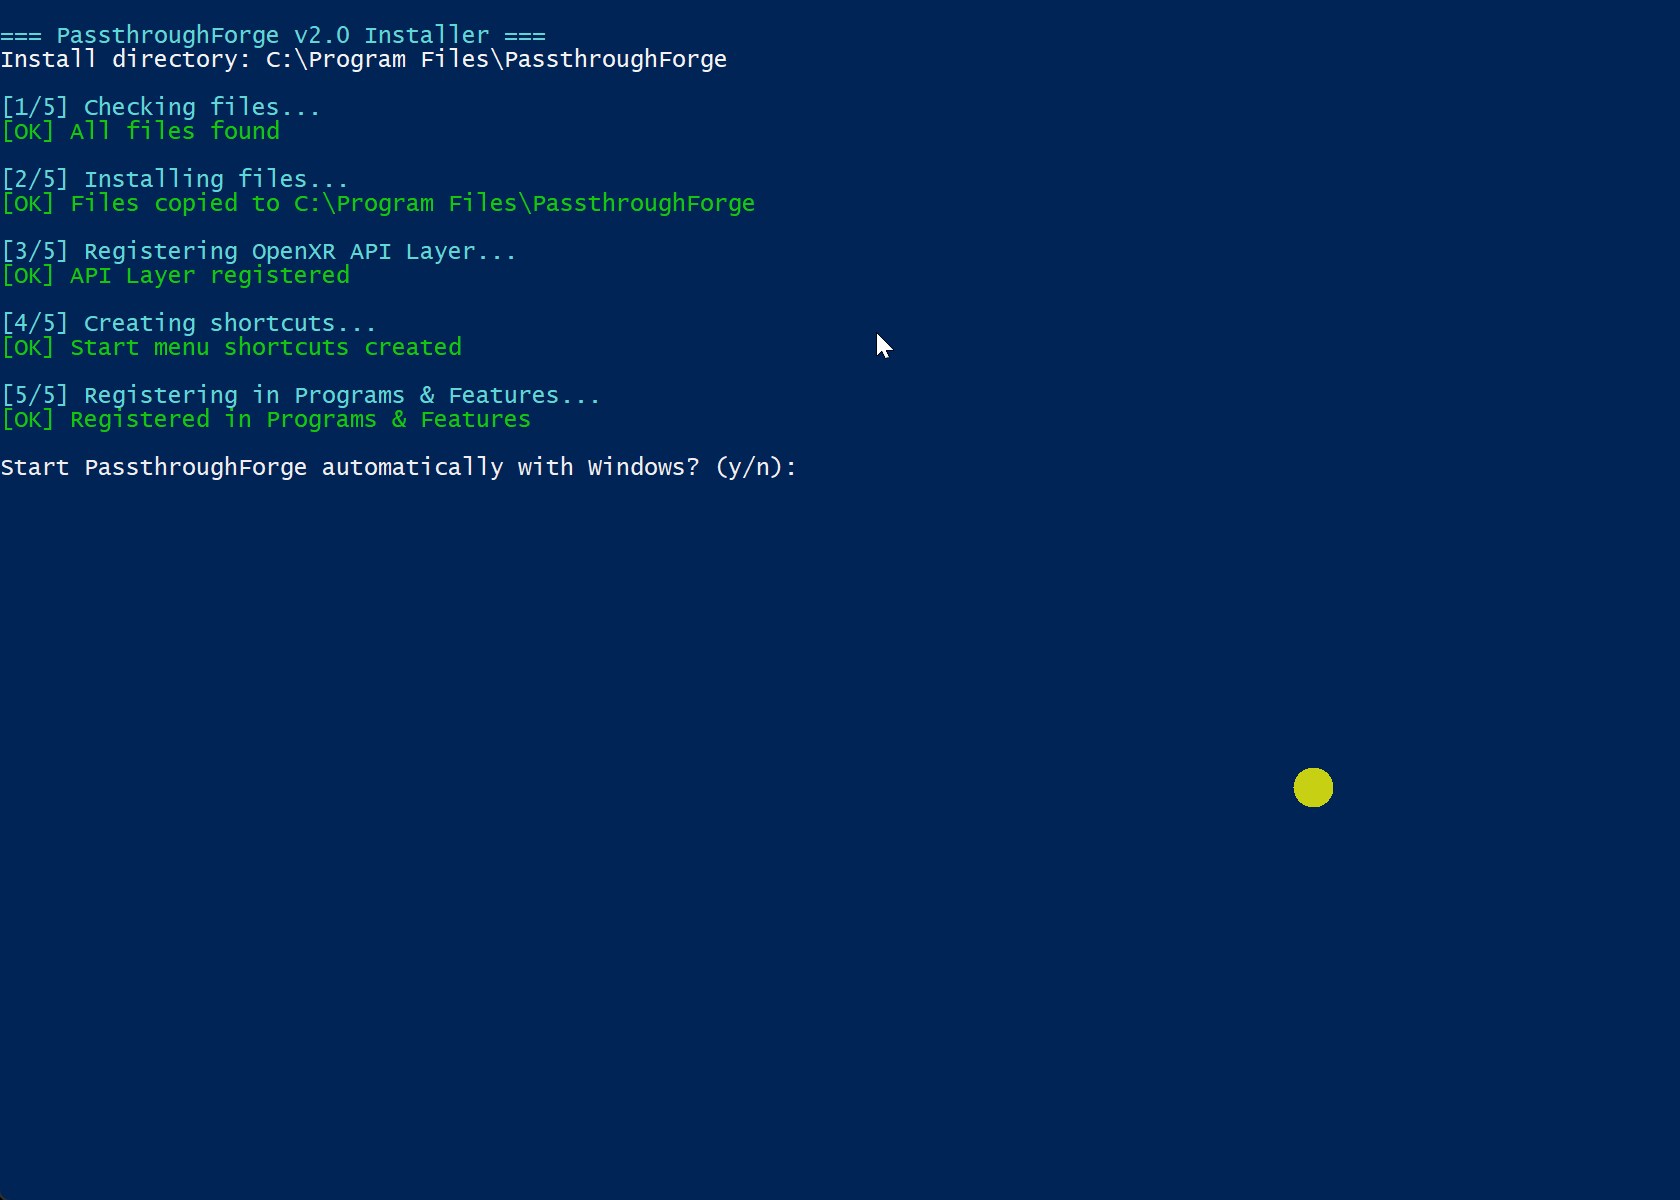
Double-click Install PassthroughForge.bat. A console
window opens and immediately requests Administrator rights - the installer needs them
to write to C:\Program Files and to add the OpenXR API layer entry under
HKLM\SOFTWARE\Khronos\OpenXR\1\ApiLayers\Implicit.
InstallConfirm the Administrator prompt
Windows will show a User Account Control dialog asking permission to run the installer with elevated rights. Click Yes to continue. If you click No, nothing is changed on your system - you can re-run the installer at any time.
InstallWhat gets installed
The installer console prints each step as it goes. When it finishes you'll see
a green [OK] line for every action and a Done
summary at the end.
![Installer console showing successful install steps with [OK] markers.](screenshots/install-result.jpg)
| Location | What's there |
|---|---|
C:\Program Files\PassthroughForge\ | Application executable, API layer DLL, support DLLs, layer manifest JSON. |
| Start menu | PassthroughForge shortcut for normal launches. |
| Startup folder | Optional auto-start shortcut so PassthroughForge launches with Windows. Remove the shortcut to disable auto-start. |
HKLM\SOFTWARE\Khronos\OpenXR\1\ApiLayers\Implicit | Registry value pointing at the layer JSON. This is what makes DCS / MSFS / IL-2 / War Thunder / Falcon BMS load PassthroughForge automatically when they create their OpenXR session. |
%APPDATA%\PassthroughForge\ | Per-user runtime data: profile JSONs, settings, logs. Only created on first launch, not by the installer. |
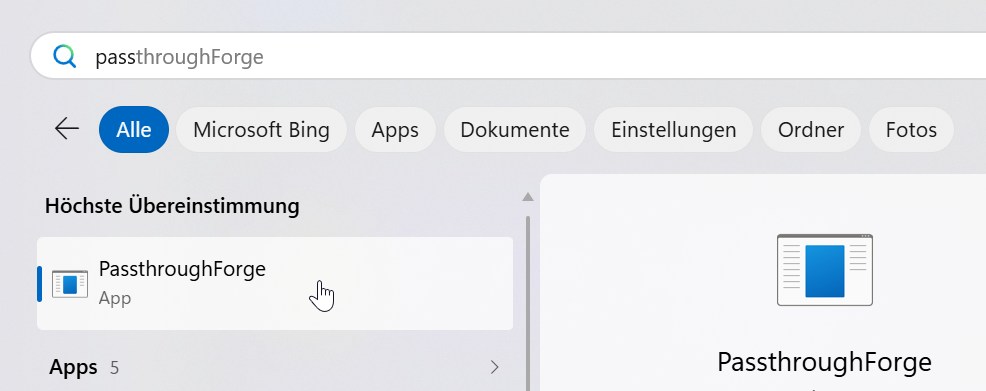
InstallFirst launch
Start PassthroughForge from the Start menu (or just reboot - the auto-start will bring it up). The desktop window opens with an empty default profile. Now start your sim - DCS, MSFS, IL-2, War Thunder or Falcon BMS - and the OpenXR layer activates automatically inside the game's render loop. Add a mask, position it with the sliders or in Trace VR, and the chroma-key cutout appears in your headset.
- In Virtual Desktop on the Quest: Streaming → VR Passthrough is ON
- VD's chroma-key Color matches the hex value
PassthroughForge shows in Settings → Passthrough
Color. Default is
#0000B4(dark blue) - VD's chroma-key Similarity / Threshold sliders are wide enough to absorb stream-compression colour drift - see the troubleshooting section if the mask renders as a solid block.
InstallUninstall
Right-click the installer file again and pick Run with PowerShell,
then add the -Uninstall flag - or simpler: open an elevated
PowerShell window in the install folder and run:
powershell -ExecutionPolicy Bypass -File install.ps1 -Uninstall
The script removes the API layer registry entry, deletes the Start-menu and
Startup shortcuts, and clears the install folder. Your profiles and settings
under %APPDATA%\PassthroughForge\ are kept; delete that
folder yourself if you want to wipe them too.
Start hereFirst-time walkthrough — your first 15 minutes with PassthroughForge
Welcome. PassthroughForge has a lot of panels and a lot of options, but you don't need most of them on day one. This walkthrough takes you from a fresh install to a single working mask in your real cockpit, so you can see the whole pipeline (editor → OpenXR layer → Virtual Desktop → real-world passthrough) actually work end-to-end before you invest time in detailed cockpit cutouts.
Before you put the headset on
Required Virtual Desktop settings. The chroma-key passthrough only works if Virtual Desktop is configured for it. Open the Virtual Desktop streamer on the Quest and set:
- Streaming → Environment: enabled (checked)
- Passthrough color (RGB):
0, 0, 180(deep blue) as your starting point - Similarity:
15 - Smoothness:
15 - Passthrough:
100
These values are a known-good baseline. You can fine-tune Similarity and Smoothness later if your room lighting causes pink/blue rim artifacts at mask edges, but get them set to these defaults first — most "it doesn't work at all" reports turn out to be a Virtual Desktop default that's far away from these numbers.
Heads up: the same color (0, 0, 180)
must also be set as the Passthrough Color inside
PassthroughForge (Settings → Passthrough Color).
The two values must match exactly — the editor
paints masks in that color, and Virtual Desktop only swaps that
exact color for camera pixels. A mismatch is the #1 reason masks
appear solid.
Other prerequisites:
- Virtual Desktop running on the Quest and connected to your PC
- DCS World (or any OpenXR title) installed and ready to launch
- PassthroughForge installed and the OpenXR layer registered (see Run the installer above)
- Plan 30 minutes. Most of it is positioning, not setup.
If you plan to bind a mask to a controller (real-time controller
tracking) — disable Hand Tracking AND Body Tracking before
you start. Both Quest 3 + Virtual Desktop and Meta's
native OpenXR runtime feed an inferred hand pose through the
same action space the controller uses when those modes
are on — so the moment you put a controller down the mask
starts following your hand instead. PassthroughForge cannot tell
the two apart from inside the API layer (we tried; the
POSITION_TRACKED_BIT discriminator is set on both
poses on Quest 3 + VDXR). Turn them off at the source:
- Virtual Desktop streamer → Streaming tab → Hand Tracking: OFF
- Meta Quest headset → Settings → Movement Tracking: Controllers only
- Meta Quest headset → Settings → Movement Tracking → Body Tracking: OFF (this one alone causes the symptom even with Hand Tracking off)
Full background and a quick-test procedure live under Troubleshooting → a controller-tracked mask locks to my hand instead of the controller.
About the trial: the open beta runs as a 44-day evaluation window from your first launch. The remaining days are shown in the title-area banner. After 44 days you continue with an activation code, which the dev team sends out in response to your beta-program signup. Setting your system clock backward to extend the trial is detected and blocked — but legitimate clock corrections (DST, NTP, a flat CMOS battery) won't cost you any trial time.
Start hereTape the proximity sensor — and use the right tape
This is the single most useful tip for anyone setting up masks for the first time.
The Quest 3 has a small infrared proximity sensor between the lenses that pauses the headset and re-centers the playspace whenever you take it off. While you're building masks, you'll constantly switch between the headset (to check placement) and the desk (to adjust polygon points). Every time you take the headset off, the proximity sensor fires, and your playspace can shift — your masks then no longer line up with your real cockpit, even though nothing about your setup actually changed.
Use light, reflective tape — never black. The sensor works by emitting infrared light and measuring what bounces back. Black tape absorbs IR instead of reflecting it, so the sensor still reads "no object near" and the headset goes into standby anyway. Use white masking tape, silver duct tape, or aluminum tape — anything light-coloured or metallic. A small folded piece of white paper held in place with a strip of regular tape also works.
Cover the sensor with that piece of tape. The headset will keep tracking and stay in its current playspace orientation while you flip it up onto your forehead to look at the screen. Remove the tape when you're done — proximity sensing is genuinely useful for normal flying because it pauses the headset to save battery.
(See also: Troubleshooting → a controller-tracked mask drifts when the controller is still, where the same tip applies.)
‼️ The permanent fix — “Center to Playspace” (the single most important setting for World-locked masks):
In Virtual Desktop → Streaming, enable
“Center to Playspace”. This anchors the
OpenXR reference space to your playspace centre (your guardian),
not to wherever the headset happens to be — so it stays consistent
across headset off/on cycles and across restarts.
Once you have set up, aligned and saved a World mask in
PassthroughForge, the mask effectively becomes the central reference
object. On the next session it already sits almost perfectly in
place — all you do is fire your
DCS “Recenter VR View” shortcut once to
centre the real cockpit, and everything lines up. No re-placing, no
per-session fiddling.
And within a session, a plain World mask only ever needs one
Recenter All Masks (Ctrl+Del) after start — from
then on it is rock-solid.
Start hereStart with the simplest possible mask
Don't open PassthroughForge for the first time and try to mask a complete HOTAS, keyboard and kneeboard. You'll spend an hour, and if anything is misconfigured (chroma key wrong, layer not loaded, Virtual Desktop in the wrong mode) you won't know which step broke it.
Instead: pick one rectangular real-world object you can see clearly — a coffee mug, a single keyboard, a notepad — and create a single rectangular mask over it. Goal for the first attempt is just to see real-world passthrough through that one rectangle while the rest of VR stays opaque. That proves the whole chain works. After that, every additional mask is just more polygons.
Start hereStep-by-step: your first mask in VR
- Confirm the Virtual Desktop settings above
(Environment on, color
0, 0, 180, Similarity15, Smoothness15, Passthrough100). - Launch PassthroughForge before you start VR. The OpenXR layer activates per-process; it must be loaded by the time DCS starts.
- Verify
Settings → Passthrough Coloris also0, 0, 180(matches Virtual Desktop). - Click "+ New" in the Profiles panel to create an empty profile.
- Start your VR session (Virtual Desktop → DCS in VR). Put the headset on.
- The default new mask is a small rectangle floating in front of you. Look at it. If you see real-world passthrough inside the rectangle, the chroma key + Virtual Desktop combo is working.
- Lift the headset (proximity sensor taped,
remember). Use the Position panel sliders or the keyboard
shortcuts (
Ctrl+Arrowto nudge,Ctrl+Shift+Arrowfor size) to move and resize the rectangle until its outline matches the object. - Put the headset back on, check alignment, repeat.
- When happy, press
Ctrl+Sto save the profile.
Start hereSave your work as a profile
Profiles store everything: mask shapes, positions, sizes, tracking targets, even reference images. Each aircraft / cockpit gets its own profile; switch with one click in the Profile dropdown when you change planes.
Once this simple example works, you've proven the whole pipeline. From here, the rest of the manual covers how to draw real polygon shapes, bind masks to controllers (real-time tracking), mirror live windows into a mask, and more.
Menu BarProfile dropdown
Top-left of the window. Combobox listing all saved profiles plus quick-action buttons.
Buttons

| Control | Function |
|---|---|
| Profile combobox | Click to drop down a list of all saved profiles. Selecting one immediately loads its full state - masks, color, transforms, gaze settings. |
| Save | Saves the current state back to the profile that's currently loaded. Overwrites without asking. Use + New if you want to keep the original intact. |
| + New | Creates a brand new profile from the current state. If the rename textbox in the Profiles panel has a name typed in, that name is used (with auto-suffix if it collides). Otherwise Profile 1, Profile 2... is auto-generated. |
Menu BarRecenter All Masks
Big blue button to the right of + New. Performs a Snap to View: rigidly rotates the whole mask group around your head pivot so the centroid lines up with your forward direction. Distances and heights between masks are preserved exactly.
Shortcut: Ctrl + Delete. Same action available from the global
keyboard hook in tray mode.

Menu BarSettings menu
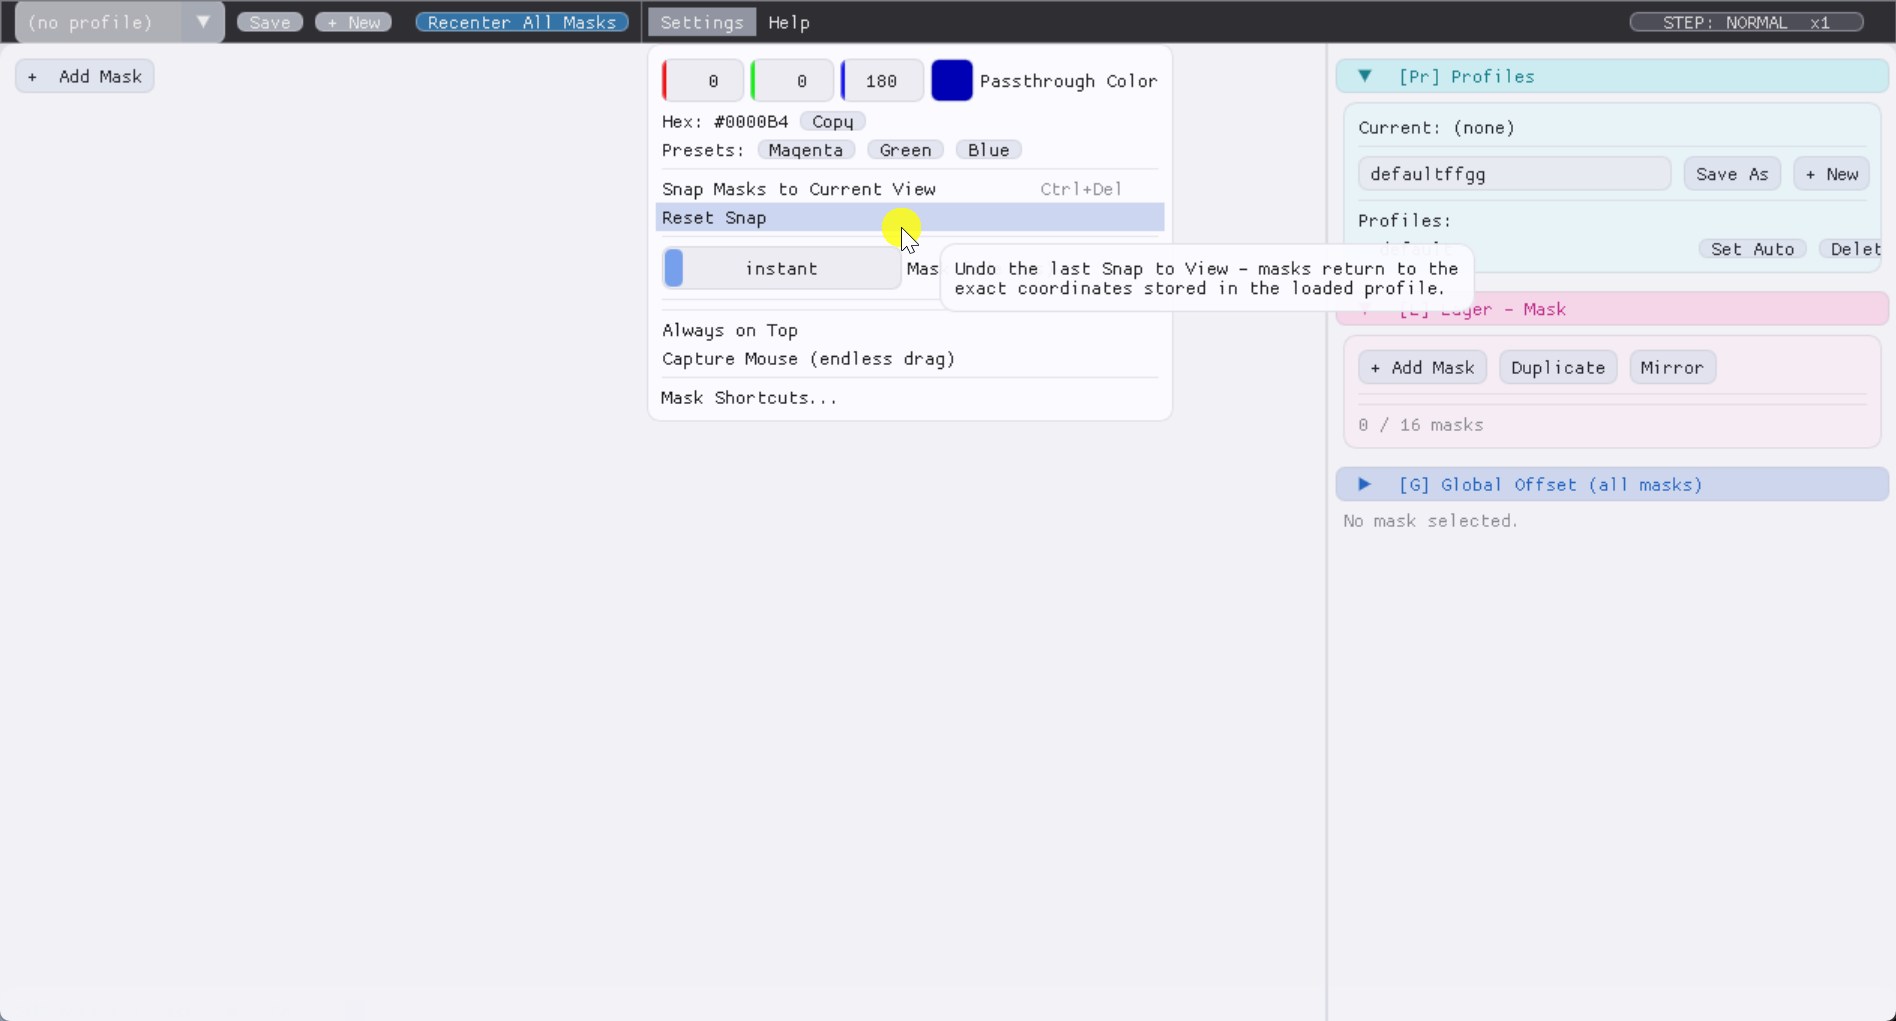
Drops down a menu with passthrough-color controls and global behaviour toggles.
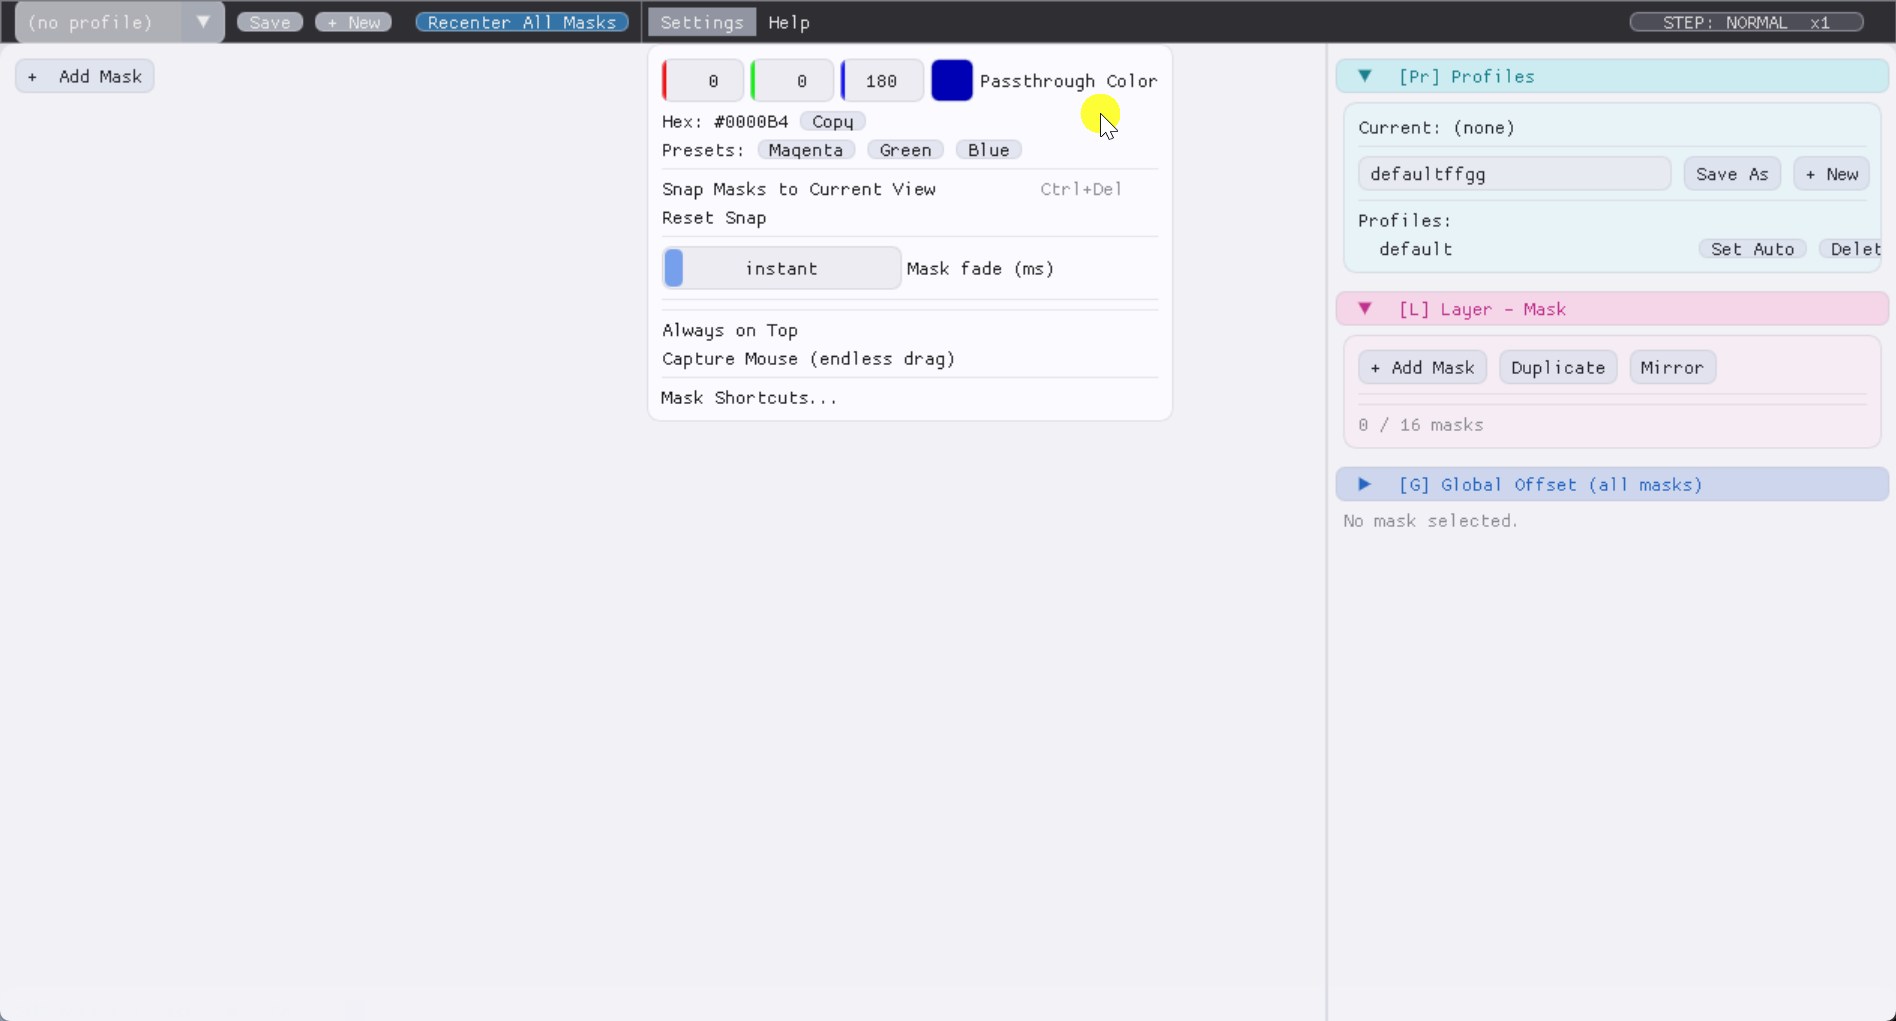
Color controls
| Passthrough Color | RGB color picker. The mask interior is filled with this color, and Virtual Desktop's chroma-key replaces it with the camera feed. |
| Hex: #RRGGBB | Read-only display of the chosen color as hex. Useful for matching VD's chroma-key setting. |
| Copy | Copies the hex code to clipboard. |
| Magenta / Green / Blue | One-click presets. Default is dark blue #0000B4. |
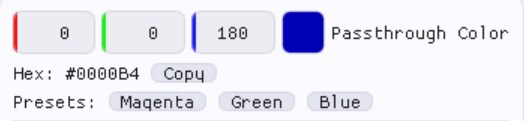
Snap controls

| Snap Masks to Current View | Same as the Recenter All Masks button or Ctrl+Delete. |
| Reset Snap | Clears the session pivot + rotation + position offset. Masks return to their pristine profile coordinates. |
Behaviour toggles
| Mask fade (ms) | 0 = instant snap when toggling masks on/off. Slider up to 500ms for smooth fade. |
| Always on Top | Pins the desktop window above all others. Useful for second-monitor setups. |
| Capture Mouse (endless drag) | Clips the cursor inside the window AND wraps it across edges so DragFloat / SliderFloat values can be dragged endlessly. |
| Mask Shortcuts... | Opens the keyboard-binding configuration window (see below). |
Menu BarHelp menu
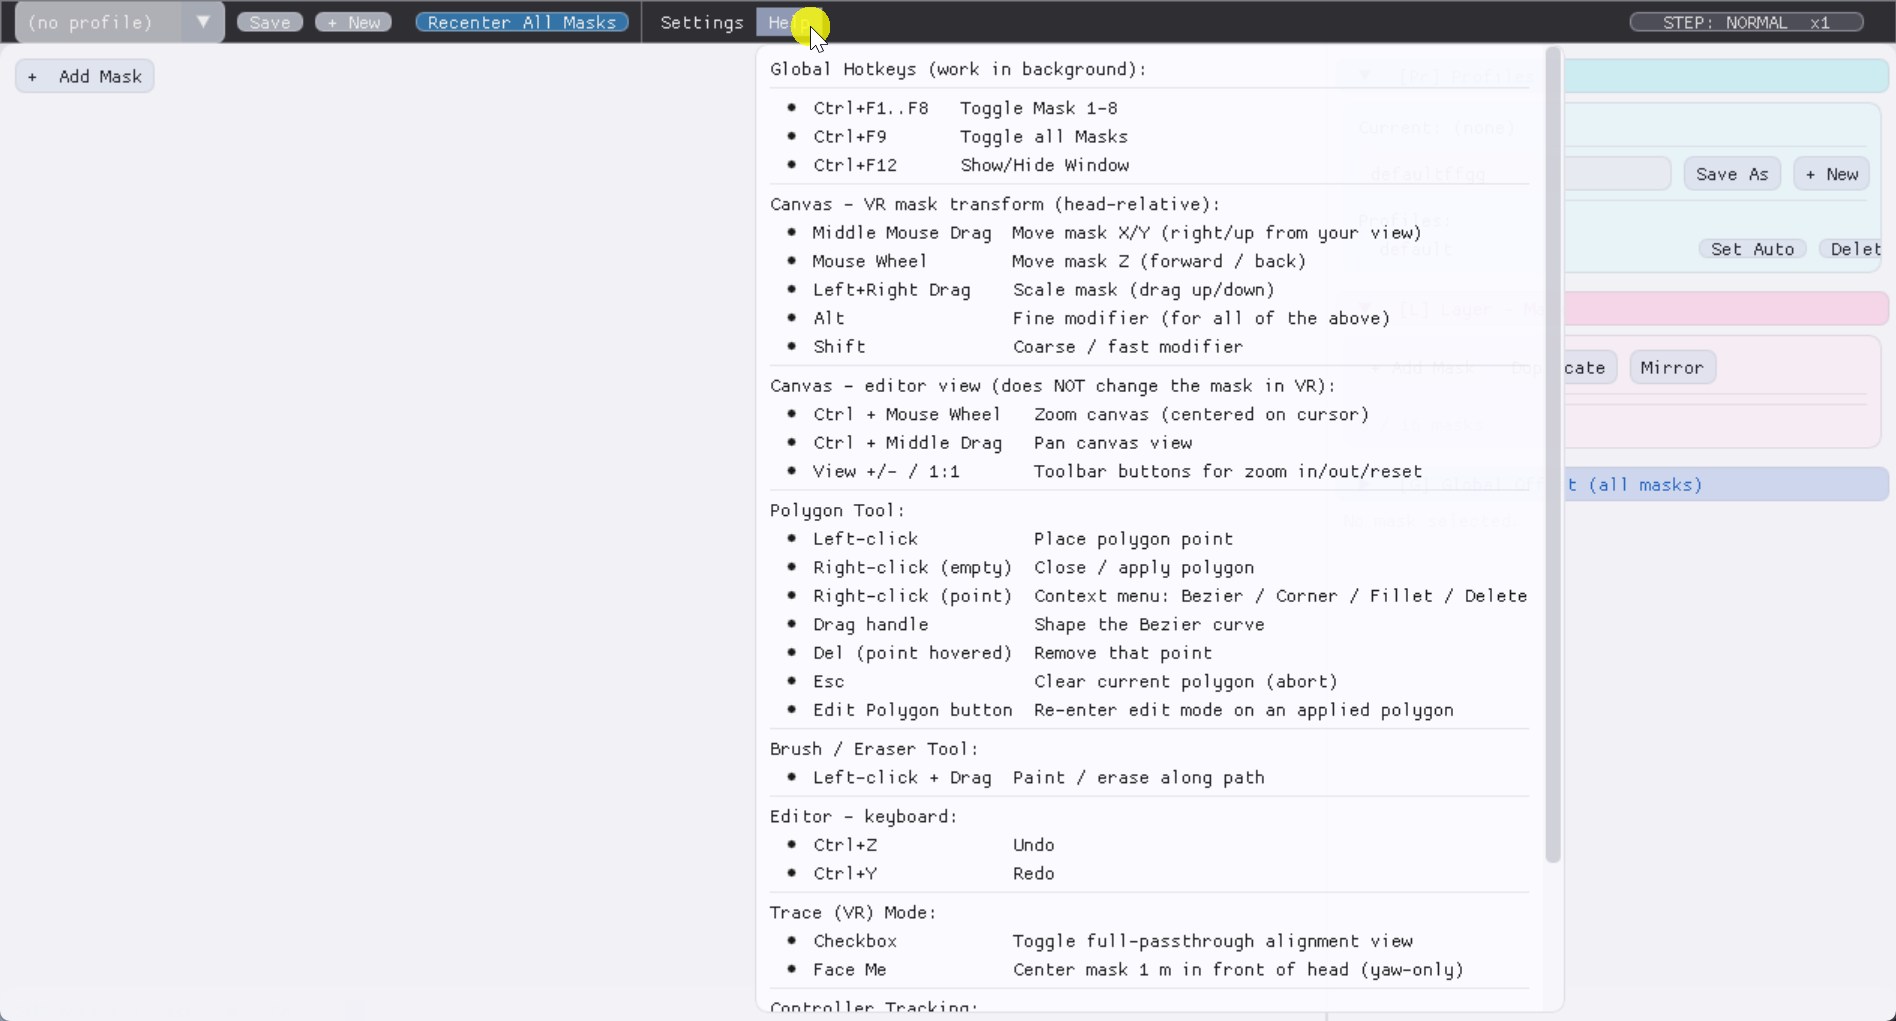
Quick reference of mouse/keyboard shortcuts inline. The full list is on the main page under Shortcuts.
Menu BarStep mode pill
Top-right of the menu bar. Shows the current keyboard nudge step:
NORMAL x1, FINE x0.1 (green), or
COARSE x5 (orange). Click to cycle through the modes.
Default toggles: Q (Fine), E (Coarse). Tap once
to enter, tap again to leave.
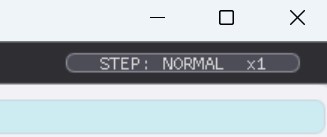
The selected step multiplies all keyboard transform shortcuts: Ctrl+Arrow translates by 1 cm in Normal, 1 mm in Fine, 5 cm in Coarse.
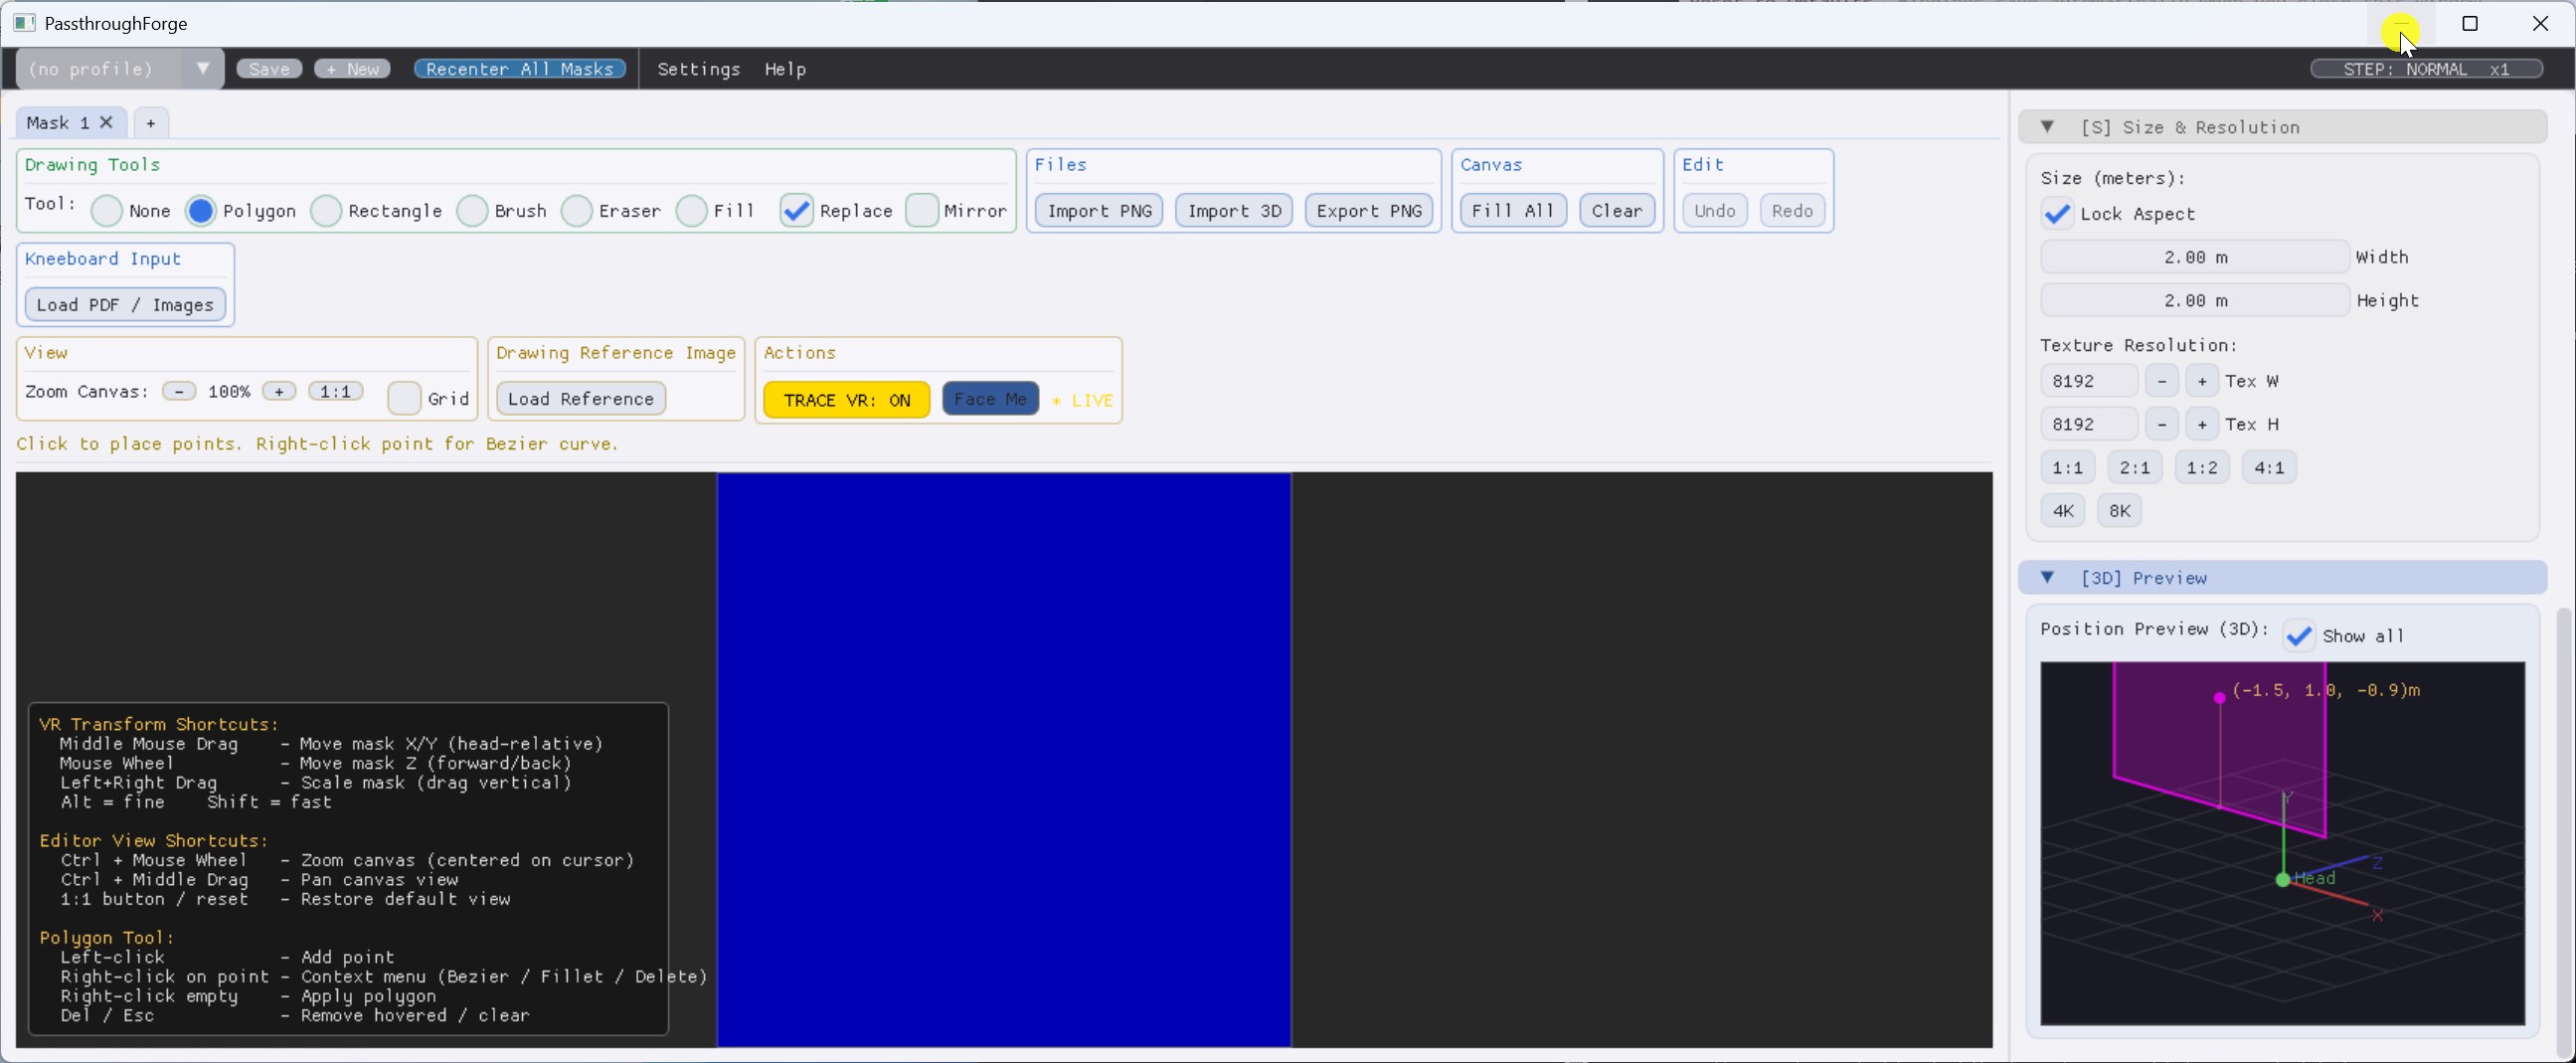
EditorDrawing Tools
Choose the tool you want to draw your mask with.

| Tool | Effect |
|---|---|
| None | Default. Canvas clicks/drags do nothing - safe state for adjusting position via shortcuts without accidentally drawing. |
| Polygon | Click to place vertices, right-click on empty canvas to apply, right-click on point for context menu (Bezier toggle, Fillet, Delete). |
| Rectangle | Click + drag to fill an axis-aligned rectangle with the passthrough color. |
| Brush | Click + drag to paint a soft circle with the size from the slider that appears next to the radio buttons. |
| Eraser | Same as brush but removes pixels (alpha = 0). |
| Fill | Bucket flood-fill: click any region and the connected area is filled with the passthrough color. Use Eraser to remove a fill. |
Add / Subtract draw mode
Right of the tool radios (when a painting tool is selected) is a Mode toggle with two options: Add (default — tool fills with the passthrough colour) and Subtract (tool clears pixels in the affected region instead). Subtract works for Brush, Rectangle, Polygon and Fill, turning every painting tool into a "cut a hole" tool. Classic use case: filled rectangle in Add for the outer shape, switch to Subtract, drag a smaller rectangle inside → instant frame in two clicks. The standalone Eraser tool is still there for muscle memory; it is always-erase regardless of mode.
EditorFiles card

| Import PNG | Loads any image and uses its alpha channel as the mask shape. Pixels with alpha > 128 become the passthrough color, everything else is transparent. Good for stencils / silhouettes. |
| Import 3D | Loads an STL or FBX file, projects its silhouette to a 2D shape and uses that as the mask. Useful for projecting hardware models. |
| Export PNG | Writes the current mask pixels (RGBA) to a PNG file - good for backups or sharing. |
EditorCanvas / Edit cards
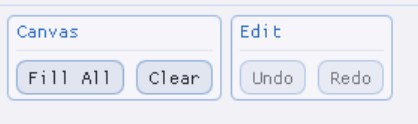
| Fill All | Fills the entire texture with the passthrough color (full passthrough quad). Mostly used to start with a "blank passthrough sheet" you then carve away from with the Eraser. |
| Clear | Wipes all pixels to alpha=0 (fully transparent / no passthrough). |
| Undo | Reverts the last drawing operation. |
| Redo | Re-applies an undone operation. |
EditorView card
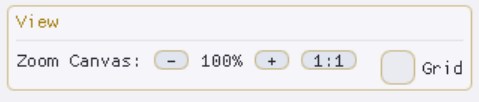
| Zoom Canvas - / + | Discrete zoom buttons. Each press multiplies/divides zoom by 1.25. |
| 1:1 | Reset zoom and pan to default centered view. |
| Grid checkbox | Toggles a divisions grid overlay on the canvas - useful for symmetric polygon placement. |
| Mask α slider | Editor-only mask transparency on the canvas (0.05–1.0). Drop below 1.0 and the mask becomes semi-transparent in the editor so a reference image (or any canvas-only background) shows through while you paint — the difference between guessing edges and tracing them. Does not affect VR rendering: the mask in the headset stays at its real opacity regardless of where the slider sits. Click 100% to snap back to fully opaque. |
Mouse alternative: Ctrl + Wheel zooms continuously and centers
on the cursor; Ctrl + Middle Drag pans.
EditorReference Image card
Loads any image (typically a cockpit photo) as a tracing background. The image is fitted to the canvas with correct aspect ratio and centered.
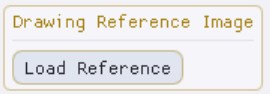
| Load Reference | Open file dialog to pick an image. |
| Show / Hide | Toggle visibility of the loaded reference. |
| Opacity slider | 0 = invisible, 1 = fully opaque. |
| Rotate 90 / 180 / 270 | Rotates the reference if your photo is in portrait or upside-down. |
EditorActions card
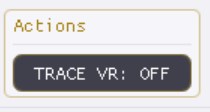
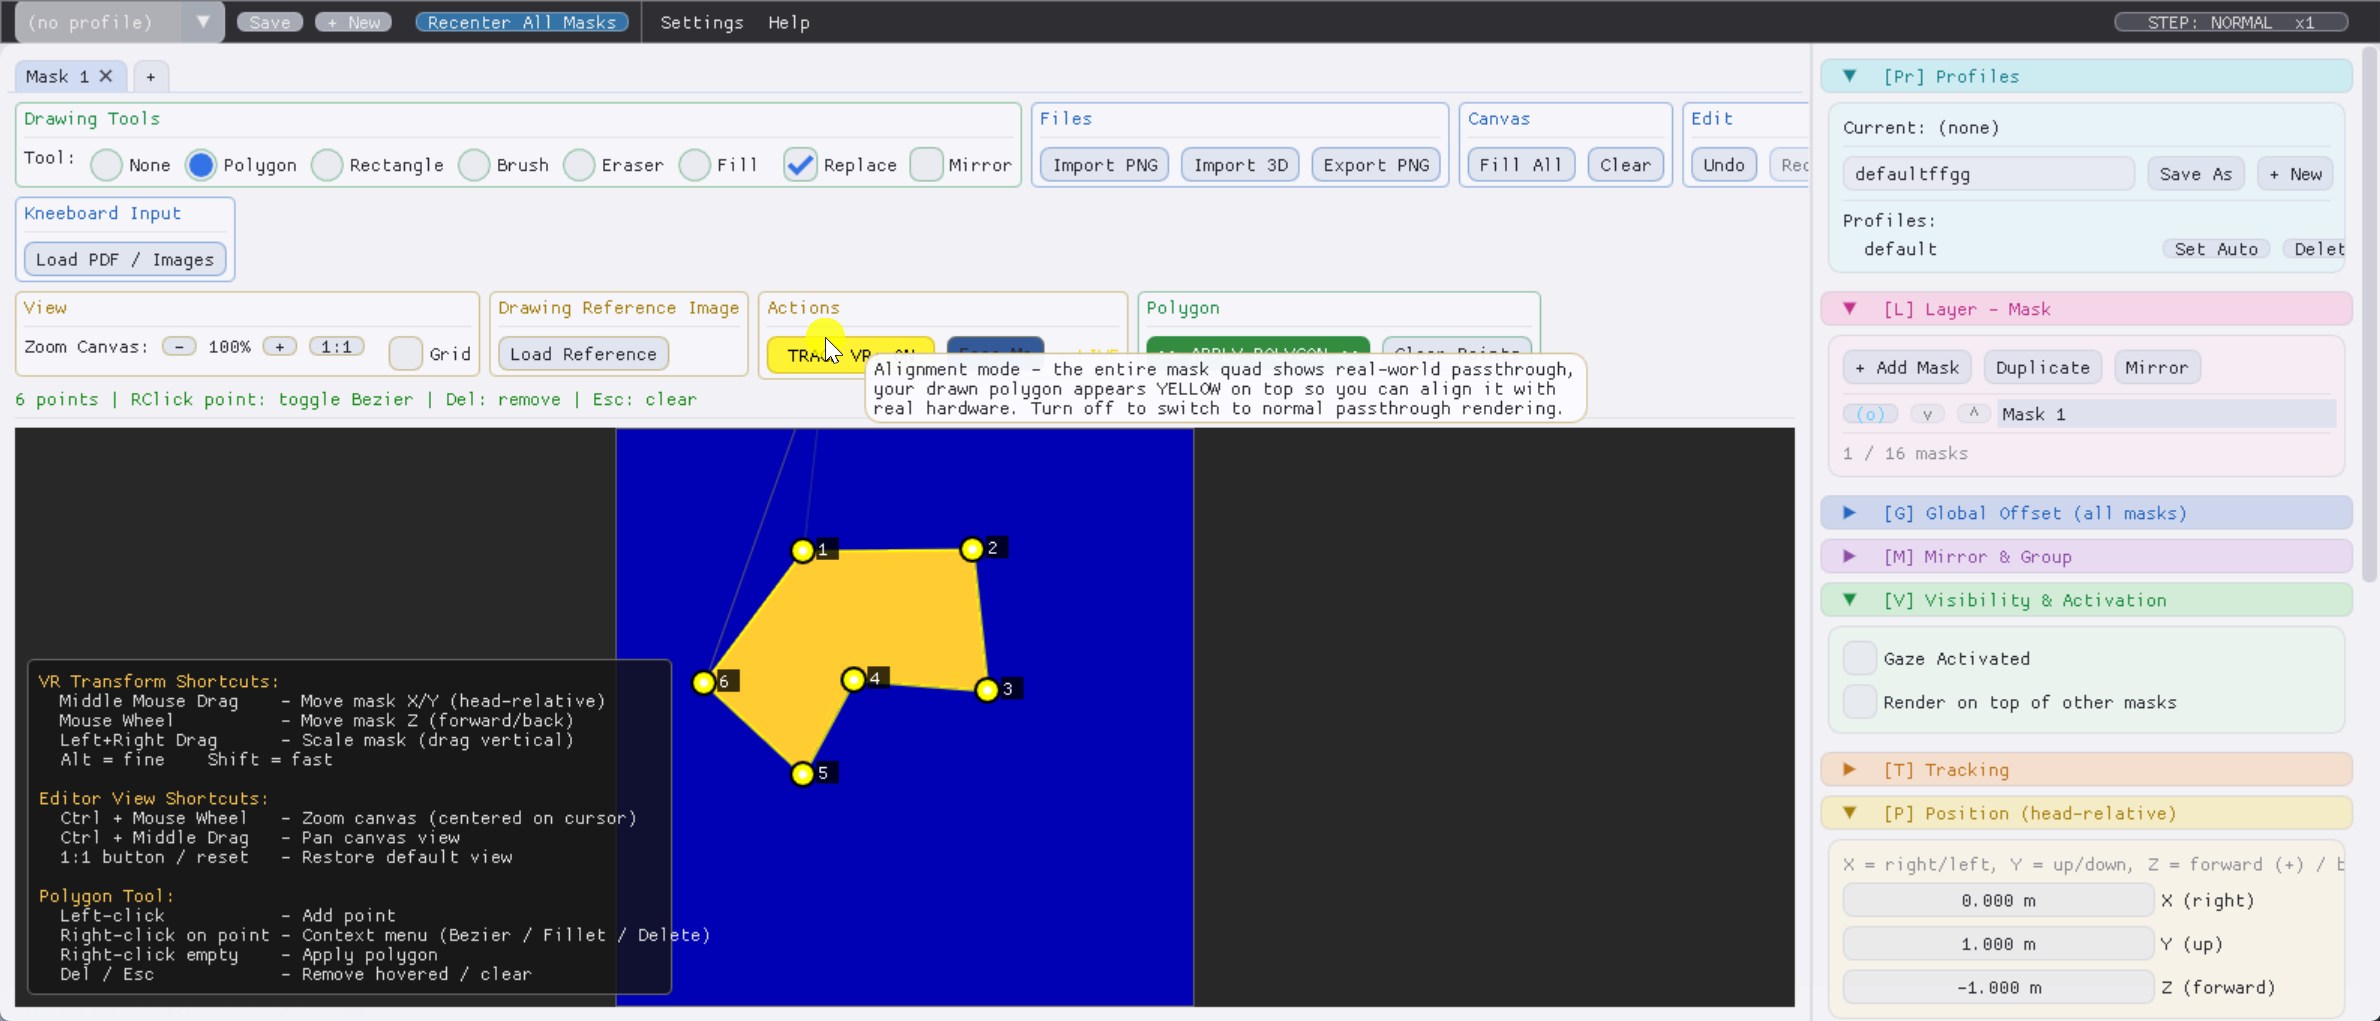
| TRACE VR | Toggles a special render mode: every painted pixel of the SELECTED mask is drawn yellow in VR (instead of using passthrough), all other masks become invisible. Used for fine-aligning the painted shape with the real cockpit. |
| Face Me | Rotates the currently selected mask so its surface normal points exactly at your head. Disables Auto-Face mode (which keeps the rotation live). |
EditorPolygon tool detail
The polygon tool is the most powerful drawing tool. Each click places a vertex; right-clicking on the canvas applies the polygon (rasterizes it to the mask pixels). After applying, the polygon vertices are saved with the mask so you can re-edit later.
Per-vertex actions
| Drag a vertex | Repositions it. |
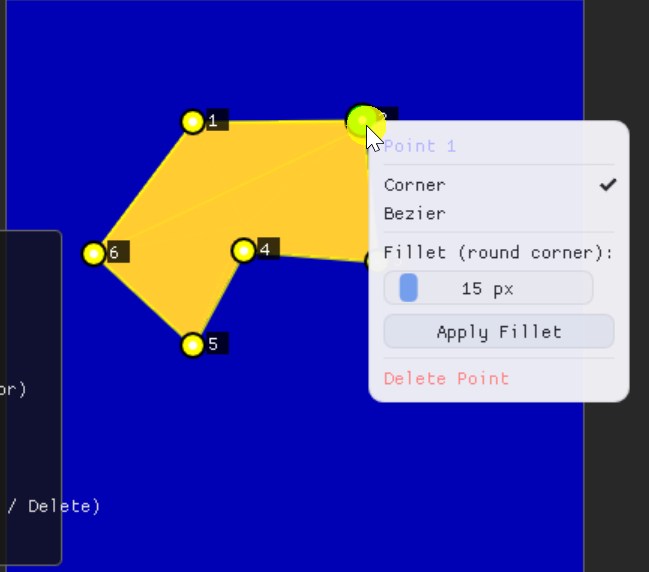
| Right-click on a vertex | Opens context menu: Corner / Bezier toggle (controls handle visibility), Fillet radius (adds a rounded corner on apply), Delete. |
| Right-click on an edge | Inserts a new vertex at the click position. |
| Drag a Bezier handle | Adjusts the curve tangent at that vertex. |
| Hover + Del | Deletes hovered vertex. |
| Esc | Cancel the in-progress polygon (no apply). |
Mirror mode
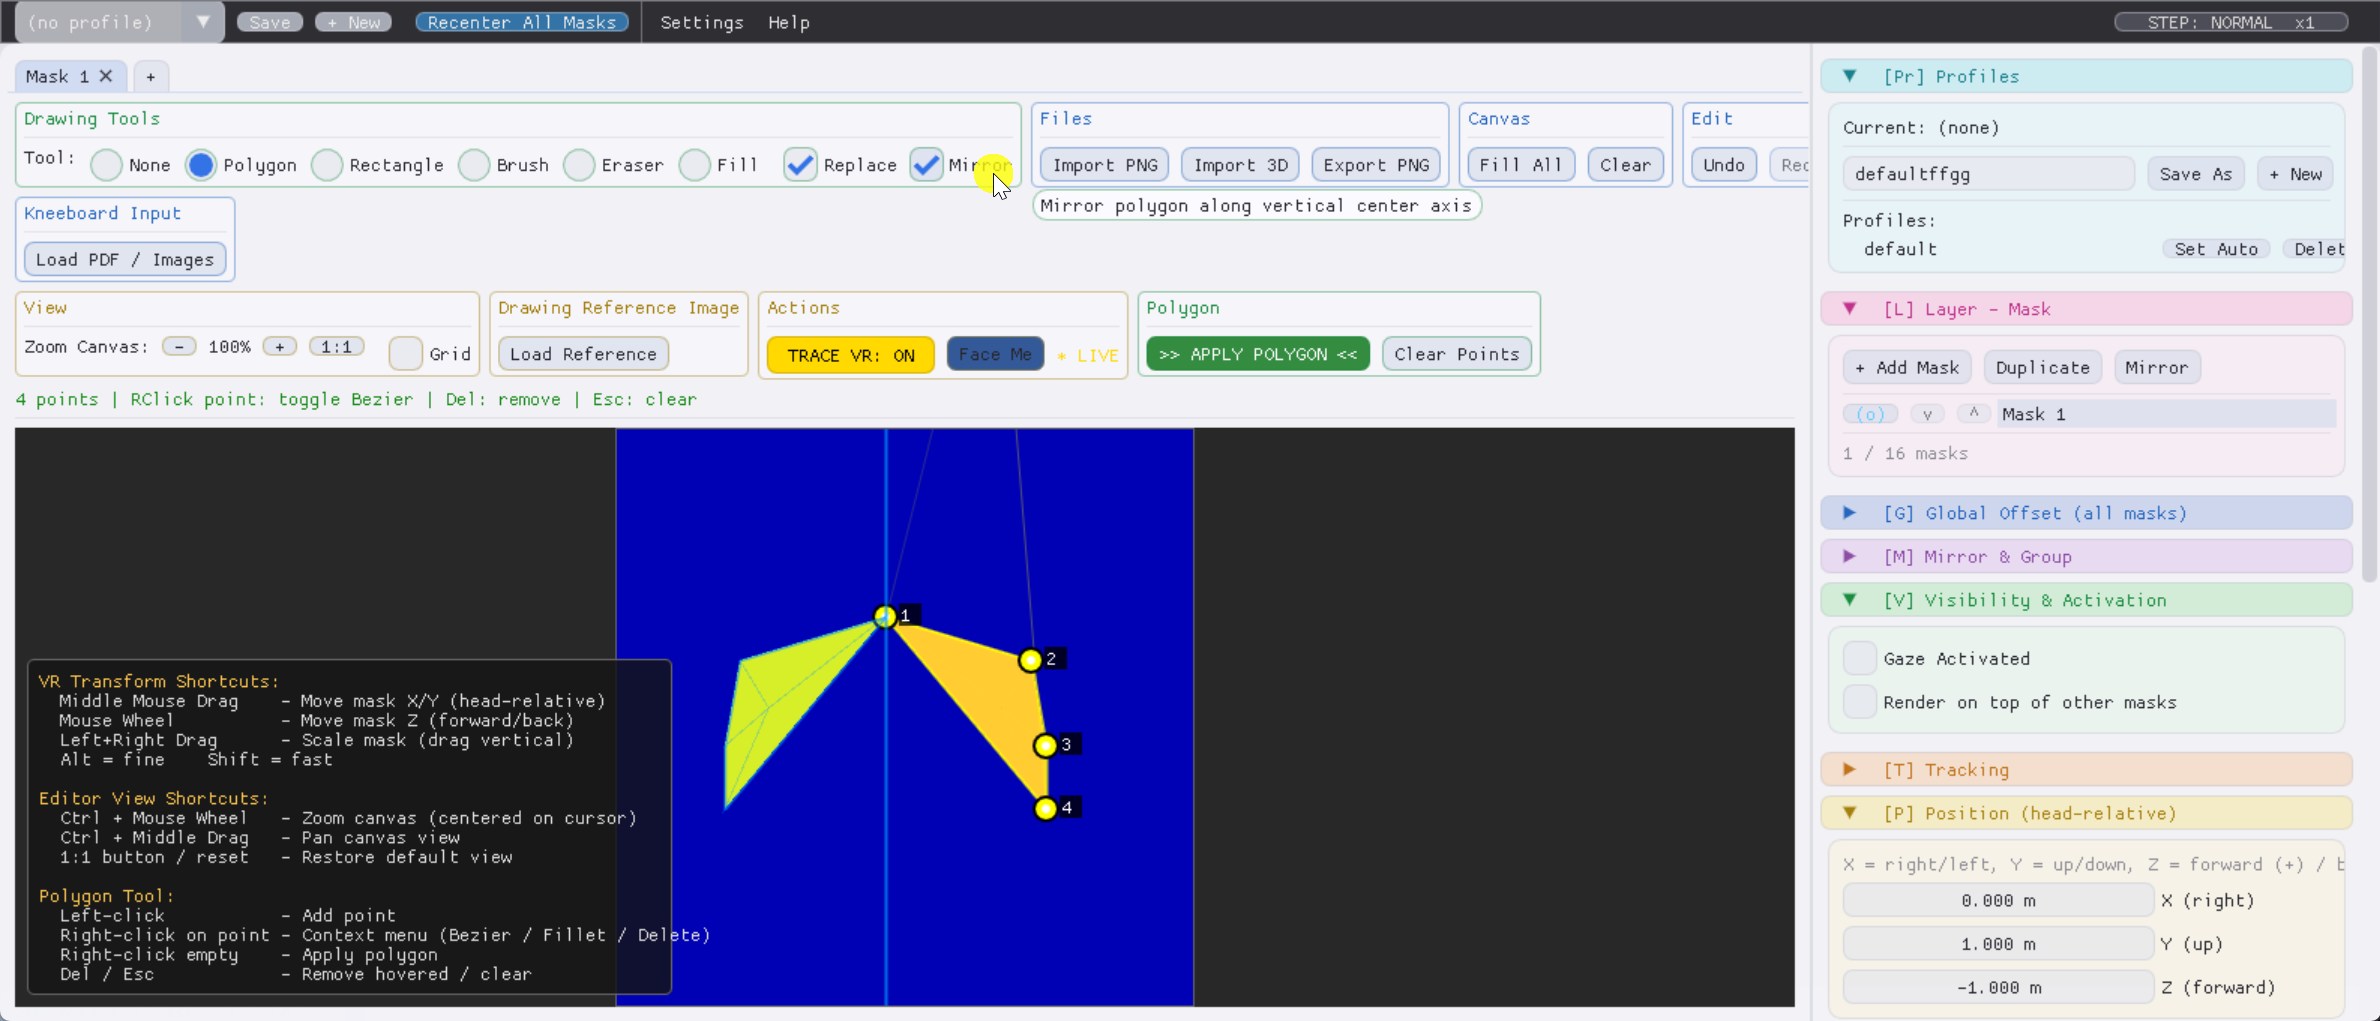
The Mirror checkbox creates a real-time mirrored preview of the polygon along a vertical axis through the first placed point. On apply, both the original and the mirrored shape are rasterized in one go. Bezier handles and fillet radii are mirrored correctly.
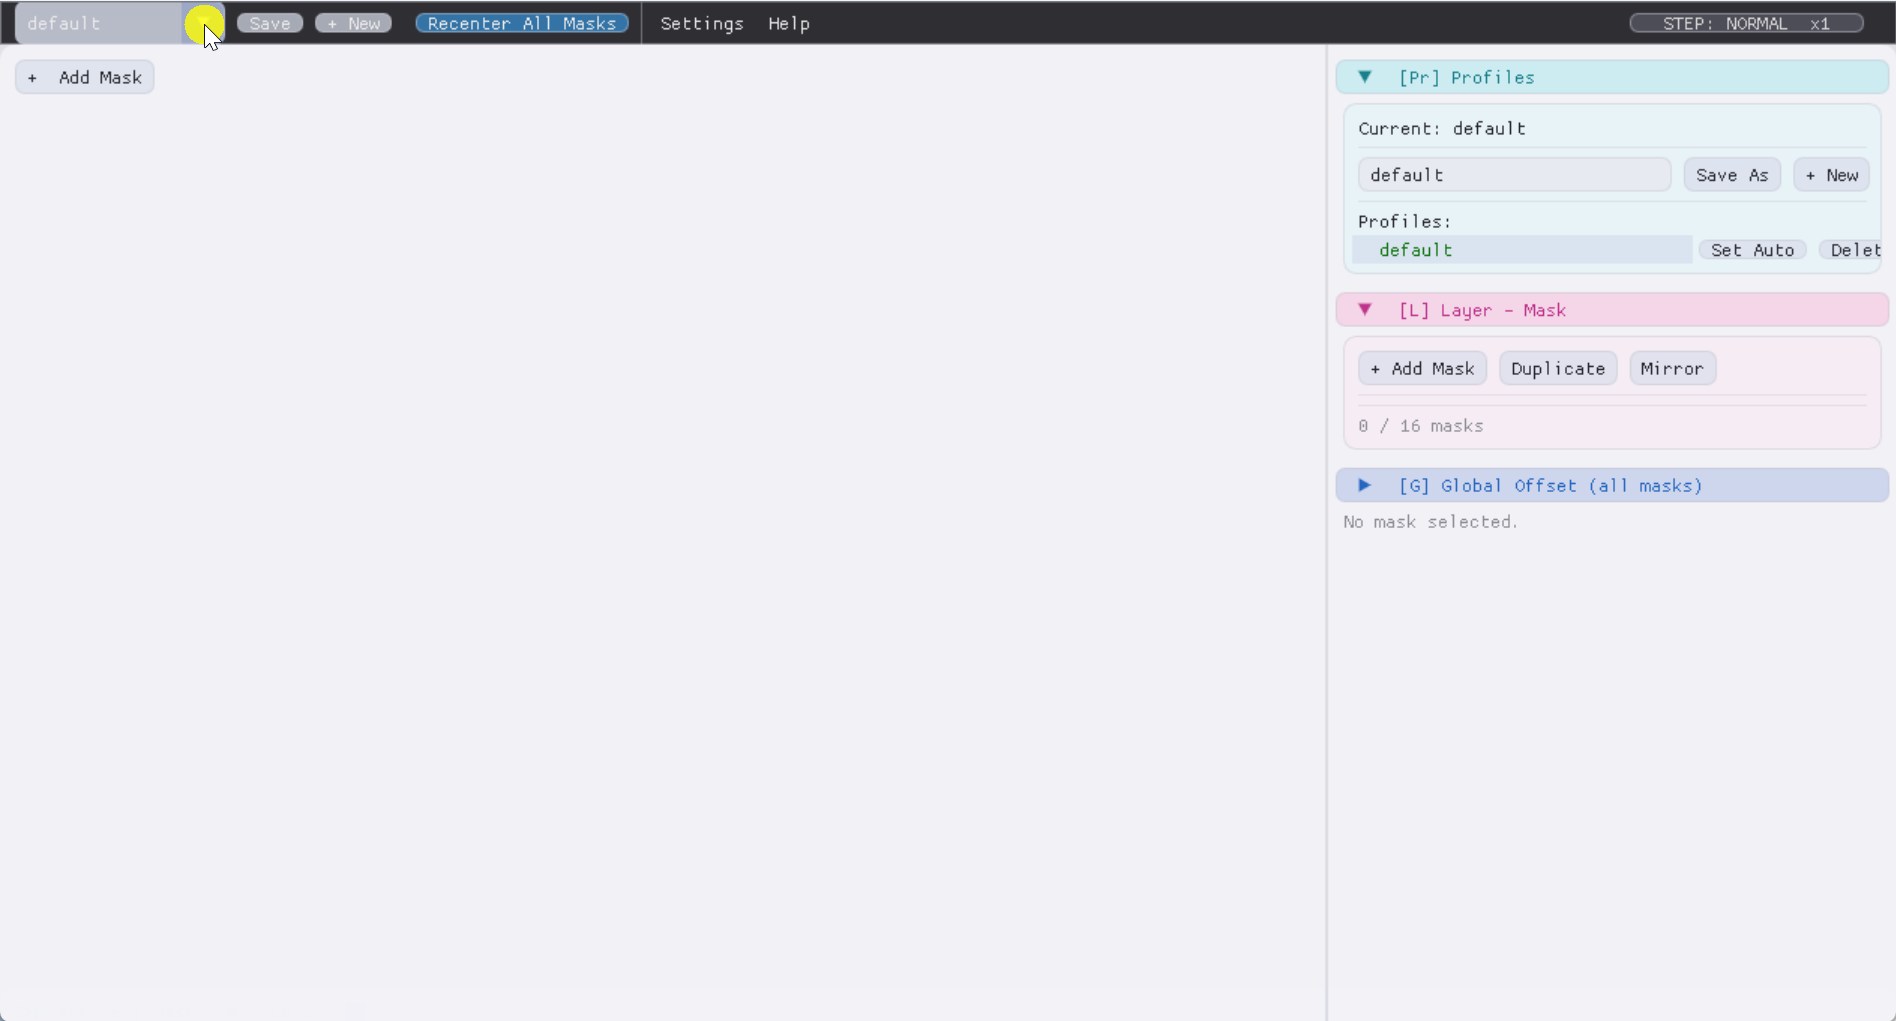
Right Panel[Pr] Profiles
Manages saved profiles - each profile holds a complete mask layout, color, and transform offsets.
![[Pr] Profiles section with profile list and management buttons.](screenshots/panel-profiles.jpg)
| Profile name textbox | The name used by Save As / + New. Pre-filled with the loaded profile's name; edit it to rename or create variations. |
| Save As | Saves the current state under the typed name. If the name already exists it is overwritten without asking. |
| + New | Same as the menu-bar version: creates a fresh profile (typed name preferred, otherwise auto "Profile N"). |
| Profile list (one row each) | Click to load a profile. The currently loaded profile is highlighted green. The default (auto-loaded) profile gets a star prefix. |
| Set Auto / Auto label | Marks a profile as the auto-load default for next launch. Only one profile can have this. |
| Delete | Permanently deletes the profile JSON. No undo. |
Right Panel[L] Layer - Mask
The mask list. Each row is one mask in the current profile. The order is the rendering order (top of list = drawn under everything else).
![[L] Layer - Mask list with reorder arrows and visibility toggles.](screenshots/panel-layer.jpg)
| + Add Mask | Creates a new empty mask, spawned about 1 m in front of you, centred on your recentered forward direction. Several freshly-added masks are staggered slightly in depth so they don't flicker into each other. |
| Duplicate | Creates an exact copy of the selected mask, including pixel content. |
| Mirror | Creates a mirrored child of the selected mask. The child syncs its position (X negated), rotation (Y / Z negated) and pixel content (horizontally flipped) from the source. Edit only the source. |
| (o) toggle | Mask visibility checkbox - same as Ctrl+F1..F8 hotkey for that mask. |
| v / ^ arrows | Move the mask up or down in the render order (Z-order). |
| Mask name | Click to select and edit. Press Enter to commit the new name. |
| X (close button on tab) | Removes the mask. Confirmation dialog appears. |
Right Panel[G] Global Offset
Translation and rotation applied to ALL world-anchored masks. Modified automatically by Snap to View, can be edited manually for fine group-level adjustments.
![[G] Global Offset sliders for translate and rotate.](screenshots/panel-global.jpg)
| Offset X / Y / Z | Translates the whole group. Held Alt = fine, Shift = fast. |
| G.Pitch / G.Yaw / G.Roll | Euler-angle rotation of the group around world axes (around the pivot if a Snap is active, otherwise around origin). |
| Reset All Offsets | Clears every offset to zero / identity. Same as Settings -> Reset Snap. |
Right Panel[M] Mirror & Group
Per-mask mirror controls. Visible only when a mask is selected.
![[M] Mirror & Group with Create Mirror / distance slider.](screenshots/panel-mirror.jpg)
| Create Mirror | Same as the Mirror button in the mask list - spawns a linked mirror child. |
| Unlink Mirror | Visible only on mirror children. Detaches the child from its source - the child becomes an independent editable mask with its current state frozen. |
| Mirror Distance slider | Visible when a mirror pair is selected. Sets the X-axis distance between the source and mirror child centers in one slider. |
Right Panel[V] Visibility & Activation
![[V] Visibility & Activation](screenshots/panel-visibility.jpg)
| Gaze Activated | When checked, the mask only fades in while you're looking within an angular cone of its center. Cone width controlled by the slider next to it (5..90 degrees). |
| Gaze angle slider | Half-angle of the activation cone. 30 deg is the default and works for most cockpit panels. |
| Render on top of other masks | Forces this mask to draw above all others in the OpenXR composition layer order, even if geometrically further away. Use for PDF / document overlays. |
Right Panel[T] Tracking
Per-mask tracking target. Determines whether the mask sits in world-space or follows a controller in real time.
| None (World) | Static world position. Default. Profile-stored coords + global offset. |
| Real Time Tracking Left Controller | Mask pose = (left controller pose) * (mask's stored offset). The mask follows your left hand. |
| Real Time Tracking Right Controller | Same for right hand. |
| Reset Offset (when tracked) | Sets the offset to identity - mask sits exactly at the controller's grip pose. |
TrackingReal-time controller tracking
Real-time controller tracking pins a mask to a Quest / Touch controller so it follows the controller live. It is ideal for anchoring a kneeboard to a controller you have mounted somewhere in your cockpit: the mask sits exactly where the controller is, and stays glued to it. This page covers the one-time Virtual Desktop setup you need first, then how to switch a mask to controller tracking inside PassthroughForge.
Step 1 — Configure Virtual Desktop (do this first)
Controller tracking only reaches PassthroughForge if Virtual Desktop is set up to forward it. Open the Virtual Desktop Streamer menu in your headset and set the following. These are one-time settings — once they are right you never touch them again.
| VD tab | Setting | Required state |
|---|---|---|
| INPUT | Automatically hide controllers | OFF (un-ticked). If this is on, Virtual Desktop stops reporting a controller the moment you put it down — so the mask would lose its anchor. |
| STREAMING | Track controllers | ON (ticked). |
| STREAMING | Forward tracking data to PC | ON (ticked). This is what actually sends the controller pose to the PC. Requires a restart of the game / SteamVR to take effect. |
Step 2 — Switch a mask to controller tracking
⚠️ You must be in a running VR application to select a Real Time Tracking mode — the choice will not “stick” otherwise. The tracking target is a live connection between your controllers and PassthroughForge, and that connection only exists while a VR environment is running (DCS in VR, or any OpenXR/VR scene). If you open the dropdown on the flat desktop with no VR app running, the controller is not being tracked, so the selection is rejected and falls back to None (World). Start DCS (or any VR app), put the headset on, and make the selection from inside VR.
First, make sure the controller is actually tracking. Turn the controller ON and be in a VR environment — DCS running in VR, or any VR scene — because PassthroughForge reads the controller pose from the live VR runtime. Then check the controller status: only once the L: and R: indicators are GREEN (the controller is powered on and tracked) can you choose a Real Time Tracking mode. If they aren't green yet, switch on / wake the controller and look at it so the headset cameras pick it up.
In PassthroughForge, controller tracking is set per mask in the [T] Tracking panel:
- Place the mask first, in World mode. While the mask's Tracking Target is None (World), position it exactly where you want it in the cockpit (move/rotate it until it sits right).
- Open the [T] Tracking panel and set Tracking Target to Real Time Tracking Left Controller or Real Time Tracking Right Controller — whichever controller you mounted.
- The mask stays exactly where it is (it does not jump to the controller) and from now on follows that controller live. Mount the controller in its place and the mask is anchored to your cockpit.
Good to know
- No jump on switch. Switching from World to a controller keeps the mask's current position to the millimetre, so you can place it comfortably in World first and then lock it to the controller.
- Mount the controller statically and you're set. Fix the controller rigidly to your cockpit frame and use real-time tracking, and the masks stay in exactly the same place. It is no problem if the controller goes into standby — at the start of your session just give it a quick tap and the masks come to life.
- Mount it where the headset cameras can always see it — that is the one thing that matters. As long as the headset can see the controller, it re-tracks instantly. Short look-aways are fine: even a ~30-second pause is no problem, so when you check your six in a dogfight the mask simply stays where it is and is right there again when you look forward.
Right Panel[P] Position (head-relative)
The position sliders show head-relative coordinates: X = right of player's view, Y = up, Z = forward (positive) / behind (negative). The internal mask.transform stays in stage-space; this panel converts on the fly so values feel intuitive.
![[P] Position sliders, head-relative coordinates.](screenshots/panel-position.jpg)
| X (right) | Drag to move along the player's right-axis. Held Alt = fine, Shift = fast. |
| Y (up) | Up/down in world coords (gravity-aligned). |
| Z (forward) | Forward / back relative to player's yaw. |
Keyboard alternative: Ctrl + Arrows for X/Y, Ctrl + PgUp/PgDn for Z.
Right Panel[R] Rotation (world axes)
![[R] Rotation (world axes)](screenshots/panel-rotation.jpg)
| Pitch | Rotation around world X axis (front-to-back tilt). |
| Yaw | Rotation around world Y axis (vertical / heading). |
| Roll | Rotation around world Z axis (banking). |
Right Panel[S] Size & Resolution
![[S] Size & Resolution](screenshots/panel-size.jpg)
| Width / Height (m) | Physical size of the mask in meters as it appears in VR. |
| Lock aspect | When checked, editing one dimension scales the other proportionally. |
| Texture resolution | Internal pixel resolution of the mask buffer. Higher = sharper edges but more GPU bandwidth. Default 8192x8192. Document Masks usually need lower (e.g. 2048x2048). |
Right Panel[3D] Preview
Wireframe preview of the mask group around the player's head pose. Updates live. Useful for understanding the spatial relationship between masks and validating where Recenter All Masks will land them.
![[3D] Preview wireframe of mask group around head pose.](screenshots/panel-3d.jpg)
| Show all checkbox | If unchecked, only the selected mask is drawn (simplifies the preview when you have many masks). |
WorkflowShortcut configuration
Reachable via Settings -> Mask Shortcuts.... Opens a modal where every action's binding can be customized.
Multiple bindings per action (v2.73+): every action
can carry any number of bindings at the same time — a
keyboard combo (with Ctrl/Shift/Alt modifiers) and a
joystick / HOTAS button and a hat-switch direction, across
several physical devices. Any one of them triggers the action, so an
in-cockpit pilot can map e.g. Toggle All Masks to
Ctrl+F9 (for a Stream Deck) and a stick button and a
throttle button without ever switching hands. Click Add on a
row, then press a key or a joystick button to add a binding; each
binding is listed on its own line as the key combo or
Joy[<Device>] Btn 7 / Joy[<Device>] Hat1 Up,
with its own x to remove just that one. Joystick
bindings work in tray-mode and coexist with DCS bindings on the same
physical button (PassthroughForge polls non-exclusively).
Upgrading from an older build keeps your existing setup: each previous single binding is migrated automatically to the new list on first launch — nothing to reconfigure, you can simply add more.
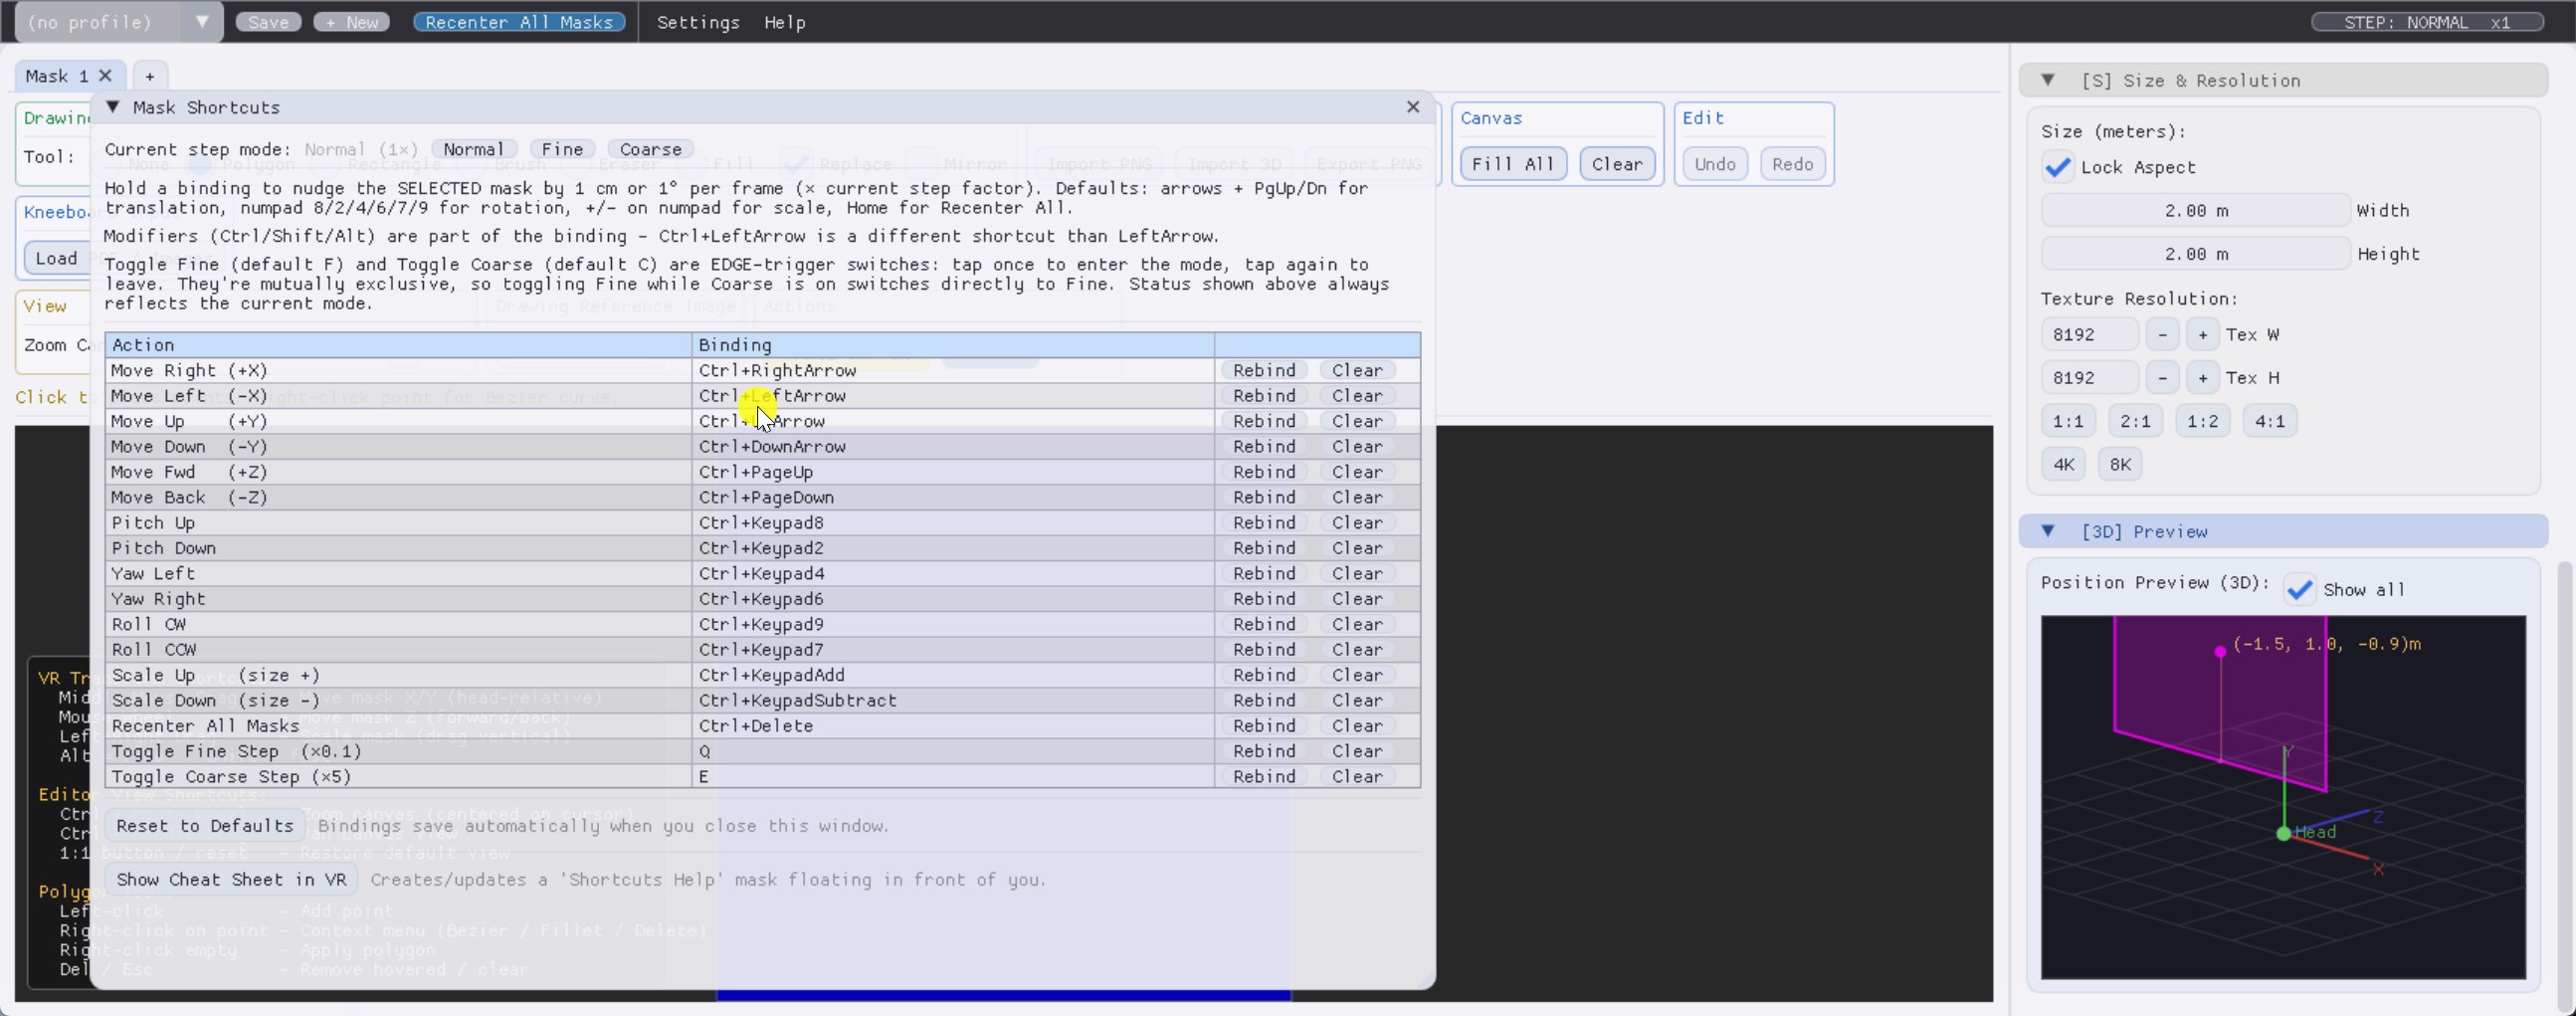
Step mode controls

Three buttons at the top set the current step multiplier directly: Normal (x1, default), Fine (x0.1), Coarse (x5). The toggles also fire automatically on the configured Toggle keys (Q / E by default).
Action table

Each row shows an action and all of its bindings, one per
line (e.g. Ctrl+RightArrow, Joy[Warthog] Btn 7),
plus Add / Clear buttons. An action with no bindings shows
<unbound> and is inactive.
| Add | Click, then press the desired key or joystick/HOTAS button to add another binding to this action (existing ones are kept). Modifier keys (Ctrl / Shift / Alt) are part of the binding - LeftArrow and Ctrl+LeftArrow are different bindings. Press Esc to cancel. Duplicate bindings are ignored. |
| x | The small x next to a binding removes just that one binding, leaving the others intact. |
| Clear | Removes all bindings for the action. It becomes inactive. |
Other buttons

| Reset to Defaults | Restores all bindings to factory defaults (Ctrl + arrows / numpad / Q / E). |
| Show Cheat Sheet in VR | Generates a 1024x768 image with all current bindings rendered as a panel and creates a "Shortcuts Help" mask floating ~1 m in front of you. |
WorkflowTray mode
Click the Minimize button (top-right of the title bar) to send PassthroughForge to the system tray. While in tray:
- The window is hidden but the layer keeps publishing mask data to your sim.
- All keyboard shortcuts are registered as Win32
RegisterHotKeys. - A low-level
WH_KEYBOARD_LLhook is also installed to intercept keys before sims (DCS) which use DirectInput / RawInput see them. - The hook only fires when a known flight sim has foreground (DCS, MSFS, IL-2, War Thunder, Falcon BMS). Plain typing in Notepad / browser passes through normally.
X (close button) always quits the application - only the Minimize button sends to tray. The tray icon's right-click menu also has "Show PassthroughForge" (restore) and "Exit".
WorkflowVR cheat sheet
Settings -> Mask Shortcuts -> Show Cheat Sheet in VR builds a high-res image with the current keyboard bindings and creates a dedicated mask called "Shortcuts Help". It floats ~1 m in front of you, large enough to read at a glance.
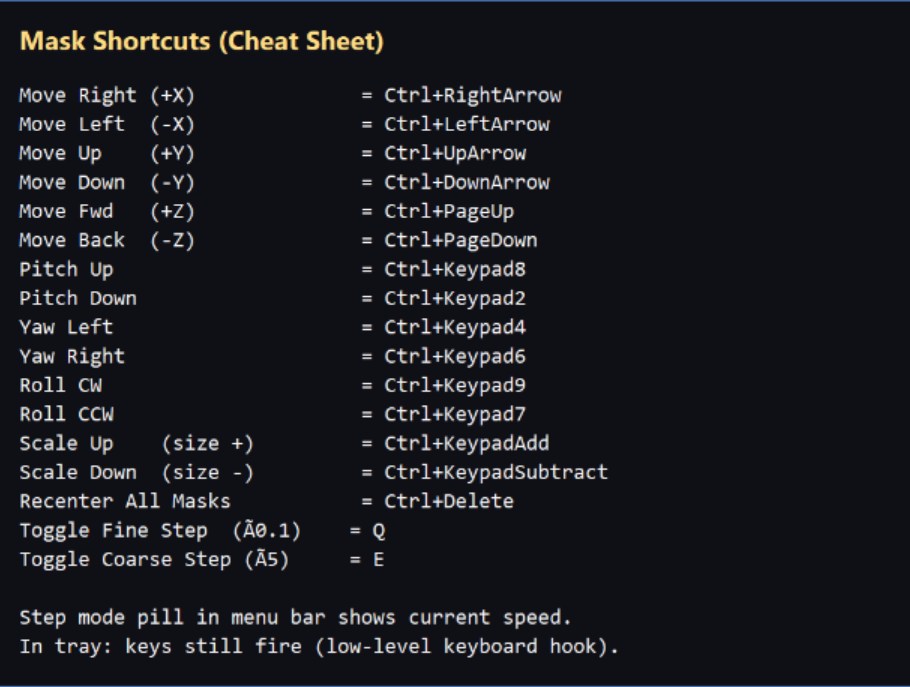
It's a normal mask - you can move it, hide it via Ctrl+F<n>, snap it to a controller, or delete it like any other. Re-press the menu item to regenerate it after rebinding.
WorkflowStatus bar
Bottom of the desktop window. Shows live state:

- SHM Active / Disconnected: green if the layer is connected, gray otherwise.
- Masks: N: number of masks in the current profile.
- Color: : the current passthrough color.
- Step: Fine / Coarse: appears in green / orange when not in Normal step mode.
DCS IntegrationDCS Messages mask
PassthroughForge can display DCS in-game messages — multiplayer chat, mission trigger texts, and AI radio chatter — on a freely placeable A4 panel inside your cockpit. Useful for keeping JTAC briefings, ATC instructions, or wingman calls in your peripheral vision instead of cluttering the HUD.
Two ingredients make this work:
- A small Lua script (
PassthroughForge.lua) that lives inside DCS'sScripts\Hooks\folder and forwards messages over a local UDP socket (127.0.0.1:31090, never leaves your PC). - The PassthroughForge desktop app, which buffers incoming messages and renders them on any mask you marked as a "Messages" layer.
Add a Messages mask via Layer — Mask → + Messages.
The panel spawns ~1 m in front of your head; reposition with the standard
mask transform shortcuts. Only traffic addressed to the player
is shown — your own outbound radio calls (lines starting with
Spieler: / Player:) are filtered out.
DCS IntegrationInstall the DCS hook (automatic)
The PassthroughForge installer handles the hook for you. From version
2.46 onwards, running install.ps1 performs
step [3.5/5] Installing DCS message hook…:
- It scans every Windows user profile under
C:\Users\forSaved Games\DCS,DCS.openbeta,DCS.dev,DCS.earlyaccess. - For each match, it creates the
Scripts\Hooks\folder if missing and copiesPassthroughForge.luainto it. - The uninstaller removes the same files.
If you installed PassthroughForge before DCS: the
Saved Games folder didn't exist yet, so the installer skipped this
step. Just run DCS once, then re-run install.ps1 — it's
safe to run repeatedly.
DCS IntegrationManual hook install
If you'd rather not run the installer (or you're using a portable build), install the hook by hand:
- Open File Explorer and paste this into the address bar:
For OpenBeta use%USERPROFILE%\Saved Games\DCS\Scripts%USERPROFILE%\Saved Games\DCS.openbeta\Scriptsinstead. - If a folder named
Hooksdoesn't exist insideScripts\, create it. - Copy
PassthroughForge.luafromdist\PassthroughForge\(next to the installer) into theHooksfolder. - Start PassthroughForge, then start DCS. To verify the hook loaded,
open
%USERPROFILE%\Saved Games\DCS\Logs\dcs.logand search for the line:PassthroughForge: Hook loaded — forwarding messages to 127.0.0.1:31090 - In PassthroughForge, open Settings → DCS Messages (Beta)… for a live debug feed. The "received" counter should tick up while DCS is running and traffic is happening.
Network safety: The hook only sends data to
127.0.0.1 (loopback). Nothing leaves your PC; no firewall
rule is needed.
Multiplayer Integrity Check (IC): DCS treats anything in
Scripts\Hooks\ as a client-side mod. Strict-IC servers may
flag this hook. If your server is strict, leave the file out for those
sessions — PassthroughForge keeps working, you just won't get the
message feed.
Crash safety: Every callback in the hook is wrapped in
pcall; a bug in the script can never crash DCS itself.
DCS IntegrationRemoving the hook
Either run the PassthroughForge uninstaller (Programs & Features → PassthroughForge → Uninstall — it removes the hook from every DCS profile it finds), or delete the file manually:
%USERPROFILE%\Saved Games\DCS\Scripts\Hooks\PassthroughForge.luaDCS picks up the change on the next launch.
DCS IntegrationAuto-switch profile on aircraft change (v2.65+)
Most multi-jet pilots end up with one PassthroughForge profile per airframe — "Hornet-Setup" with HOTAS-shaped cutouts and a DDI region capture, "Hog-Setup" with different panel positions, "Apache-Setup" with two MFDs side by side. Auto-switch makes the right profile load itself the moment DCS reports you've slotted into the matching aircraft. No menu clicks, no manual dropdown, no profile-mix-up between sorties.
Prerequisites (one-time)
- The DCS GUI hook must be installed. The PassthroughForge
installer drops it automatically into every
Saved Games\DCS*\Scripts\Hooks\folder it finds (see Install the DCS hook). You can verify it ran by launching DCS and looking for "PassthroughForge: Hook loaded" inSaved Games\DCS\Logs\dcs.log. - In PassthroughForge: open Settings menu and tick Auto-switch profile on DCS aircraft change. (Default: on.) You can flip this off any time — the per-profile aircraft assignments stay saved either way.
Step 1. Build one profile per jet
Standard PassthroughForge workflow: launch the app, design the masks for one specific aircraft (positions / sizes / capture regions / panel layouts), then click Save As in the right-side Profiles panel. Give it a descriptive name — e.g. "Hornet-Cockpit", "Hog-CCIP", "Apache-MPDs".
Repeat for every aircraft you want covered. There's no limit on profile count.
Step 2. Bind each profile to an aircraft
Each profile carries an optional Default for aircraft field. When the DCS hook reports a slot change matching that aircraft ID, PassthroughForge auto-loads that profile.
In the Profiles panel:
- Click the profile name in the list to load it (so "Current:" shows the right profile at the top of the panel).
- Scroll down to the new DCS auto-switch: section.
- Type the DCS aircraft ID into the Default for aircraft input field and press Enter. Or, if you have DCS open and you're in that aircraft right now, click the "Use 'XYZ'" button next to the field — it fills in the exact ID DCS just reported.
That's it. The setting is written back to the profile's JSON immediately (no Save needed for the assignment itself).
Step 3. Use it
Start DCS, slot into any aircraft you've bound. Within a second of slotting, PassthroughForge swaps to the matching profile and every mask layout / capture / kneeboard adjusts accordingly. Slot to a different jet mid-mission (multiplayer slot picker, or "Restart Mission" into another aircraft) and the profile switches again.
If you slot into an aircraft no profile is bound to, PassthroughForge stays on the currently-loaded profile — nothing happens, no error.
DCS aircraft IDs (cheat sheet)
These are the IDs DCS uses internally, exactly as they appear in
Saved Games\DCS\KNEEBOARD\<id> folders and in
our auto-switch hook. The "Use 'XYZ'" button is the safe way to
avoid typos — but for reference:
| Aircraft | DCS ID |
|---|---|
| F/A-18C Hornet | FA-18C_hornet |
| A-10C II Warthog | A-10C_2 |
| A-10C (original) | A-10C |
| F-16C Viper | F-16C_50 |
| F-14B Tomcat | F-14B |
| F-14A Tomcat | F-14A-135-GR |
| F-15E Strike Eagle | F-15E |
| F-15C | F-15C |
| AH-64D Apache | AH-64D_BLK_II |
| UH-60L Black Hawk | UH-60L |
| Ka-50 Black Shark | Ka-50_3 |
| Mi-8 / Mi-24 | Mi-8MT / Mi-24P |
| M-2000C Mirage | M-2000C |
| JF-17 Thunder | JF-17 |
| MiG-21bis | MiG-21Bis |
| Mosquito FB Mk VI | MosquitoFBMkVI |
| P-51D Mustang | P-51D |
| Spitfire LF Mk IX | SpitfireLFMkIX |
Don't see your jet? The "Use 'XYZ'" button is the safe path. Open DCS, slot into the aircraft, hop back to the PassthroughForge window, click the button. The exact ID DCS uses is auto-filled. Third-party modules (Heatblur F-4, Razbam M-2000, etc.) follow the same convention — DCS gives us their internal string and we use it.
Worked example: switching between Hornet and Hog
- Build a profile for the F/A-18C with HOTAS / DDI / kneeboard cutouts placed for your physical Hornet sim setup. Save as "Hornet-Setup".
- In DCS, fire up an Instant Action Hornet mission. Slot into the cockpit.
- In the PassthroughForge Profiles panel, with "Hornet-Setup" loaded as current, click "Use 'FA-18C_hornet'".
- Build a second profile for the A-10C II. Save as "Hog-Setup".
- Restart your DCS mission as a Hog. Slot in.
- In PF, with "Hog-Setup" loaded, click "Use 'A-10C_2'".
- From now on, every time you slot into the Hornet, PF auto-loads Hornet-Setup. Every time you slot into the Hog, PF auto-loads Hog-Setup. Multiplayer slot picker, instant-action restart, campaign next-mission — all trigger the switch automatically.
Limitations + edge cases
- One profile per aircraft. If you bind two profiles to the same DCS ID, the first one in alphabetical order wins. To work around: give each profile a different Default for aircraft assignment, or leave one empty (manual-only).
- Unsaved changes on the current profile won't survive a switch. Profile auto-switch loads the target profile fresh from disk. If you were mid-edit on the previously-loaded profile and hadn't clicked Save, those edits are discarded. Save before you slot into a different jet.
- Spectator slots don't trigger a switch. Going into the multiplayer Spectator does NOT clear or change the current profile — it just keeps whatever was loaded.
- The first slot of a mission does trigger. When DCS reports the initial slot at mission start, PF acts on it the same way it acts on a later switch.
- Auto-switch toggle in Settings is global. Disable it and ALL profile auto-switching is paused (per-profile assignments stay saved). Re-enable any time.
Verification + troubleshooting
The PassthroughForge app log records every transition:
%APPDATA%\PassthroughForge\logs\passthrough_forge_app.logLook for lines like:
DcsMessageListener: aircraft '' -> 'FA-18C_hornet'
App: auto-switching profile to 'Hornet-Setup' (matched defaultAircraft=FA-18C_hornet)
If you see the first line but not the second:
- No profile has Default for aircraft set to that exact DCS ID. Double-check spelling.
- Or Auto-switch profile on DCS aircraft change is disabled in the Settings menu.
If you see neither line:
- The DCS hook didn't load. Check
Saved Games\DCS\Logs\dcs.logfor "PassthroughForge: Hook loaded". If missing, re-run the PassthroughForge installer. - Or the DCS Lua hook is loading but
Export.LoGetSelfData()isn't available on your DCS revision — rare, but possible on very old beta builds. The hook tolerates this gracefully (no aircraft event); you'll just have to switch profiles manually.
DCS IntegrationDCS Auto-Kneeboard (Aircraft / Theater / Mission / Briefing) — v2.65+, multi-tab from v2.66
The shortest summary: point a mask at one or more DCS content sources by ticking checkboxes, and PassthroughForge fills it with the right pages automatically — refreshed whenever DCS reports a new slot or loads a new mission. With v2.66 multiple sources on the same mask are presented as tabs so a single cockpit panel can carry your Hornet charts, your Syria theatre reference, the current mission's baked images, and the auto-rendered briefing — all switchable with a HOTAS button.
The four source modes
| Source | Pages come from | Refreshes on |
|---|---|---|
| DCS Aircraft | Saved Games\DCS\KNEEBOARD\<aircraft>\ — whatever PNG/JPG you've dropped in there. Use the same folders DCS already supports natively. |
Slot change |
| DCS Theater | Saved Games\DCS\KNEEBOARD\<theatre>\ — e.g. Syria, Caucasus, Afghanistan. |
Mission load (different theatre) |
| DCS Mission (.miz) | The KNEEBOARD/IMAGES/ folder baked into the active .miz file by the mission designer. Unzipped on the fly to %TEMP%\PassthroughForge\miz-cache\. |
Mission load (different .miz) |
| DCS Briefing | Rendered live from the mission's Lua table. Includes Sortie, Mission (theatre + start), Your Flight (callsign + frequency), Bullseye, full waypoint list with altitude (m + ft) and speed (kts), AI assets (AWACS / Tankers / CAP / SEAD / CAS with frequencies), the briefing prose, per-coalition tasking, weather, and — if enabled in Settings — an enemy Threats section. | Mission load (different .miz) |
Prerequisites
The PassthroughForge DCS GUI hook must be installed (the standard
installer does this automatically into every
Saved Games\DCS*\Scripts\Hooks\ it finds; see
Install the DCS hook). Without it
PassthroughForge has no way to learn which aircraft / theatre /
mission is active, so the auto-sources have nothing to refresh from.
Step 1. Pick a mask + open the editor
Any mask can carry auto-source content. Click the mask's tab in the editor, or create a new one with + Add Mask. In the editor scroll to the Files card — below the "Load PDF / Images" button you'll see an Auto-source section with one checkbox per DCS source mode.
Step 2. Tick one or more sources
Each checkbox you tick enables that source for this mask. Next to each checkbox PassthroughForge shows a live page count ("(8 pages)") so you immediately see whether the source has content for your current DCS state. Empty sources are not hidden — you can still keep them ticked, see Empty tabs below.
Single-source mode (one checkbox ticked). The mask behaves exactly like a regular document mask with that source's pages. No tab strip in VR, no new shortcuts needed — just paginate with the existing Doc Next / Previous Page bindings.
Multi-source mode (two or more ticked). A tab strip appears at the top of the mask in VR with one tab per enabled source. Switching tabs swaps the visible content instantly; each tab remembers its own current page across switches.
Step 3. Use it in VR
In multi-source mode the mask renders something like this in your headset (real version is full-resolution image content below the strip):
┌───────────┬──────────┬──────────┬──────────────┐
│ Aircraft  │ Theater  │ Mission  │  Briefing    │   ← tab strip
│  3 of 8   │  2 of 4  │  5 of 45 │   1 of 7     │     (page indicator)
├───────────┴──────────┴──────────┴──────────────┤
│                                                │
│           (page content for active tab)        │
│                                                │
└────────────────────────────────────────────────┘
The active tab is highlighted in blue with bright white text. The other tabs are darker grey with off-white text. Each tab carries a "current page / total pages" counter underneath its name; the counter updates live as you flip pages within the active tab.
Step 4. Bind tab navigation shortcuts
Open Settings → Mask Shortcuts…. Two new actions are available:
- Next Kneeboard Tab — cycle forward through the enabled sources of the currently selected mask. Wraps around.
- Previous Kneeboard Tab — cycle backward.
Click the binding row and press any key or HOTAS button to assign it. For a typical hat-switch setup most pilots end up with:
- Hat Up / Down → Doc Previous / Next Page (paginate inside the active tab)
- Hat Left / Right → Previous / Next Kneeboard Tab (jump between sources)
Both shortcut families work in tray mode while DCS is in the foreground — no need to alt-tab.
Optional: hide the tab strip
If you prefer a cleaner look in VR and don't need the visible tab indicators — you can still cycle via shortcut — un-tick Show tab strip in VR in the editor. The mask then renders just the active tab's content with no overlay; only the shortcut bindings work for switching.
Empty tabs
It's normal for a source to have zero pages —
e.g. a stock DCS mission without a baked KNEEBOARD/IMAGES/
folder, or a theatre you've never dropped any chart into. Empty
tabs don't get hidden; instead the tab strip still shows them and
the page area shows
"(no content for this source)" — a status hint
rather than an error. You can leave the tab enabled and the moment
DCS loads a mission that does have content for it, the
pages pop in.
Briefing Threats section (v2.67+, opt-in)
The rendered DCS Briefing source can append a
Threats section listing every enemy SAM / AAA /
MANPAD group the mission designer placed in the
.miz. Each line shows the NATO reporting name, the
group's name, and a bullseye-relative bearing + distance, grouped
by engagement range:
THREATS
────────────────────────────────────────────
Long-range SAM (60+ nm)
   SA-10 Grumble (LN)    - RU S-300 Bty (Al Assad)   BE 233 / 76 nm
Medium-range SAM (15-40 nm)
   SA-6 Gainful (LN)     - Palmyra battery           BE 105 / 38 nm
Short-range SAM / AAA / MANPAD (< 15 nm)
   ZSU-23-4 Shilka (AAA) - RU Shilka (Al Assad)      BE 233 / 76 nm
"BE 233 / 76 nm" = bearing 233° from your coalition's bullseye, 76 nautical miles out. Same reference frame AWACS and your wingmen use for contact calls, so it lines up without any coordinate conversion. The bullseye itself is printed one section higher.
How to enable it: open Settings
and tick Briefing: include enemy threats (SAM/AAA/MANPAD).
Any open Briefing-mode mask re-renders immediately — no
mission reload needed. The setting is remembered in
settings.json.
OFF by default — read this before enabling for multiplayer. This surfaces information some MP servers deliberately hide (an IADS spoiler / "SAM cheat"). The data is read client-side from the mission file you already have on disk — for single-player or your own missions it's entirely fair game and hugely useful for SEAD / strike planning. For public servers, check the server's stance first. PassthroughForge ships it disabled so the choice is always an explicit one you make.
Detection details
- ~80 common DCS unit-type strings are mapped directly to NATO
names. Uncatalogued or community-mod units fall back to a
prefix match (e.g. an unknown
S-400…still lands in "Long-range SAM (uncatalogued)") so nothing is silently dropped. - A multi-component SAM site (search radar + tracker + launchers + command post) is collapsed to one line, tagged with the longest-range category present in the group.
- Each range category is capped at 30 entries with a "… N more in this category" tail, so a heavily-defended mission still fits a readable page.
- Only the enemy coalition (opposite of your slot) is scanned. If you're in a neutral slot the section is skipped.
Profile persistence
The set of enabled sources, which one is currently active, the
"Show tab strip in VR" flag, and each tab's last-viewed page are
all stored in the profile JSON under
%APPDATA%\PassthroughForge\profiles\<name>.json.
Older v2.65 profiles with the previous single-source format are
auto-migrated on load — one ticked checkbox, no behaviour
change.
Worked example: one cockpit panel, everything you need
- Create a regular mask, place it where your physical kneeboard sits (knee, dashboard, whatever).
- In the editor, tick all four checkboxes: Aircraft, Theater, Mission, Briefing.
- Save the profile and assign it to your jet (see Auto-switch profile).
- Bind Hat Left / Right to Previous / Next Kneeboard Tab, Hat Up / Down to Doc Previous / Next Page.
- Load any mission. The tab strip appears; you spawn on Aircraft tab and see your usual checklists. Hat-Right to Theater for a Syrian airfield reference. Hat-Right again to Mission for the briefing pictures the designer baked in. Hat-Right once more to Briefing for the auto-rendered objectives + waypoints + frequencies + weather. Hat-Up / Down paginates within each. Total: one panel, one stick movement to reach any reference, zero re-configuration between missions.
Troubleshooting
App log lines that confirm or deny each step
(%APPDATA%\PassthroughForge\logs\passthrough_forge_app.log):
DcsMessageListener: aircraft '' -> 'FA-18C_hornet'
DcsMessageListener: theater '' -> 'Syria'
DcsMessageListener: mission '' -> 'D:\Steam\..\test.miz'
App: mask 0 source aircraft -> 8 page(s) from C:\..\KNEEBOARD\FA-18C_hornet
App: mask 0 source mission  -> 45 page(s) from C:\..\miz-cache\<hash>
App: mask 0 source briefing -> 7 page(s) from C:\..\miz-cache\<hash>
MizExtractor: test.miz (cached=no) -> 45 kneeboard image(s)
BriefingRenderer: rendered 7 page(s)
If you don't see those lines:
- The DCS GUI hook didn't load — check
Saved Games\DCS\Logs\dcs.logfor "PassthroughForge: Hook loaded"; if missing, re-run the PassthroughForge installer. - You haven't actually slotted into a mission yet (auto-sources can't refresh before DCS publishes which aircraft / mission you're in).
- The mask doesn't have any source ticked (check the editor's Auto-source section).
Tablet & Phone NotesWrite on a Whiteboard kneeboard
The Whiteboard (Notes) tab turns a DCS-Kneeboard mask into a plain white page you can write and draw on — with a graphics tablet (Wacom / Huion / XP-Pen) or with your phone over Wi-Fi. Ink appears live on the kneeboard in VR, so you can jot down a frequency, a steerpoint or a quick sketch without leaving the headset.
- It works while DCS has focus — no alt-tabbing.
- Pressure-sensitive: harder strokes draw thicker (stylus / pen).
- Notes are not saved to disk. The page starts blank each session, like a real grease-pencil board.
Tablet & Phone NotesAdd the Whiteboard (Notes) tab
The Whiteboard is one of the DCS-Kneeboard tabs, so it lives next to Aircraft / Theater / Mission / Briefing / Nearest Airfields / Moving Map.
- Create or select a DCS Kneeboard mask (+ Add Mask → DCS Kneeboard).
- In the editor's Auto-source section, tick “Whiteboard (tablet / phone notes)”.
- In VR, flip the kneeboard tab strip to “Notes” — you'll see a white page.
Ink lands on whichever kneeboard is currently showing its Notes tab, so just flip to Notes when you want to write and flip back to your charts when you're done.
Tablet & Phone NotesUse a graphics tablet
PassthroughForge reads a graphics tablet through one of two paths, picked automatically. Which one you use matters a lot once you're flying, so read this before you set up:
WinTab (vendor driver) — great for the desktop, NOT for flight
The driver that ships with Wacom / Huion / XP-Pen tablets. If it's installed, PassthroughForge uses it with zero extra setup and the status line shows “Connected: WinTab”. The catch: WinTab only delivers pen data to the window that currently has focus. So it works while the PassthroughForge window is in front (setting up your kneeboard on the desktop), but once you're in a DCS mission — DCS has focus, PassthroughForge sits in the tray — WinTab sends nothing, and your pen just moves the Windows mouse. This is a WinTab limitation, not a bug.
OpenTabletDriver + OTD-IPC — the in-cockpit path (recommended)
To write during a flight with a tablet, use OpenTabletDriver (OTD) with its OTD-IPC plugin. OTD takes over the tablet and streams pen data over a local pipe, so it's focus-independent (works while DCS is in front and PF is in the tray) and the pen no longer drifts the Windows mouse. This is the same approach OpenKneeboard uses.
- Install OpenTabletDriver from opentabletdriver.net and confirm it sees your tablet.
- Install the OTD-IPC plugin via Plugins → Open Plugin Manager, then enable it under “Tools” / “Filters”. Installing alone is not enough — the connection only opens once the OTD-IPC tool is ticked/active.
- OpenTabletDriver must be running whenever you fly. Its background “Daemon” does the work; you can close the OTD window, but don't quit it. Tip: enable OTD's “Run on startup” so the daemon launches with Windows.
- Start (or restart) PassthroughForge — the status line under Settings → Tablet / Whiteboard should switch to “Connected: OpenTabletDriver” (auto-detected and preferred over WinTab). If it still shows WinTab, OTD-IPC wasn't active yet — enable the tool, then restart PassthroughForge.
- Flip a kneeboard to its Notes tab and write — in the cockpit, mid-mission.
Stop the pen from clicking in the sim: if both the vendor
driver and OTD run at once, the pen also drives the Windows mouse (and a
tip-press can click cockpit controls). Stop the vendor service so only OTD
runs — Win+R → services.msc → “Wacom
Professional Service” / “WTabletServicePro” →
Stop (set it to Manual to keep it off). In OpenTabletDriver
you can also clear the Tip binding so the pen never left-clicks,
while still writing on the kneeboard.
Which should I use?
| Scenario | WinTab (vendor driver) | OTD-IPC | Phone (Wi-Fi) |
|---|---|---|---|
| Desktop setup (PF in focus) | ✔ | ✔ | ✔ |
| In a DCS mission (PF in tray) | ✘ focus-bound | ✔ | ✔ |
| Pen stops moving the mouse | ✘ | ✔ | n/a |
| Extra install needed | none | OTD + plugin | none |
Bottom line: WinTab is fine for laying out masks on the desktop, but for actually writing while you fly install OTD-IPC — or use your phone (next section), which needs no install and also works in the tray.
Download links
For in-flight tablet writing (focus-independent):
- OpenTabletDriver — opentabletdriver.net (latest build: GitHub releases).
- OTD-IPC plugin (lets OpenTabletDriver stream to PassthroughForge) — github.com/OpenKneeboard/OTD-IPC.
Vendor WinTab drivers (fine for desktop setup):
- Wacom — wacom.com/download-center
- Huion — huion.com/download
- XP-Pen — xp-pen.com/download
No tablet? Your phone needs none of these — see the next section.
Tablet & Phone NotesUse your phone over Wi-Fi
No app to install — PassthroughForge serves a small web page that your phone's browser draws on. Your phone and this PC must be on the same Wi-Fi / local network.
- Open Settings → Tablet / Whiteboard and tick “Use my phone as a tablet”.
- The panel shows one or more addresses like
http://192.168.1.57:8723/?k=ABC123. If several are listed (a PC wired and on Wi-Fi has more than one), pick the one whose first numbers match your phone's network. Use Copy and paste it into the phone, or just type thehttp://<ip>:<port>shown. - On the phone you get a full-screen pad. Write with a finger or stylus (stylus pressure supported). Pen / Erase / Clear buttons sit along the top.
- Firewall: the installer opens the needed port automatically — nothing to confirm. (If you run a portable build, allow PassthroughForge through Windows Firewall once.)
- Screen stays awake: the page holds a wake-lock so the phone doesn't sleep and drop the connection while you fly.
- Security: the key in the URL keeps other devices on your network from drawing. It stays the same every session; only the New key button changes it (then reload the page on the phone).
- Can't connect? Make sure both devices are on the same Wi-Fi (not a “guest” network with client isolation), and that you used the address whose subnet matches the phone.
Tablet & Phone NotesInk settings, calibration & pen buttons
Everything lives under Settings → Tablet / Whiteboard:
- Colour & width — pick the ink colour and base stroke width (pressure scales it).
- Calibration (graphics tablet only) — tap Calibrate, then touch the top-left and bottom-right corners of the area you want mapped onto the page. Reset maps the whole tablet. Phone input needs no calibration (the screen already maps 1:1).
- Pen buttons — map a barrel button to Erase and another to Clear page. On the phone, use the on-screen Erase / Clear buttons instead.
The eraser paints white (it doesn't punch a hole), so the page always stays a clean white sheet.
Live & Web MasksCapture a window or monitor region
Besides drawn passthrough masks, a mask can show live desktop content: + Add Mask → Capture window… mirrors one application window, Capture monitor region… mirrors a whole monitor (with an editable crop rectangle in the right panel). Both update at ~30 Hz fully on the GPU.
- Gamma slider (v2.97+): captured content used to look washed out in VR. Every capture mask now has a Gamma control above the toolbar — the default 2.2 matches the VR pipeline; set 1.0 for the old raw look.
- The captured window may be covered by other windows — but it must not be minimised (Windows stops delivering frames for minimised windows).
- Painting tools are disabled on capture masks; position / scale / opacity work as usual.
Live & Web MasksWebcam as a mask (Camera Feed)
+ Add Mask → Capture webcam… shows a live camera as a mask — a passthrough substitute for headsets without passthrough cameras, or a dedicated cockpit camera you can place freely in VR.
- Device & resolution are picked in the panel above the toolbar. 4K streams are heavy — 1440p is the VR sweet spot.
- Gamma: default 2.2 matches VR colours (same control as capture masks).
- True 3D with a stereo camera: set Stereo → Side-by-Side (3D) for cameras that deliver a left|right image — each eye gets its own half, fused into real depth. Side-by-Side → single eye shows one half flat instead. A swap toggle fixes reversed eyes.
- Shape stencil: Load shape… clips the feed to an image — transparent (or dark) areas hide the camera, white/opaque areas show it. Great for cutting the feed to a cockpit opening. With side-by-side stereo the shape is applied per eye, so you see ONE fused shape in VR.
- Several masks, one camera: multiple camera masks of the same device share a single stream. Each mask has its own Crop (X/Y/W/H sliders) — split one camera across several surfaces. A per-mask coloured calibration border helps lining the pieces up edge-to-edge in VR.
- Camera pixels are never saved to disk; profiles only store the device, resolution and settings.
Live & Web MasksWeb page (browser) mask
+ Add Mask → Web page (browser)… shows any URL as a live mask in VR — charts, SimBrief, checklists, YouTube (with sound). The page renders off-screen through Windows' built-in WebView2 engine: there is no browser window anywhere, and the page keeps running while PassthroughForge is in the background or minimised to the tray.
- Interact on the canvas: the editor canvas IS the page — click, drag and right-click directly on it. The mouse wheel scrolls the page (Ctrl+wheel still zooms the canvas).
- Navigate with the URL bar above the toolbar (Enter or Go), plus Reload and Back.
- Typing into web forms is not supported yet — navigation via the URL bar covers most cockpit use cases.
- The page URL and size are saved in the profile; the browser starts again automatically when the profile loads.
- Requires the WebView2 Runtime (preinstalled on Windows 11 and current Windows 10). If it is missing, the mask panel shows a download link.
Live & Web MasksShow PassthroughForge inside VR
Drawing masks normally means peeking at your monitor through the transparent canvas — which only works if the monitor is in front of you. + Add Mask → Show PassthroughForge in VR mirrors the app itself onto a mask, including your mouse pointer, so you can operate PassthroughForge entirely from inside the headset.
- While the mirror mask is enabled, the real PassthroughForge window is kept always-on-top — blind clicks always land in PSF, never in a window covering it. Disable or delete the mask and the window behaves normally again.
- Keep mouse inside this window (checkbox in the mask panel) confines the cursor to the PSF window while it has focus, so the pointer can't get lost outside the mirror. It releases automatically when another app (e.g. DCS) takes focus.
- Selecting the mirror mask itself in the editor shows a mirror-in-mirror tunnel — that's normal.
- New mirror masks default to Render on top so they never hide behind other masks in VR.
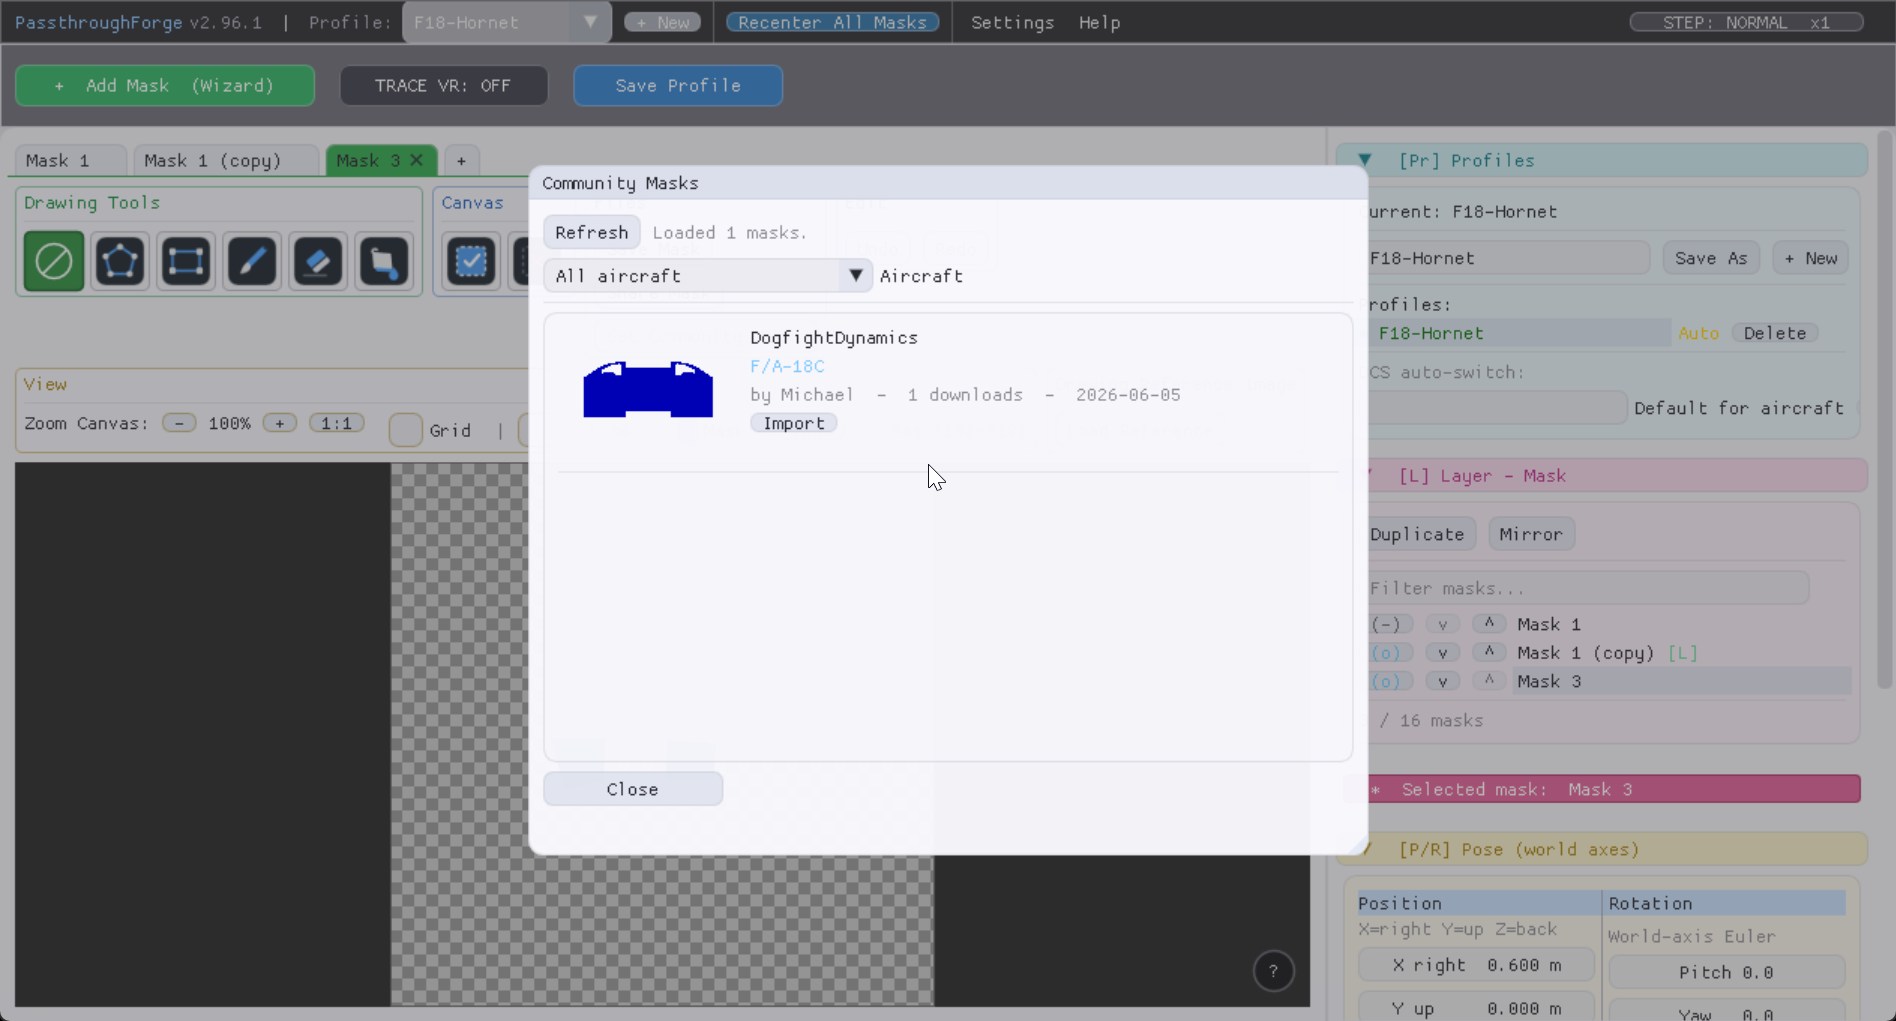
Community MasksShare masks with other pilots
You don't have to build every mask from scratch. Community Masks lets you share a mask you made and import masks other pilots have shared — right from the editor's Files card: Share Mask to upload one, Get Community Masks to browse and import.
- An activated license is required for both sharing and importing.
- Reviewed before it goes public — every shared mask is checked before it appears in the gallery, so the library stays clean.
- Tagged by aircraft — each mask carries an aircraft type, so you can find exactly what fits your jet.
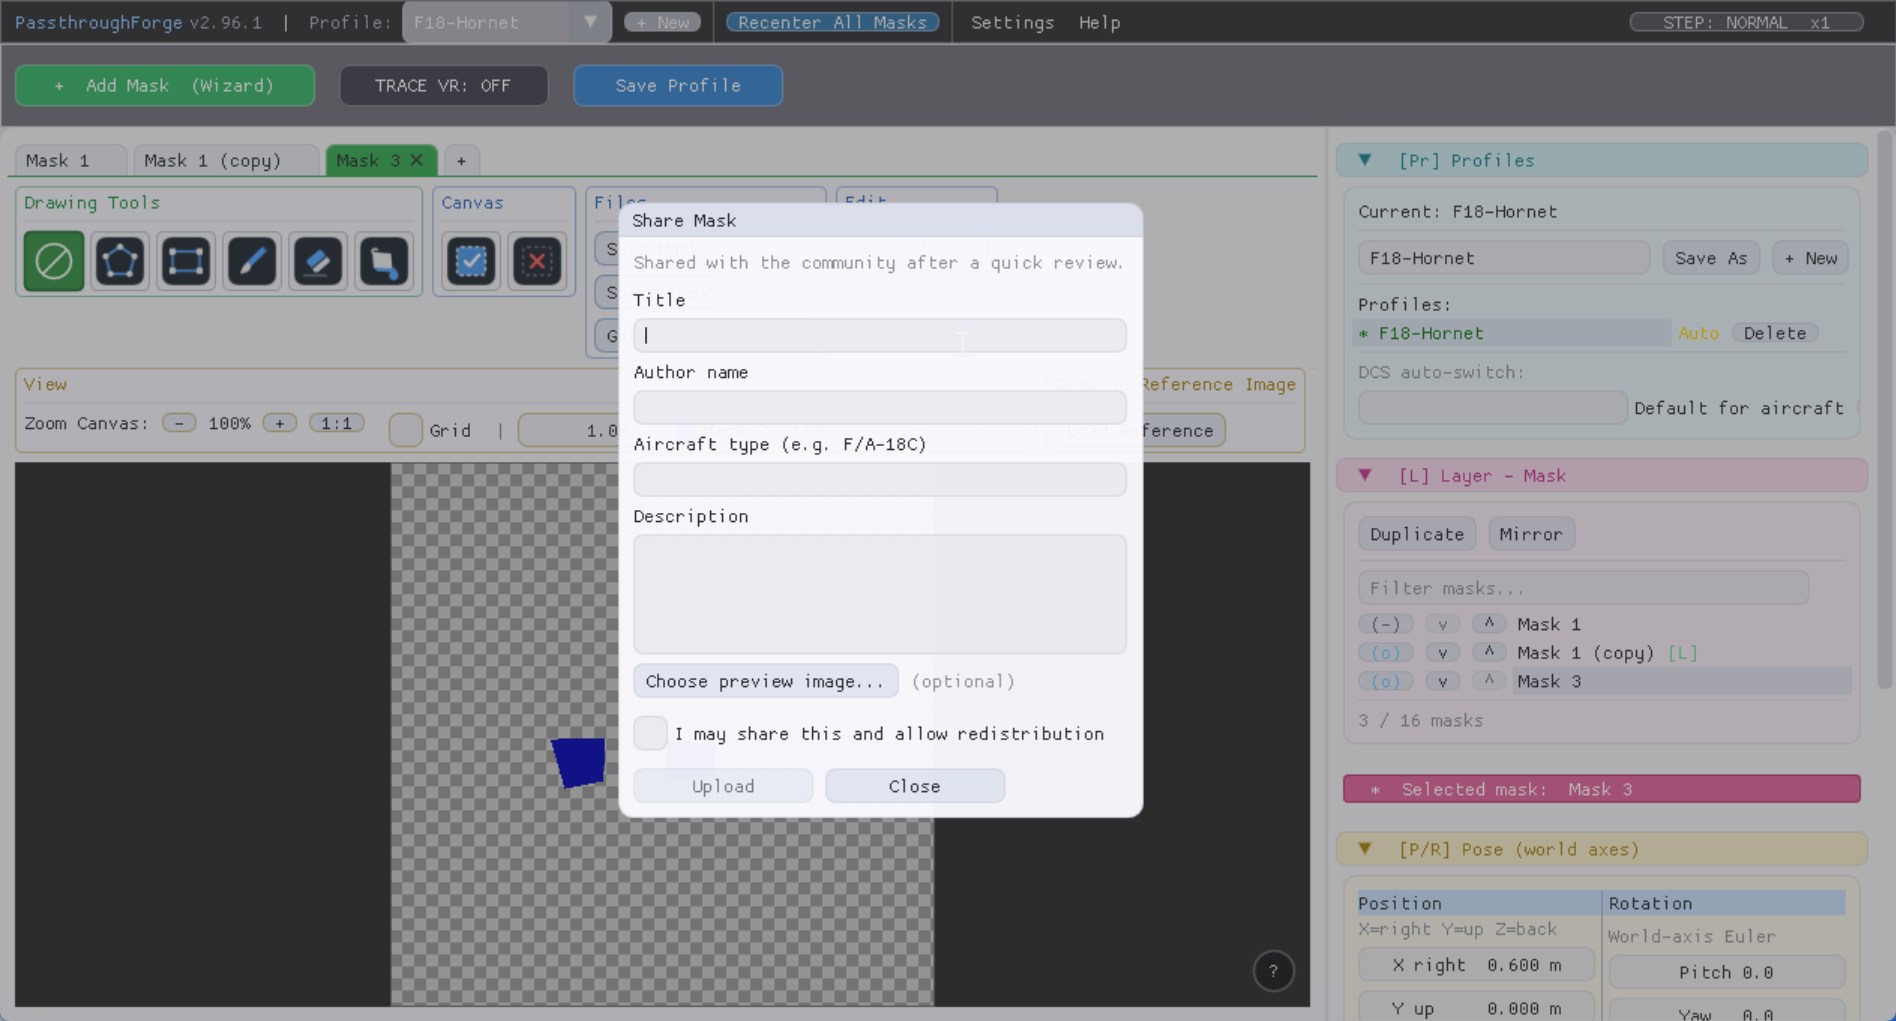
Community MasksShare a mask
Select the mask you want to share, open the Files card and click Share Mask. Fill in:
- Title — a short, descriptive name.
- Your name — shown as the author credit.
- Aircraft type — so others can filter for it.
- Description (optional) — what it covers and how it's meant to sit in the cockpit.
- Preview (optional) — a thumbnail shown in the gallery.
Submit it and the mask goes into the review queue; it appears in the public gallery once approved. Note that some masks can't be shared — live window/region captures and the DCS-Messages mask have Save / Share greyed out, because their content is live rather than a drawn/static mask.
Community MasksGet community masks
Open the Files card and click Get Community Masks to browse the gallery:
- Preview thumbnails for every shared mask.
- Filter by aircraft to narrow it down to your jet.
- One-click import drops the chosen mask straight into a new layer in your current profile — ready to position.
An imported mask behaves like any other: move, rotate, scale it and bind it to a controller exactly as if you had drawn it yourself.
Files & StorageWhere your data lives
PassthroughForge keeps all of its user-side state under a single AppData folder, completely separate from the installation directory. Reinstalling, updating to a new version, or moving the install directory has no effect on your profiles — they stay put.
User folder
%APPDATA%\PassthroughForge\
(full path: C:\Users\<you>\AppData\Roaming\PassthroughForge\)
Quick way to open it: press Win+R, type
%APPDATA%\PassthroughForge, hit Enter.
| Path | Contents |
|---|---|
settings.json |
Global app settings: default profile, passthrough colour, mask fade duration, capture refresh rate, Auto-recenter toggle. NOT per-profile. |
profiles\<name>.json |
One file per profile. Contains every mask: its position, rotation, size, tracking mode, pixels — everything you see in VR for that profile. Largest file in the system; can easily reach several hundred MB when you have multiple high-resolution masks (the pixel buffer is embedded as Base64, so 8K masks alone are ~256 MB each). |
logs\ |
passthrough_forge_app.log — main app logpassthrough_forge_layer.log — OpenXR layer logPassthroughForge_LayerDiag.log — per-frame diag CSVPassthroughForge_SwimDiag.log — pose-jitter CSV (v2.64+)All rotate at 5 MB × 3 archives. |
.license, .clock_status, .sentinel |
Beta-key bookkeeping (license validity, install-date integrity check). Hidden by their leading dot. Do not edit — tampering invalidates your beta access. |
Installation folder (program files)
C:\Program Files\PassthroughForge\ — the binaries
(EXE + OpenXR layer DLL + dependencies), installed by
install.ps1. No user data lives here. Replaced on every
version upgrade.
Files & StorageProfile file structure
A profile is a JSON document. The top level holds session-wide
values (passthrough colour, global offsets from a Recenter), and a
masks array holds one entry per mask in the order they
stack from back to front in VR.
{
  "version": 1,
  "name":   "my-cockpit",
  "passthroughColor": [r, g, b],
  "positionOffset":   [x, y, z],          // global Recenter translation
  "rotationOffset":   [w, x, y, z],       // global Recenter quaternion
  "masks": [
    {
      "name":              "ND Display",
      "group":             "F-16 cockpit",
      "enabled":           true,
      "texWidth":          8192,
      "texHeight":         8192,
      "position":          [x, y, z],     // metres in OpenXR LOCAL space
      "rotation":          [w, x, y, z],  // quaternion
      "sizeMeters":        [w, h],
      "trackingTarget":    0,             // 0=World, 1=LeftCtrl, 2=RightCtrl
                                           //  (legacy 3/4 = old Mask Locker -> migrated to 1/2 on load)
      "renderOnTop":       false,         // force-on-top regardless of depth
      "mirrorOf":          -1,            // -1 standalone, else mirror source idx
      "gazeActivated":     false,
      "gazeAngleThreshold": 30.0,
      "pixels":            "<base64 RGBA>",
      "savedPolygon":      [ {x, y, bez, hix, hiy, hox, hoy}, ... ],

      // Optional, only present when applicable:
      "isDocumentMask":     true,
      "documentPages":      ["page1.png", "page2.png"],
      "currentDocumentPage": 0,
      "documentSourcePath": "C:\\...\\source.pdf",

      "source":             "window_capture" | "screen_region",
      "captureWindowTitle": "Chrome",
      "captureProcessName": "chrome.exe",
      "captureMonitorIndex": 0,
      "captureRegionX":      0,  "captureRegionY":      0,
      "captureRegionW":      0,  "captureRegionH":      0,

      "isDcsMessageMask":   true
    },
    ...
  ]
}
What each field controls
- Where the mask sits in space:
position(x, y, z in metres, OpenXR LOCAL coordinate space) androtation(quaternion w, x, y, z). - How big it is in VR:
sizeMeters[width, height]. Independent of texture resolution — a mask can be 2×2 m physical and 4K×4K texture. - Texture resolution:
texWidth/texHeight. The actual pixel buffer is inpixels(Base64 RGBA, top-left origin). - Why it follows your controller / cockpit / head:
trackingTarget. 0 = world-anchored (most common), 1/2 = real-time tracking bound to the left/right controller (the mask follows that controller live). Switching a mask from World to a controller keeps its current position (no jump). (Legacy values 3/4 from the old “Mask Locker” mode are migrated to 1/2 on load.) - Stack order (z-depth): determined by the array
position —
masks[0]renders first (furthest back),masks[N]last (on top). For document overlays that need to sit on top of passthrough cutouts even when geometrically further away, setrenderOnTop: trueto force a second-pass render. - Mirror link:
mirrorOf— the index of the source mask whose pixels are copied + horizontally flipped each frame.-1means independent. - Globally shifted by a Recenter event: the
top-level
positionOffset+rotationOffset(NOT per-mask values). Applied additively in the layer so individual mask coordinates stay untouched in the file.
Where the OpenXR layer itself stores its data:
nowhere. The layer DLL (passthrough_forge_layer.dll)
reads mask poses from a shared-memory channel the app writes
every frame. It has no on-disk state of its own beyond its
registration in the Windows registry under
HKLM\SOFTWARE\Khronos\OpenXR\1\ApiLayers\Implicit.
Files & StorageBackup & share profiles
Because a profile is a single self-contained JSON file with every mask's pixels embedded, you can:
- Back up all your work by copying the
profiles\folder to a USB stick. Restoring is the reverse copy. - Share a cockpit setup with another pilot by
sending them a single
<name>.jsonfile. They drop it into their own%APPDATA%\PassthroughForge\profiles\and pick it from the profile dropdown. - Migrate to a new PC by copying the entire
%APPDATA%\PassthroughForge\folder (profiles + settings + license). The fresh install on the new machine picks up everything automatically.
Tip for very large profiles: profile JSONs can
easily reach several hundred MB because the pixel buffer for each
mask is embedded as Base64. If you only want to share the layout
(positions, sizes, names) without the pixels, you can strip them
with a one-liner: python -c "import json; d=json.load(open('default.json')); [m.pop('pixels',None) for m in d['masks']]; json.dump(d, open('layout-only.json','w'), indent=2)"
— the result is < 100 KB and easy to diff/version-control.
The recipient still needs to fill in the pixels themselves.
TroubleshootingMask appears as a solid block (no passthrough)
You see the mask in VR but the area that should reveal the real world stays as a solid colour (typically the blue passthrough fill, or yellow when Trace VR is on). A small transparent border around the very edge of the quad suggests Virtual Desktop's general passthrough is working - it's specifically the chroma-key replacement that fails.
Why it happens:
Virtual Desktop streams the PC frame to the Quest through a
lossy video codec (H.264 / H.265 / AV1). A pixel sent as
(0, 0, 180) can arrive on the Quest as e.g.
(0, 1, 178) after encode/decode. If VD's chroma-key
Threshold is too tight, those near-misses are not recognised as
passthrough and stay opaque. The drift is bigger on lower
bitrates and varies between PCs depending on encoder, GPU and
codec.
How to fix:
- Increase Similarity / Threshold in Virtual Desktop's chroma-key settings on the Quest: Settings → Streaming → Chroma Key. Two to three times the default value usually absorbs codec drift without leaking colours from your in-game scene.
- Raise the streaming bitrate on the Streamer app on your PC (200 Mbit+ over a strong 5 GHz Wi-Fi link). Higher bitrate = less compression = less colour drift.
-
Switch to a maximally-saturated key colour.
Magenta
#FF00FFor pure green#00FF00sit at the corners of the colour cube and barely move under compression. In PF: Settings → Passthrough Color → pick the preset, copy the new hex value, paste it as VD's chroma-key colour on the Quest.
Important: the chroma-key setting lives in the Virtual Desktop app on the Quest, not on the PC - so it's tied to the headset, not the streaming PC. Once configured for one PC it carries over to any other PC the Quest streams from.
TroubleshootingPink / blue rim around the mask edges
You can see the cockpit through the mask, but there's a coloured halo right at the edge - usually pink, sometimes blue, a few pixels wide.
Why it happens:
This is a Virtual Desktop limitation, not a PassthroughForge bug. VD's chroma-key replacement is per-pixel; at antialiased edges where the rendered pixel partially blends the passthrough colour with the surrounding image, the mixed pixel falls inside VD's chroma-key tolerance from one direction and outside from the other, producing a colour fringe.
How to reduce it:
- Bump VD's chroma-key Smoothing / Edge feathering slider up - smooths the transition between keyed and un-keyed pixels.
- Use a colour that contrasts strongly with the typical pixels next to the mask edge. Dark blue against a typically-grey cockpit produces a pink rim; magenta against a grey cockpit produces a green rim. Pick the colour whose complement is least visible in your sim.
- Cannot be fixed in PassthroughForge - the mask antialiasing is the same on the PC side, the colour fringe is created on the Quest side during compositing.
- HIDE it with a bezel overlay — the most effective workaround. See Bezel overlay workflow below for step-by-step instructions.
Visual PolishHide the chroma-key edge with a bezel overlay
The pink/blue chroma rim happens on the Quest side and can't be removed in PassthroughForge directly. What you can do is drop a second mask on top of the first that contains a cockpit-style bezel image with a transparent centre — the bezel covers the rim, the centre shows your passthrough cutout through it. From normal cockpit viewing angles this looks like a proper 3D frame around the instrument; from extreme side-views it goes flat (it's a 2D PNG), but cockpit ergonomics keep your head pointed roughly forward anyway.
Step 1. Make the bezel image (PNG with transparency)
Three ways to produce one, easiest first:
-
From a DCS screenshot (15 minutes, no 3D skill needed).
Take a high-resolution screenshot of your aircraft's cockpit
with the instrument or panel you want to frame visible. Open it
in GIMP
(free), Photopea
(free, browser-based), or Photoshop. Use the magic-wand or
polygonal-lasso to select the area INSIDE the bezel (the
screen / glass), then Edit → Clear so the inside
becomes transparent. Crop to the bezel + a generous frame
margin. Export as PNG with alpha channel.
Tip: include 50–100 px of opaque frame around the cutout — that's the part that has to cover VD's chroma rim. - From a real cockpit photo. Same workflow as above but with a photo. Works particularly well for fixed-glass instruments (MFDs, RWR, RMI) where the real-world frame matches what your eye expects to see in VR.
-
3D-render from Blender (1–2 hours, polished look).
Model a simple ring/frame in
Blender,
set the render output to RGBA PNG, set
Film → Transparent to true, place the camera so
the frame is centred. Render. The result is a sharp clean
bezel image with transparent inside and outside.
Resolution rule of thumb: same as your target mask (1024×1024, 2048×2048, or 4096×4096 are good defaults).
Step 2. Import the bezel as a second mask in PassthroughForge
- Open PassthroughForge. Make sure the underlying passthrough mask (the one with the chroma-key cutout) is set up and working.
- Click "+" to add a new mask. Name it something like "<mask name> bezel" so you can tell them apart.
- In the editor, use File → Import PNG to load your bezel PNG. Confirm the dimensions match (PassthroughForge preserves aspect ratio).
- In the right-side panel, copy the underlying mask's position, rotation, and size values into this new bezel mask — they need to be co-located. Quickest way: select the original mask, write down the numbers; select the bezel, type them in.
- Make the bezel slightly larger than the underlying mask (e.g. +5 cm on each side) so the opaque frame extends past the chroma rim.
- In [V] Visibility & Activation tick Render on top. Without this the bezel will z-fight with the underlying mask — both layers are at the same depth.
Step 3. Fine-tune in VR
- Put the headset on and check the bezel covers the rim from your typical seating position. If you still see pink, edit the PNG to widen the opaque margin and re-import.
- If the bezel sits visibly in front of or behind the underlying mask (because their positions don't quite match), use the Z-slider on the bezel mask to shift it 1–2 cm closer to your eye — covers the parallax mismatch completely.
- Don't make the bezel a passthrough mask itself. It's a regular image mask whose visible pixels stay opaque (the chroma-key colour should NOT appear in the bezel image).
Step 4. Save it
Once it looks right, hit Save Profile. The bezel
mask is stored exactly like any other mask — you can share
the profile with other testers and your bezel goes with it
(the PNG pixels are embedded in profiles\<name>.json
as Base64, see Profile file structure).
Why this works: Virtual Desktop's chroma-key replacement runs per-pixel on the rendered frame from your PC. The pink rim is generated where the chroma colour meets the surrounding image — that's outside our masked pixels. By rendering a second mask with normal (non-chroma) pixels just slightly further from your eye, you simply put an opaque opaque-coloured layer over the area where the rim would appear. VD never sees a chroma-key transition there anymore, so the rim doesn't get drawn.
TroubleshootingMask never appears in VR (no rectangle, no Trace polygon)
You see the cockpit normally but no mask at all - not even the solid blue or the Trace VR yellow polygon. Suggests the OpenXR API layer never loaded into your VR app's process.
Verify in this order:
- VC++ Redistributable: PassthroughForge depends on the Microsoft Visual C++ 2015-2022 Redistributable (x64). On a fresh PC it's often missing. Download: aka.ms/vs/17/release/vc_redist.x64.exe
-
Layer registration: open PowerShell and run
Get-ItemProperty "HKLM:\SOFTWARE\Khronos\OpenXR\1\ApiLayers\Implicit". You should see a line ending inpassthrough_forge_layer.jsonwith value0. If it's missing, re-runinstall.ps1as Administrator. - Active OpenXR runtime: PassthroughForge needs the runtime that does chroma-key (Virtual Desktop), not Quest Link's runtime - Quest Link doesn't do chroma-key replacement at all. In Meta Quest Link or Virtual Desktop Streamer set the desired runtime as the default OpenXR runtime.
- SHM Active: at the bottom of the PassthroughForge desktop window, the status bar should show a green SHM Active badge. If it stays grey, the app couldn't create its shared memory - try running PassthroughForge as Administrator once.
TroubleshootingA controller-tracked mask drifts when the controller is still
Symptom: you set a mask to Real Time Tracking Left / Right Controller and mount the controller in your cockpit. After a short break the mask is no longer exactly where you put it, and a quick tap of the controller snaps it back into place.
Cause: Quest controllers are tracked by the headset's inside-out cameras looking at the controller's infrared (IR) LEDs. To save battery, a controller that sits still goes into standby after about 30 seconds and switches its tracking LEDs off — so the cameras can no longer see it, even if it is right in front of you. The runtime then falls back to the controller's internal motion sensor (IMU), whose pose drifts. The mask follows that pose live, so it drifts too. This is normal Quest hardware behaviour, not a PassthroughForge bug — a tap (real motion) wakes the controller, the LEDs come back on, and tracking is restored.
How to make it stable
- Keep the controller in the headset cameras' field of view. In front of the headset works perfectly; tucked behind a monitor or under a keyboard does not.
- Cover the proximity sensor on the headset (a small piece of tape works) so the headset itself doesn't go to standby.
- If the mask drifts after a pause, just tap / nudge the bound controller — the LEDs come back on, the cameras re-acquire it, and the mask snaps back to the right cockpit position immediately.
- To avoid sleep entirely: give the controller a little constant motion — e.g. mount it where it picks up some vibration (a bass-shaker rig, or a small vibration motor on the mount). A controller that never sits perfectly still never goes to standby, so it stays camera-tracked and the mask stays put on its own.
Also check Virtual Desktop: on the INPUT tab, “Automatically hide controllers” must be OFF, and on the STREAMING tab, “Forward tracking data to PC” must be ON — otherwise the controller pose never reaches the PC. See the Real-time controller tracking tutorial.
TroubleshootingA controller-tracked mask locks to my hand instead of the controller
Symptom: you set a mask to Real Time Tracking Left / Right Controller, put the controller down in your cockpit, and the mask doesn't stay there — instead it follows whichever hand you move around the cockpit (the steering hand, the throttle hand, your face when you scratch your nose).
Cause: hand tracking is enabled in your VR stack. Quest 3 + Virtual Desktop (and Meta's native OpenXR runtime) supports a controller-tracking fallback: as soon as a controller goes inactive (you put it down, it sleeps, the battery dies), hand tracking takes over and reports the hand pose through the exact same OpenXR action space the controller was using. From the app's perspective the pose is still "valid" and "from the controller" — the API deliberately hides the source. PassthroughForge sees a perfectly valid pose stream from the configured controller slot and locks the mask to it, just as designed.
How to fix it (~99 % of cases — pick whichever you have):
- Virtual Desktop: Streamer settings → Streaming tab → turn Hand Tracking OFF. This is by far the most common source on Quest 3 + VD setups.
- Meta Quest headset: Settings → Movement Tracking → set to "Controllers only" (or disable Hand Tracking entirely).
- Also in the Meta Quest headset menu: the Body Tracking menu item under Movement Tracking must also be disabled. Body tracking synthesises hand / arm poses from upper-body inference and feeds them through the same OpenXR action spaces as the controllers, so leaving it on causes exactly the same mask-follows-the-hand symptom even after Hand Tracking is off.
- SteamVR / other runtimes: look for a "controller fallback to hand tracking" toggle in the runtime settings and disable it.
Workaround if you want to keep hand tracking on: keep the controller actively held when you switch the mask to controller tracking — press any button to wake the controller out of standby. While the controller is awake, its pose wins over the hand-tracking fallback in the runtime.
Quick test to confirm hand tracking is the cause: hold the controller, press any button on it to make sure it's awake, then switch the mask to controller tracking. If the mask now correctly sticks to the controller — and only drifts to your hand after you put the controller down — hand tracking is definitely the culprit.
Why we can't detect this in PassthroughForge:
our OpenXR API layer asks the runtime for exactly one thing
per hand: /user/hand/<left|right>/input/grip/pose.
The action set is bound strictly to controller
interaction profiles (Touch, Touch Plus, Touch Pro, Index,
Vive, WMR, Pico) — we never request hand-tracking poses.
The problem is what the runtime does behind that
request: when Hand Tracking (or Body Tracking) is enabled
and your physical controller is not actively held, the
runtime synthesises a hand pose from the headset cameras and
writes it into the same grip-pose action space. From
the app's side it looks like a normal, valid controller pose
— same data type, same coordinate frame, same flags.
We tested the technically-correct discriminator
— XR_SPACE_LOCATION_POSITION_TRACKED_BIT,
which is supposed to mean "actively tracked, not inferred"
— and on Quest 3 + VDXR + Body Tracking ON, the
runtime sets that bit on both the real controller pose
and the inferred hand pose. It isn't a reliable
discriminator in practice, so an app-side fix would only
mask the symptom on some setups and break others. The
cleanest, headset-runtime-correct fix is to disable Hand /
Body Tracking at the source — see the bullet list
above.
TroubleshootingMask "swims" relative to the cockpit during fast head motion in a DCS mission
Symptom: you turn your head left/right and the mask appears to lag the world for a fraction of a second before settling. Effect is barely visible in the DCS main menu, but obvious inside a busy mission especially when DCS frame-time stutters.
Cause: PassthroughForge submits masks as OpenXR quad composition layers. When DCS hits a stable frame rate, the headset compositor reprojects the quad against your live head pose at scan-out and the mask sits rock-solid in the cockpit. When DCS frame time starts varying under mission load (planes, weather, dense terrain), the compositor catches the world layer with motion smoothing / Asynchronous SpaceWarp, but the mask layer can lag by a frame or two — that's the "swim".
Tester-validated fix — works in practice
Lowering your VR render resolution until DCS holds a stable frame rate eliminates the swim completely. In testing on Quest 3 + Virtual Desktop the mask went from visibly swimming to perfectly stationary just by stepping the render resolution one notch down. The exact setting depends on your hardware, but the rule of thumb is: if the world feels smooth without motion smoothing artefacts, the mask follows.
In detail — settings to try, in order
- Drop the VR render resolution one notch. Virtual Desktop → Godlike / Ultra / High: try one step lower. Quest Link → Oculus Debug Tool encode resolution width: try a lower value. This is the highest-leverage change.
- In DCS, drop Pixel Density to 1.0, turn off MSAA, set Shadows and Visibility Range to Low, reduce Preload Radius. The goal is a stable frame time, not maximum quality.
- Quest Link (cable) is more stable than Virtual Desktop for the most demanding missions — less frame-time variance.
- Smaller masks hide the effect better. A 30 cm panel showing only a control surface is far more forgiving than a 2 m×2 m cockpit overlay.
TroubleshootingThe Real Time Tracking selection won't stick (reverts to None)
Symptom: you pick Real Time Tracking Left / Right Controller in the Tracking Target dropdown, but it jumps straight back to None (World) — the selection is simply not accepted.
Cause: you are not in a running VR application. The tracking target is a live connection between your controllers and PassthroughForge, and that connection only exists while a VR environment is running. On the flat desktop with no VR app open, there is no controller pose to attach to, so PSF rejects the choice and falls back to None (World).
Fix: start DCS in VR (or any OpenXR/VR scene), put the headset on, make sure the controller is on and the L: / R: indicators are GREEN, and then choose the Real Time Tracking mode from inside VR. Now it sticks. See the Real-time controller tracking tutorial.
Still reverts even though you are in VR? Then it is almost always an OpenXR layer-ordering problem — another layer (often a motion-rig / motion-compensation layer) is grabbing the controller inputs before PassthroughForge. See Real-time controller tracking does nothing and move PassthroughForge to the top of the layer order.
TroubleshootingReal-time controller tracking does nothing
Symptom: a mask set to Real Time Tracking Left / Right Controller never follows the controller — it stays where it is, as if it were still world-anchored.
First, the basics: the controller must be powered on and tracked (held or in view of the headset). Controller tracking cannot follow a controller that's switched off or asleep on the desk — that alone explains most cases (tap it to wake it).
Then check Virtual Desktop — this is the most common cause. The controller pose only reaches the PC if VD is set up to forward it: INPUT tab → “Automatically hide controllers” OFF; STREAMING tab → “Track controllers” ON and “Forward tracking data to PC” ON (needs a game / SteamVR restart). See the Real-time controller tracking tutorial.
If the controller is on, tracked and forwarded and it still doesn't work, it's almost always another OpenXR API layer conflicting with PassthroughForge. Controller tracking needs PassthroughForge to attach its tracking action set and read controller poses; some other implicit layers interfere with that. Confirmed culprits from tester reports:
- OpenXR-MotionCompensation / motion-rig layers (a motion platform can consume your controller inputs before PassthroughForge ever sees them)
- OpenXR-Quad-Views-Foveated
- OpenXR-Toolkit
Try this first — reorder, don't disable. In most cases you don't have to turn anything off: you just need PassthroughForge to sit at the TOP of the layer order. If a motion-compensation / motion-rig layer is above PSF, it grabs the controller inputs first and PSF gets nothing — so the tracking target won't engage. Open the OpenXR API Layers GUI (below), select passthrough_forge_layer.json, and click “Move Up” until it is on top of the list. Then restart your PC — the new layer order only takes effect after a full reboot, so closing DCS / PassthroughForge alone is not enough. This keeps your motion platform working and restores controller tracking — it is the fix that resolved this for most testers.
Easiest way — OpenXR API Layers GUI: a free tool by Fred Emmott that lists every active OpenXR layer in its real order and lets you enable / disable / reorder them with a click (no registry editing). Download it from github.com/fredemmott/OpenXR-API-Layers-GUI, run it (it needs admin rights), disable the suspect layer (e.g. Quad-Views-Foveated) or move PassthroughForge to the top, then restart your PC and try controller tracking. Any change to the layer list (enable / disable / reorder) only takes effect after a full reboot — not just an app restart. The tool also has a “Fix Them!” button for common layer problems. Don't disable the Virtual Desktop Streamer layer — that one is needed for VD.
Advanced / manual alternative: list your active OpenXR layers from a Command Prompt:
reg query "HKLM\SOFTWARE\Khronos\OpenXR\1\ApiLayers\Implicit"
Each entry is a path to a layer's .json with a value:
0 = enabled, 1 = disabled. To test,
disable the suspect layers (admin Command Prompt), then
restart your PC and try controller tracking
(a registry change to the layer list only applies after a full reboot):
reg add "HKLM\SOFTWARE\Khronos\OpenXR\1\ApiLayers\Implicit" /v "C:\Program Files\OpenXR-Quad-Views-Foveated\openxr-api-layer.json" /t REG_DWORD /d 1 /f
Re-enable later by setting the value back to 0 (or use the
tool's own enable/disable switch). Don't disable the
Virtual Desktop Streamer layer — that one is needed for VD
to work. If tracking returns with the suspect layer off, that layer was
the conflict.
No controller at all? You can still place masks reliably as world-locked (recenter) or head-locked — those need no controller tracking.